I know fixing a wooden sliding door can seem daunting, but trust me, it's easier than you think.
In this article, I'll guide you through the step-by-step process of restoring your sliding door to its former glory.
From diagnosing the problem to choosing the right tools and materials, I'll provide detailed instructions and practical tips to ensure a successful repair.
So, don't let that stubborn door hold you back any longer. Let's get started on your journey to liberation!
Overview
- Assess the condition of the door and identify any damage or issues, including the tracks, rollers, and frame.
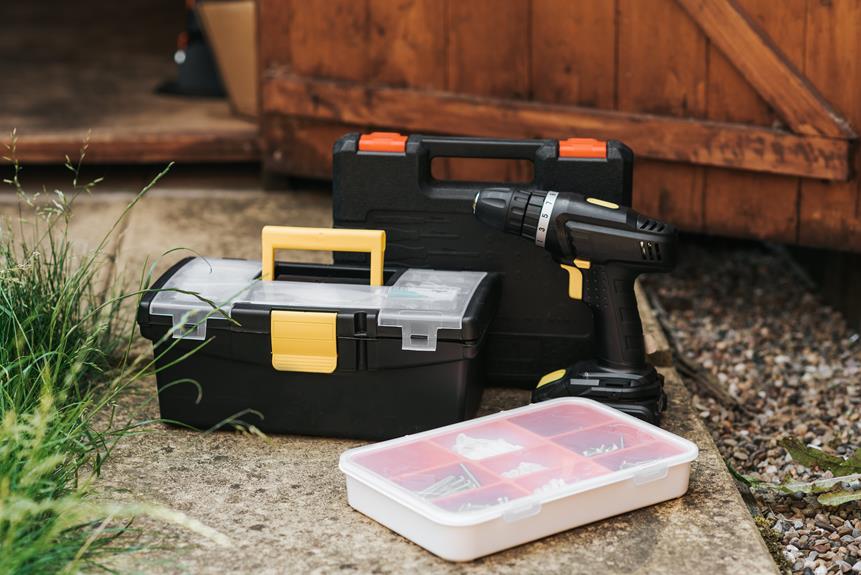
- Gather the necessary tools and materials, such as a screwdriver, hammer, lubricant, replacement parts, and possibly a level or measuring tape.
- Remove the door from the tracks and address specific issues identified, such as tightening loose screws, replacing damaged rollers, or realigning tracks.
- Reassemble the door and test its functionality, ensuring it slides smoothly and securely.
- Adapt your approach based on the specific needs of your wooden sliding door.
- Follow these steps and take a thorough and detailed approach to successfully fix your wooden sliding door.
Now that we've covered the overview of the steps involved in fixing a wooden sliding door, we can move on to a quick answer{list} that provides a concise summary of the key points to consider when undertaking this repair project.
quick answer
My go-to quick answer for fixing a wooden sliding door is to tighten any loose screws and lubricate the tracks for smooth operation. Here's a detailed breakdown of the steps involved in fixing a wooden sliding door:
- Step 1: Assess the condition of the door
- Check for any visible damage or signs of wear and tear.
- Inspect the screws and tracks to identify any loose components.
- Step 2: Tighten the screws
- Use a screwdriver to tighten any loose screws on the door frame and panels.
- Ensure all screws are secure to prevent further movement or damage.
- Step 3: Lubricate the tracks
- Apply a silicone-based lubricant to the tracks to reduce friction.
- Use a cloth to spread the lubricant evenly along the entire length of the tracks.
- Step 4: Test the door
- Slide the door back and forth to check for smooth operation.
- If necessary, repeat the lubrication process or consider replacing worn-out tracks.

By following these steps, you can effectively fix a wooden sliding door and ensure its proper functionality. Remember to prioritize safety and consult a professional if you encounter any complex issues.
Liberation in fixing your own wooden sliding door comes from understanding the process and having the confidence to tackle the task yourself.
Key Takeways
The key takeaways from this discussion are:
- Tighten loose screws to ensure the door is properly secured and prevent further issues.
- Lubricate the tracks with silicone-based lubricant for smooth sliding.
- Wipe away excess lubricant to prevent build-up.
As a woodworking expert, I understand the frustration that comes with a door that doesn't slide properly. But fear not, with a few simple steps, you can have your wooden sliding door gliding effortlessly once again.
First, let's address the loose screws. Grab your trusty screwdriver and tighten any screws that may have come loose over time. Make sure to check both the door frame and the sliding mechanism for any loose screws. This will ensure that the door is properly secured and will prevent any further issues.
Next, let's move on to lubricating the tracks. A well-lubricated track is essential for smooth sliding. Grab some silicone-based lubricant and apply it generously to the tracks. Make sure to wipe away any excess lubricant to prevent build-up.
By following these simple steps, you can fix your wooden sliding door and enjoy its smooth operation once again. Don't let a stubborn door hold you back from the freedom you desire.
Now, let's move on to the summary of our discussion and wrap things up.
Summary
To summarize, the key takeaways from our discussion on fixing a wooden sliding door are:
- Tighten loose screws: Start by inspecting the screws that hold the door together. Over time, these screws may become loose due to constant use and vibration. It's crucial to tighten them using a screwdriver or a drill, ensuring that they're secure and not protruding.
- Lubricate the tracks for smooth operation: Lubricating the tracks is essential for smooth sliding motion. This can be done by applying a silicone-based lubricant or a special sliding door track lubricant. It's essential to clean the tracks thoroughly before applying the lubricant to remove any debris or buildup. When applying the lubricant, make sure to distribute it evenly along the entire length of the tracks. This will help reduce friction and allow the door to slide effortlessly.
Detailed Instructions
When it comes to fixing a wooden sliding door, detailed instructions are essential to ensure a successful repair. Here are the key steps involved in the process:
- Lubricate the door track to ensure smooth sliding motion.
- Adjust the door alignment to eliminate any sticking or dragging.
- Replace worn rollers to improve the door's functionality.
- Repair any damaged wood to restore the door's structural integrity.
Lubricating Door Track
I need grease to lubricate the door track and improve the sliding motion. To fix a wooden sliding door, you'll first need to gather some tools and materials.
You'll need a screwdriver, a hammer, a level, and some grease specifically designed for door tracks.
Start by removing the door from the track by lifting it off the rollers. Inspect the track for any debris or obstructions and clean it thoroughly.
Once the track is clean, apply a small amount of grease to the track, focusing on the areas where the door tends to stick or slide unevenly. Use a cloth or a brush to spread the grease evenly along the track.
Finally, reinstall the door onto the track and test its sliding motion. With the proper lubrication, your wooden sliding door should slide smoothly and effortlessly.
Remember to regularly clean and reapply grease as needed to maintain optimal performance.
Adjusting Door Alignment
Adjusting the door alignment can help improve the sliding motion of the wooden sliding door. When a wooden sliding door isn't aligned properly, it can become difficult to open and close smoothly. As a carpenter, I understand the importance of proper door alignment and the impact it has on the functionality of the door.
To adjust the door alignment, follow these steps:
- Step 1: Identify the problem – Check if the door is rubbing against the frame or if it's sagging.
- Step 2: Remove the door – Unscrew the hinges and carefully remove the door from the frame.
- Step 3: Adjust the alignment – Use shims or sandpaper to adjust the alignment of the door. Add shims to lift the door or sand down areas that are rubbing against the frame.
Replacing Worn Rollers
To replace worn rollers, follow these steps:
- Remove the door from the frame:
- Unscrew any screws holding the door in place.
- Carefully lift the door out of the frame.
- Detach the old rollers:
- Locate the rollers at the bottom of the door.
- Examine them for wear or damage.
- Use a screwdriver to remove the securing screws or bolts.
- Purchase and prepare the new rollers:
- Note the type of roller needed.
- Purchase the appropriate replacement.
- Install the new rollers:
- Align the new rollers with the existing holes.
- Secure them with screws or bolts.
- Ensure they are tightly attached for smooth sliding motion.
- Reinstall the door:
- Place the door back on the frame.
- Test the functionality of the door.
Repairing Damaged Wood
After assessing the extent of the damage, I'd recommend using wood filler or epoxy resin to repair the damaged wood, and then sanding and refinishing it for a seamless finish.
This process requires attention to detail and precision. First, gather the necessary materials, including wood filler or epoxy resin, sandpaper, and a refinishing product.
Use a putty knife to apply the wood filler or epoxy resin to the damaged areas, ensuring that it's evenly spread. Allow it to dry completely before moving on to the next step.
Once dry, use sandpaper to smooth out the repaired areas, blending them seamlessly with the rest of the door.
Finally, apply the refinishing product to protect and enhance the appearance of the wood. Remember to follow the manufacturer's instructions for each product used.
Sealing Gaps for Insulation
I have found that using a foam sealant is an effective way to seal the gaps for insulation in my home. It creates a tight and durable seal, preventing air leaks and reducing energy loss. When sealing gaps, it is important to choose the right type of foam sealant for the job. Here is a table outlining the different types of foam sealants along with their features:
| Type of Foam Sealant | Features |
|---|---|
| Open-cell | – Expands to fill gaps<br>- Provides sound insulation<br>- Not suitable for outdoor use |
| Closed-cell | – Forms a rigid and waterproof seal<br>- Provides excellent thermal insulation<br>- Suitable for both indoor and outdoor use |
| Fire-rated | – Provides fire resistance<br>- Meets building code requirements<br>- Ideal for sealing around electrical outlets |
To seal the gaps, follow these steps:
- Clean the area thoroughly.
- Shake the can of foam sealant.
- Apply the foam sealant into the gaps, starting from the bottom and working your way up.
- Allow the foam to cure and expand.
- Trim any excess foam using a sharp knife or saw.
With these steps, you can effectively seal the gaps in your home and improve insulation. It's a simple and cost-effective solution that can make a significant difference in energy efficiency. In my experience, using a foam sealant has been a game-changer in keeping my home comfortable and reducing energy bills.
Final Thought
What's the best way to address a wooden sliding door that's sticking? Well, let me break it down for you.
First, you'll need to assess the cause of the sticking. It could be due to moisture, worn-out rollers, or misalignment. Once you've identified the issue, you can begin the repair process.
If moisture is the culprit, start by checking for any leaks or sources of humidity near the door. Fixing these issues will help prevent future sticking.
Next, examine the rollers. If they're worn out or damaged, replace them with new ones. Make sure to choose rollers that are compatible with your door's weight and size.
Adjusting the alignment of the door is another crucial step. You may need to tighten or loosen screws or adjust the track to ensure smooth operation.
To fix the sticking, you'll need some essential tools like a screwdriver, pliers, and a level. Additionally, have some lubricant, sandpaper, and wood putty on hand. These materials will help you maintain the functionality and appearance of the door.
By following these steps and using the right techniques, you can effectively fix your wooden sliding door. Remember to take your time and be meticulous in your approach. Don't hesitate to seek professional help if needed.
Good luck with your repair!
Frequently Asked Questions
Can I Use Any Type of Wood for Fixing a Wooden Sliding Door?
I can use any type of wood for fixing a wooden sliding door. However, it's important to choose a wood that is strong, durable, and suitable for outdoor use. Oak or mahogany are good options.
What Are the Common Reasons Behind a Wooden Sliding Door Getting Stuck?
The common reasons a wooden sliding door gets stuck can include warped or swollen wood, misalignment of the tracks, worn-out rollers, or debris in the tracks.
How Often Should I Lubricate the Tracks of a Wooden Sliding Door?
I usually lubricate the tracks of my wooden sliding door every six months. It helps to keep the door gliding smoothly and prevents it from getting stuck.
Is It Necessary to Remove the Door From Its Frame to Fix It?
Yes, it is necessary to remove the door from its frame in order to fix it. This allows for easier access to the components that may need repair or replacement.
Can I Replace the Sliding Mechanism of a Wooden Sliding Door on My Own?
Yes, you can replace the sliding mechanism of a wooden sliding door on your own. It requires a few tools and materials, but with some patience and following the right steps, it can be done successfully.
- How to Fix Wooden Sliding Door - April 12, 2024
- How to Treat Termites in Hardwood Floors - April 12, 2024
- How to Fix Splintered Wood Floor - April 12, 2024