Are you frustrated with unsightly screw holes in your wooden furniture or walls? Whether caused by a loose screw or a previous installation that didn’t quite go as planned, these holes can be a real eyesore. But fear not! In this guide, we will explore the art of fixing screw holes in wood, providing you with step-by-step instructions and expert tips to restore your wooden surfaces to their former glory.
Repairing screw holes in wood may seem like a daunting task, but with the right techniques and a little patience, you can achieve seamless results. Throughout this article, we will delve into various methods that cater to different hole sizes, types of wood, and desired finishes. From simple solutions involving wood filler and sandpaper to more advanced techniques like using wooden plugs or dowels, we will cover it all. Whether you are a seasoned DIY enthusiast or a complete beginner, this comprehensive guide will equip you with the knowledge and skills to tackle screw holes in wood like a pro. So, let’s dive in and learn how to transform those unsightly holes into a flawless surface that will leave everyone marveling at your handiwork.
How to Fix Screw Holes in Wood:
- Remove any loose debris or splinters from the hole.
- Fill the hole with wood filler or epoxy putty, following the manufacturer’s instructions.
- Smooth the surface with sandpaper once the filler is dry.
- If necessary, paint or stain the repaired area to match the surrounding wood.
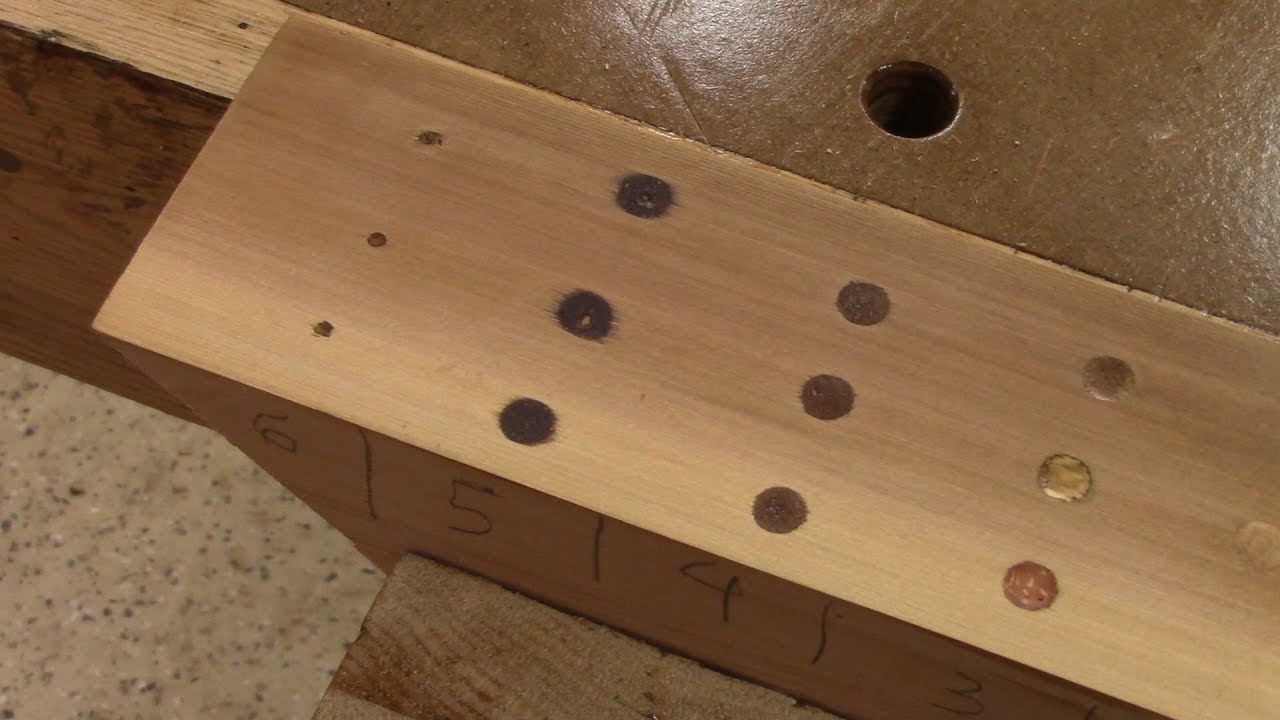
:max_bytes(150000):strip_icc()/how-to-fix-a-stripped-screw-hole-3536468-FINAL-5b982891c9e77c005037660c.png)
How to Fix Screw Holes in Wood
In this step-by-step guide, we will walk you through the process of fixing screw holes in wood. Whether you have accidentally stripped a screw hole or need to relocate a screw, this method will help you restore the integrity of the wood surface. With a few simple tools and materials, you can easily repair screw holes in wood and make it as good as new.
Step 1: Assess the Damage
The first step in fixing screw holes in wood is to assess the damage. Examine the size and depth of the hole to determine the best course of action. If the hole is small and shallow, you may be able to simply fill it with wood filler. However, if the hole is larger or the wood is severely damaged, you may need to use a different method.
If the screw hole is stripped, meaning the threads of the hole are worn or damaged, you will need to take additional steps to fix it. In this case, you can use wooden toothpicks or wooden dowels to provide a solid foundation for the screw.
Step 2: Fill the Hole with Wood Filler
If the hole is small and shallow, you can use wood filler to fix it. Start by cleaning the hole and removing any debris or loose wood particles. Then, apply a small amount of wood filler to the hole, using a putty knife or a small spatula. Make sure to fill the hole completely and level it with the surface of the wood. Allow the wood filler to dry according to the manufacturer’s instructions.

Once the wood filler is dry, sand the repaired area gently to smooth it out and blend it with the surrounding wood. You can use fine-grit sandpaper or a sanding block for this step. Be careful not to sand too aggressively, as you may damage the surrounding wood. After sanding, wipe away any dust or debris with a clean cloth.
Step 3: Reinforce the Screw Hole
If the screw hole is stripped or the wood is severely damaged, you will need to reinforce it before reinserting the screw. Start by drilling out the existing hole slightly larger than the original size. Then, cut a wooden dowel or gather wooden toothpicks that fit snugly into the enlarged hole. Apply wood glue to the dowel or toothpicks and insert them into the hole, ensuring they are flush with the surface of the wood.
Allow the wood glue to dry completely before proceeding. Once the glue is dry, you can reinsert the screw into the reinforced hole. The dowel or toothpicks will provide a solid base for the screw, allowing it to grip securely and preventing further damage to the wood.
Step 4: Finishing Touches
After fixing the screw hole, you may need to apply some finishing touches to make it blend seamlessly with the rest of the wood surface. If necessary, you can touch up the repaired area with wood stain or paint to match the color of the surrounding wood. Alternatively, you can use a wood filler that closely matches the color of the wood to ensure a seamless repair.
Once any necessary touch-ups are complete, allow the finish to dry thoroughly before using the wood surface again. This will ensure a durable and long-lasting repair.
Step 5: Preventive Measures
To avoid future screw hole damage, it’s important to take preventive measures. When drilling or screwing into wood, always use the appropriate size drill bit or screwdriver to prevent stripping the hole. Additionally, consider using pilot holes or pre-drilling before inserting screws to reduce the risk of damaging the wood. Taking these preventive measures can help maintain the integrity of the wood surface and minimize the need for future repairs.
Frequently Asked Questions
Here are some commonly asked questions about how to fix screw holes in wood:
Q: How can I fix small screw holes in wood?
When it comes to fixing small screw holes in wood, there are a few different methods you can try. One option is to use wood filler to fill in the hole. Start by cleaning the hole and removing any debris. Then, apply the wood filler to the hole, making sure to fill it completely. Allow the filler to dry, and then sand it down until it is smooth and level with the surface of the wood. Another option is to use a wooden dowel or toothpick. Simply dip the dowel or toothpick in wood glue, insert it into the hole, and then break it off at the surface. This will create a plug that can be sanded down and stained to match the wood.
If you’re dealing with a larger screw hole, you may need to use a more involved method. One option is to use a wooden plug or a wood patch. These can be glued or screwed into the hole, and then sanded down and finished to match the surrounding wood. Another option is to use a screw hole repair kit, which typically includes a plug cutter, glue, and dowels. These kits provide a more professional-looking repair, but may require more time and skill to complete.
Q: Can I reuse the same screw hole in wood?
In some cases, it is possible to reuse the same screw hole in wood. However, this depends on a few factors, such as the size and condition of the hole, as well as the type of wood you’re working with. If the hole is small and the wood is in good condition, you may be able to reuse it without any issues. However, if the hole is stripped or damaged, it’s best to repair it before attempting to reuse it.
To repair a screw hole, you can follow the steps mentioned in the previous question. Once the hole is repaired, you can then use the same screw or a slightly larger one to reattach your item to the wood. Just be sure to take care when inserting the screw to avoid causing any further damage to the wood.
Q: How do I fix stripped screw holes in wood?
If you’re dealing with a stripped screw hole in wood, there are a few methods you can try to fix it. One option is to use wooden toothpicks or wooden matches. Simply dip the toothpicks or matches in wood glue, insert them into the hole, and break them off at the surface. This will create a new grip for the screw. Allow the glue to dry, and then insert the screw into the hole.
Another option is to use a screw hole repair kit, as mentioned earlier. These kits often include dowels or plugs that can be glued or screwed into the stripped hole. Once the repair is complete, you can then insert the screw into the new hole. Just be sure to follow the instructions included with the kit for the best results.
Q: Can I fix screw holes in wood without using filler?
Yes, it is possible to fix screw holes in wood without using filler. As mentioned earlier, one option is to use wooden plugs or patches to fill the hole. These can be glued or screwed into the hole, and then sanded down and finished to match the surrounding wood. This method provides a more seamless repair without the need for traditional wood filler.
Another option is to use a wooden dowel or toothpick, as mentioned in the first question. By dipping the dowel or toothpick in wood glue and inserting it into the hole, you can create a plug that can be sanded down and stained to match the wood. This method also eliminates the need for traditional filler.
Q: How long does it take for wood filler to dry?
The drying time for wood filler can vary depending on the brand and type of filler you’re using. In general, most wood fillers will dry within 1-3 hours. However, it’s important to read the instructions on the specific product you’re using, as drying times may vary. Factors such as temperature and humidity can also affect drying times. It’s always a good idea to allow the filler to dry completely before sanding or finishing the repaired area.
Keep in mind that some wood fillers may require a longer drying time for larger or deeper holes. If you’re unsure about the drying time for a particular filler, it’s best to consult the manufacturer’s instructions or contact their customer support for guidance.
In addition, it’s important to note that prevention is key when it comes to screw holes in wood. Taking the necessary precautions, such as using pilot holes and selecting the right screws for the job, can help minimize the chances of encountering this problem in the first place. Regular maintenance and inspection of your wooden surfaces will also allow you to catch and address any potential issues early on, preventing further damage. By implementing these strategies and techniques, you can ensure that your woodwork remains sturdy and visually appealing for years to come. So, don’t let screw holes be a source of frustration – with the right knowledge and approach, you can easily fix and prevent them, maintaining the beauty and functionality of your wooden furniture, cabinets, and other wooden surfaces.
- How to Design Wood Carving - May 7, 2024
- How to Carve Wood - May 7, 2024
- How to Remove Cat Urine From Wood Furniture - May 7, 2024