Do you love the beauty of flowers but wish they could last longer? Have you ever considered making your own wooden flowers? Not only do they add a unique touch to your home décor or special occasions, but they also make wonderful gifts that will never wilt or fade away. In this guide, we will explore the art of creating wooden flowers, from selecting the right materials to mastering the techniques that bring them to life. Whether you are a crafting enthusiast or a beginner looking to explore your creative side, join us on this journey as we delve into the world of wooden flowers and discover the joy of making something beautiful that will stand the test of time.
Wooden flowers offer a delightful alternative to traditional blooms, capturing the essence of nature in an everlasting form. With a wide variety of designs and styles to choose from, you can create flowers that suit any occasion or personal taste. From elegant roses to vibrant sunflowers, the possibilities are endless. But how do you get started, and what tools and techniques will you need? In this guide, we will walk you through the step-by-step process of crafting your own wooden flowers, providing you with the knowledge and inspiration to unleash your creativity. Get ready to embark on a rewarding journey where you will learn to transform simple pieces of wood into stunning works of art, brimming with charm and beauty.
How to Make Wooden Flowers:
- Gather the necessary materials: wooden dowels, wood glue, paint, and floral wire.
- Cut the wooden dowels into desired lengths for the flower stems.
- Shape the wooden dowels into petals by carving or sanding them.
- Attach the petals to the stem using wood glue, ensuring they are securely fixed.
- Paint the wooden flowers with desired colors and patterns.
- Insert floral wire into the base of the flower to create a realistic stem.
- Allow the glue and paint to dry completely.
- Your wooden flowers are now ready to be displayed or used in various crafts and decorations!
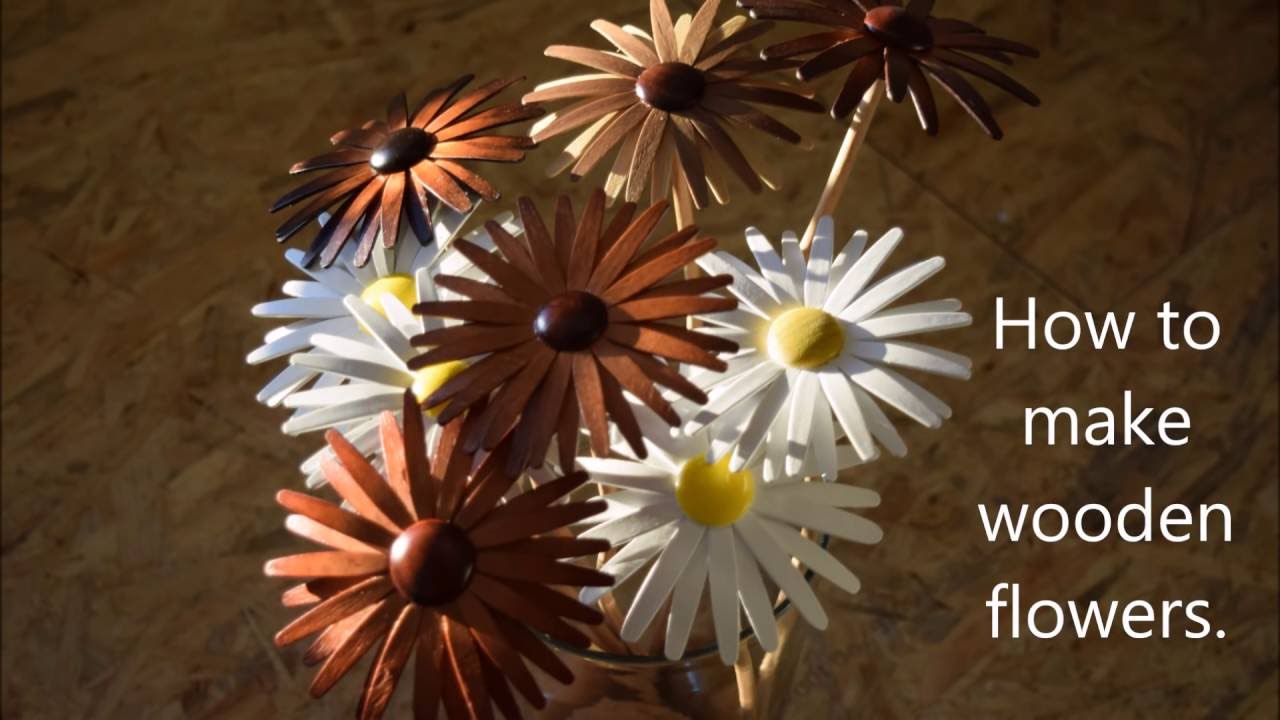
How to Make Wooden Flowers
In this step-by-step guide, we will show you how to create beautiful wooden flowers that can be used for various decorative purposes. Whether you want to add a touch of nature to your home or create unique gifts for your loved ones, making wooden flowers can be a rewarding and enjoyable craft. Follow the instructions below to get started on your own wooden flower project.
Materials Needed
Before you begin, gather the following materials:
- Wooden blocks
- Saw
- Sandpaper
- Drill
- Wood glue
- Paint or wood stain
- Paintbrushes
- Wire
- Pliers
- Decorative elements (optional)
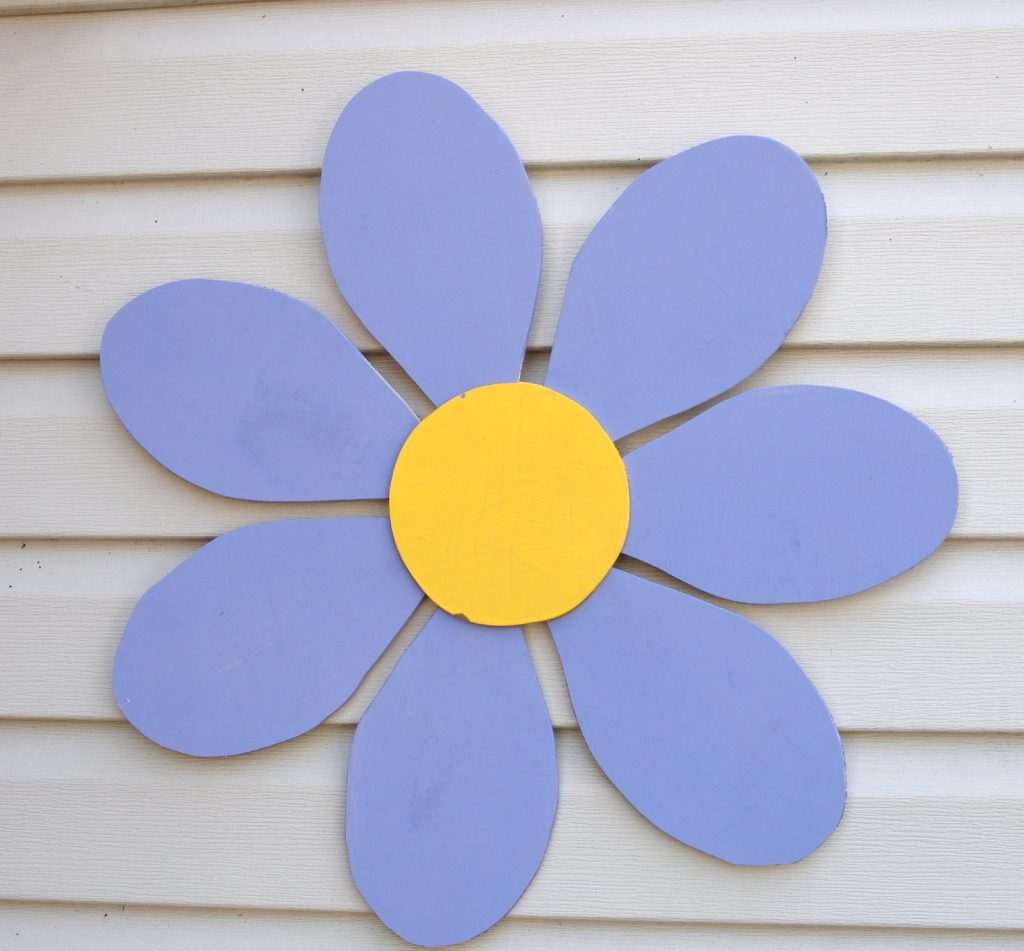
Step 1: Cutting the Wooden Blocks
Start by cutting the wooden blocks into different sizes and shapes to form the petals and the center of the flower. Use a saw to carefully shape the wood according to your desired design. Keep in mind that the size of the blocks will determine the size of your final flower.
Once you have cut the wooden blocks, use sandpaper to smooth any rough edges. This will ensure a clean and polished look for your wooden flowers.
Step 2: Creating the Flower Shape

Next, drill a small hole in the center of each wooden block. This will be used to connect the petals and the center of the flower. Make sure the hole is big enough to insert the wire later on.
Arrange the wooden blocks in a circular pattern, with the drilled holes aligned. Apply wood glue to the bottom of each block and press them together firmly. Allow the glue to dry completely before moving on to the next step.
Step 3: Adding Color and Detail
Once the wooden blocks are securely glued together, it’s time to add color and detail to your wooden flowers. You can choose to paint the petals and center in vibrant colors or apply a wood stain for a natural look.
Use paintbrushes to carefully apply the paint or stain, making sure to cover all surfaces evenly. Allow the paint or stain to dry completely before proceeding.
Step 4: Attaching the Wire
To give your wooden flowers a stem, cut a piece of wire to your desired length. Insert one end of the wire into the hole at the bottom of the flower and secure it with wood glue. Allow the glue to dry before moving the wire.
Using pliers, you can further shape the wire to create a more natural-looking stem. You can also add leaves or other decorative elements to enhance the overall appearance of your wooden flowers.
Step 5: Final Touches
Once the glue has dried and the wire is securely attached, your wooden flowers are complete. Arrange them in a vase or use them to embellish wreaths, centerpieces, or any other decorative project.
Feel free to experiment with different shapes, sizes, and colors to create a unique collection of wooden flowers that suits your personal style and preferences.
Step 6: Maintenance
To keep your wooden flowers looking their best, avoid exposing them to direct sunlight for extended periods, as this can cause the colors to fade. Dust them regularly using a soft cloth or a feather duster to maintain their beauty.
With proper care, your wooden flowers can bring a touch of nature and elegance to your home for years to come.
Frequently Asked Questions
Here are some commonly asked questions about how to make wooden flowers:
Q: What materials do I need to make wooden flowers?
To make wooden flowers, you will need the following materials:
– Wood: You can use various types of wood, such as pine, cedar, or birch, depending on your preference.
– Saw: A saw will be necessary to cut the wood into the desired shapes and sizes for your flowers.
– Sandpaper: Sandpaper is essential for smoothing out the rough edges and surfaces of the wooden pieces.
– Paint or stain: If you wish to add color or enhance the natural beauty of the wood, you can use paint or stain.
– Glue: A strong adhesive, such as wood glue, will be needed to secure the different components of the wooden flowers together.
– Floral wire or stems: To create a more realistic look, you may want to attach floral wire or stems to your wooden flowers.
Q: How do I shape the wooden pieces into flower petals?
To shape the wooden pieces into flower petals, follow these steps:
1. Draw or find a petal template that you like. You can search online for free templates or create your own.
2. Trace the petal template onto the wood using a pencil or marker.
3. Carefully cut along the traced lines using a saw. Take your time to ensure smooth and accurate cuts.
4. Use sandpaper to smooth the edges and surfaces of the wooden petals.
5. Repeat the process to create as many petals as you need for your wooden flower.
Q: Can I add additional details to my wooden flowers?
Absolutely! You can add various details to your wooden flowers to make them more visually appealing. Here are some ideas:
– Paint or stain: Use different colors or shades to create a unique look for each petal or the center of the flower.
– Wood burning: If you have the necessary tools and skills, you can create intricate designs or patterns on the wooden petals using wood burning techniques.
– Carving: Consider adding texture or carving small details onto the wooden petals to give them more depth and dimension.
– Decorative elements: Attach small beads, gems, or other decorative elements to the center of the flower or along the petals to add a touch of sparkle or whimsy.
Q: How do I assemble the wooden flower?
To assemble the wooden flower, follow these steps:
1. Arrange the wooden petals in the desired shape and order. Experiment with different arrangements until you find the look you like.
2. Apply wood glue to the areas where the petals will connect. Use a small brush or toothpick to spread the glue evenly.
3. Press the petals together firmly, ensuring they are securely bonded. Wipe off any excess glue that may have oozed out.
4. If desired, attach floral wire or stems to the back of the wooden flower using glue or by drilling small holes to insert them.
5. Let the glue dry completely before handling or displaying your wooden flower.
Q: How can I preserve and protect my wooden flowers?
To preserve and protect your wooden flowers, consider the following tips:
– Apply a clear coat or sealant: This will help protect the wood from moisture, dust, and other potential damage. Choose a sealant that is suitable for the type of wood you used.
– Avoid direct sunlight: Prolonged exposure to sunlight can fade the colors and weaken the wood. Display your wooden flowers in a location where they are not exposed to direct sunlight for extended periods.
– Dust regularly: Use a soft cloth or brush to gently remove any dust or debris that may accumulate on the wooden flowers. Avoid using harsh chemicals or abrasive materials that could damage the wood.
– Store properly: If you need to store your wooden flowers, make sure they are kept in a cool, dry place where they are protected from moisture, pests, and excessive temperature fluctuations.
Through the process of carving, shaping, and painting, wooden flowers can be transformed into beautiful works of art that can be enjoyed for years to come. Moreover, the versatility of wooden flowers allows for endless possibilities in terms of design, color, and size. Whether you choose to create a bouquet for a special occasion or simply adorn your living space with a touch of nature, the beauty of wooden flowers transcends traditional floral options.
In conclusion, the art of making wooden flowers is a rewarding and imaginative craft that offers both personal satisfaction and eco-friendly alternatives to traditional floral arrangements. So, why not embrace your creativity and embark on this delightful journey of crafting wooden flowers? Let your artistic abilities bloom and bring a touch of everlasting beauty into your life and the lives of others.
- Can You Use a Window Air Conditioner Without a Window? - May 16, 2024
- How to Bleach Wood - May 16, 2024
- How to Lighten Stained Wood - May 16, 2024