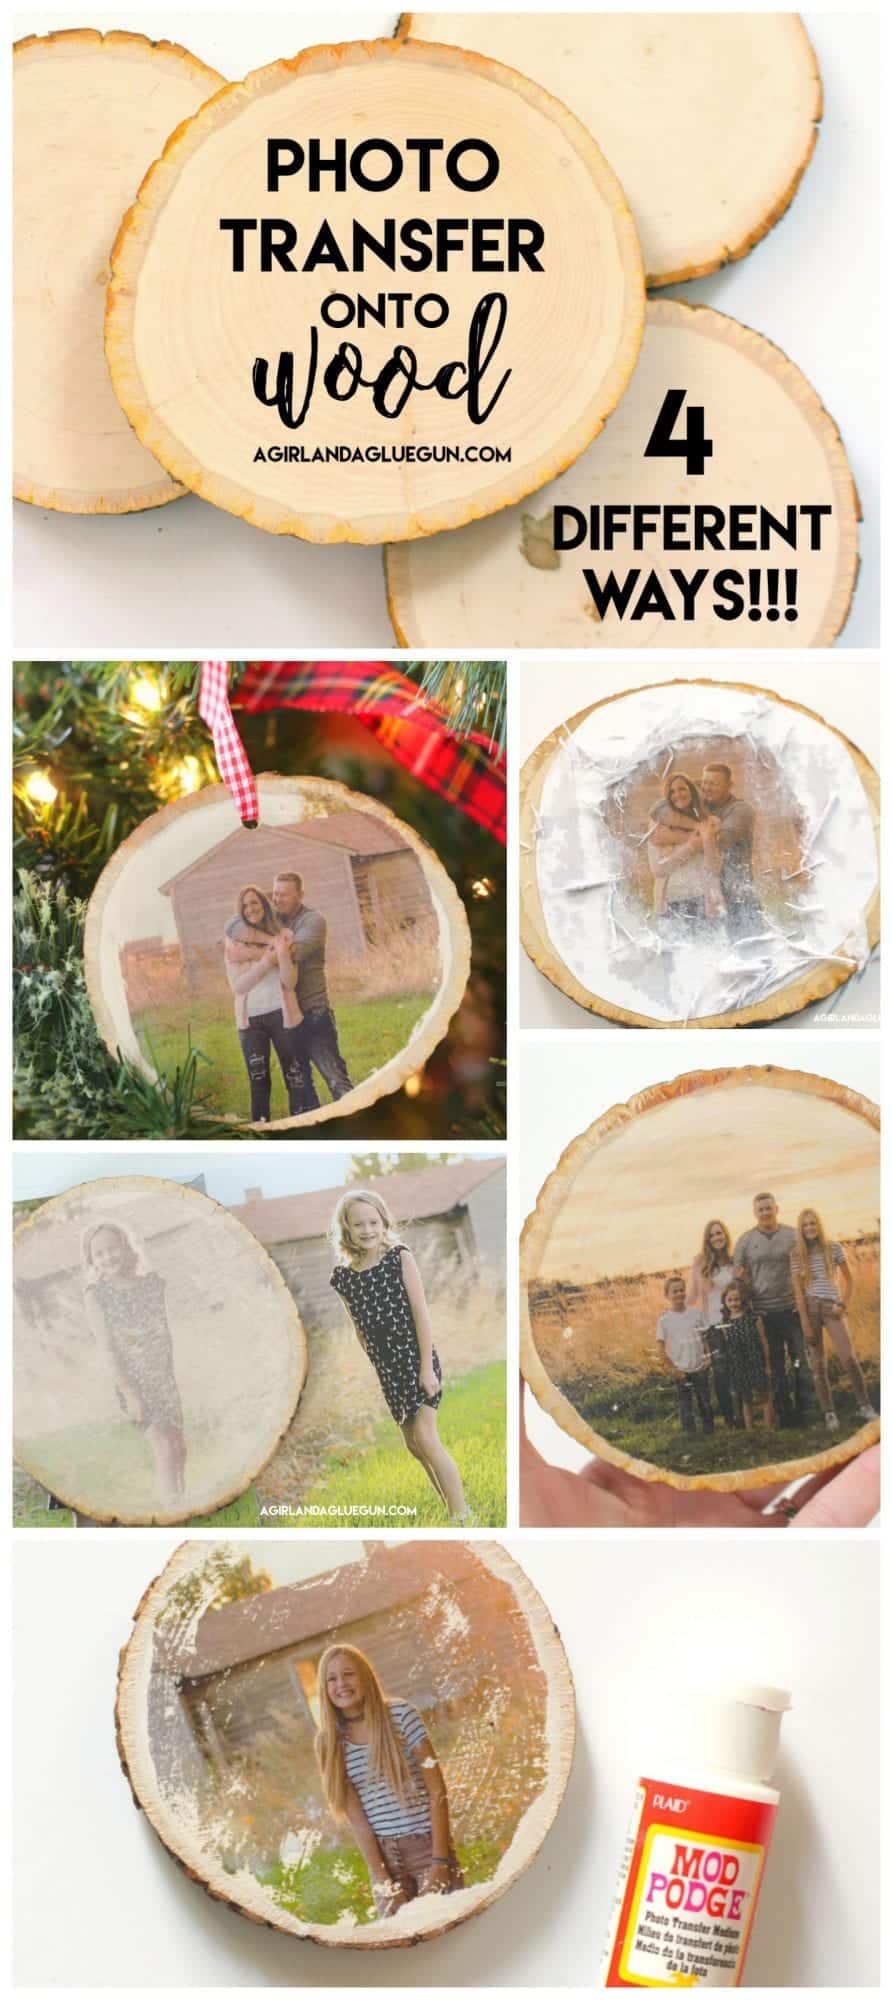
Are you tired of simply framing your favorite photographs? Do you want to explore a more creative and unique way to display your memories? Look no further! In this guide, we will delve into the fascinating world of putting pictures on wood. Whether you are a seasoned DIY enthusiast or a beginner looking for a fun and rewarding project, this step-by-step tutorial will provide you with all the information you need to create stunning wooden photo displays.
Imagine the satisfaction of transforming a plain wooden block into a personalized work of art that showcases your cherished moments. From family portraits to scenic landscapes, the possibilities are endless when it comes to customizing your wooden photo displays. Not only will you learn how to transfer images onto wood, but we will also explore various techniques to enhance the visual appeal, such as adding a rustic finish or incorporating creative embellishments. So, grab your tools and let’s embark on a creative journey that will bring your photographs to life in a whole new way!
How to put pictures on wood:
- Prepare the wood surface by sanding it lightly.
- Print your desired image onto a special transfer paper.
- Place the transfer paper face down on the wood surface.
- Apply heat using a hot iron or a heat press machine.
- Slowly peel off the transfer paper to reveal the picture on the wood.
How to Put Pictures on Wood
Adding pictures to wood can be a great way to personalize your home decor or create unique gifts for your loved ones. Whether you want to transfer photos onto a wooden surface or directly print them onto the wood, this step-by-step guide will walk you through the process.
In this article, we will cover two methods: transferring photos onto wood using a gel medium and printing photos directly onto wood using a specialized printer. Both methods have their advantages and can yield stunning results. Choose the method that best suits your needs and let’s get started!
Method 1: Transferring Photos onto Wood
Transferring photos onto wood is a popular technique that gives your images a vintage, distressed look. Here’s what you’ll need:
- Wooden surface (such as a plank, block, or a pre-made wooden canvas)
- Photo printed on a laser printer or a photocopy of the photo
- Gel medium
- Brush
- Scissors
- Sponge or cloth

Step 1: Prepare the Wood
Start by sanding the wooden surface to ensure a smooth and even texture. Wipe away any dust or debris before proceeding.
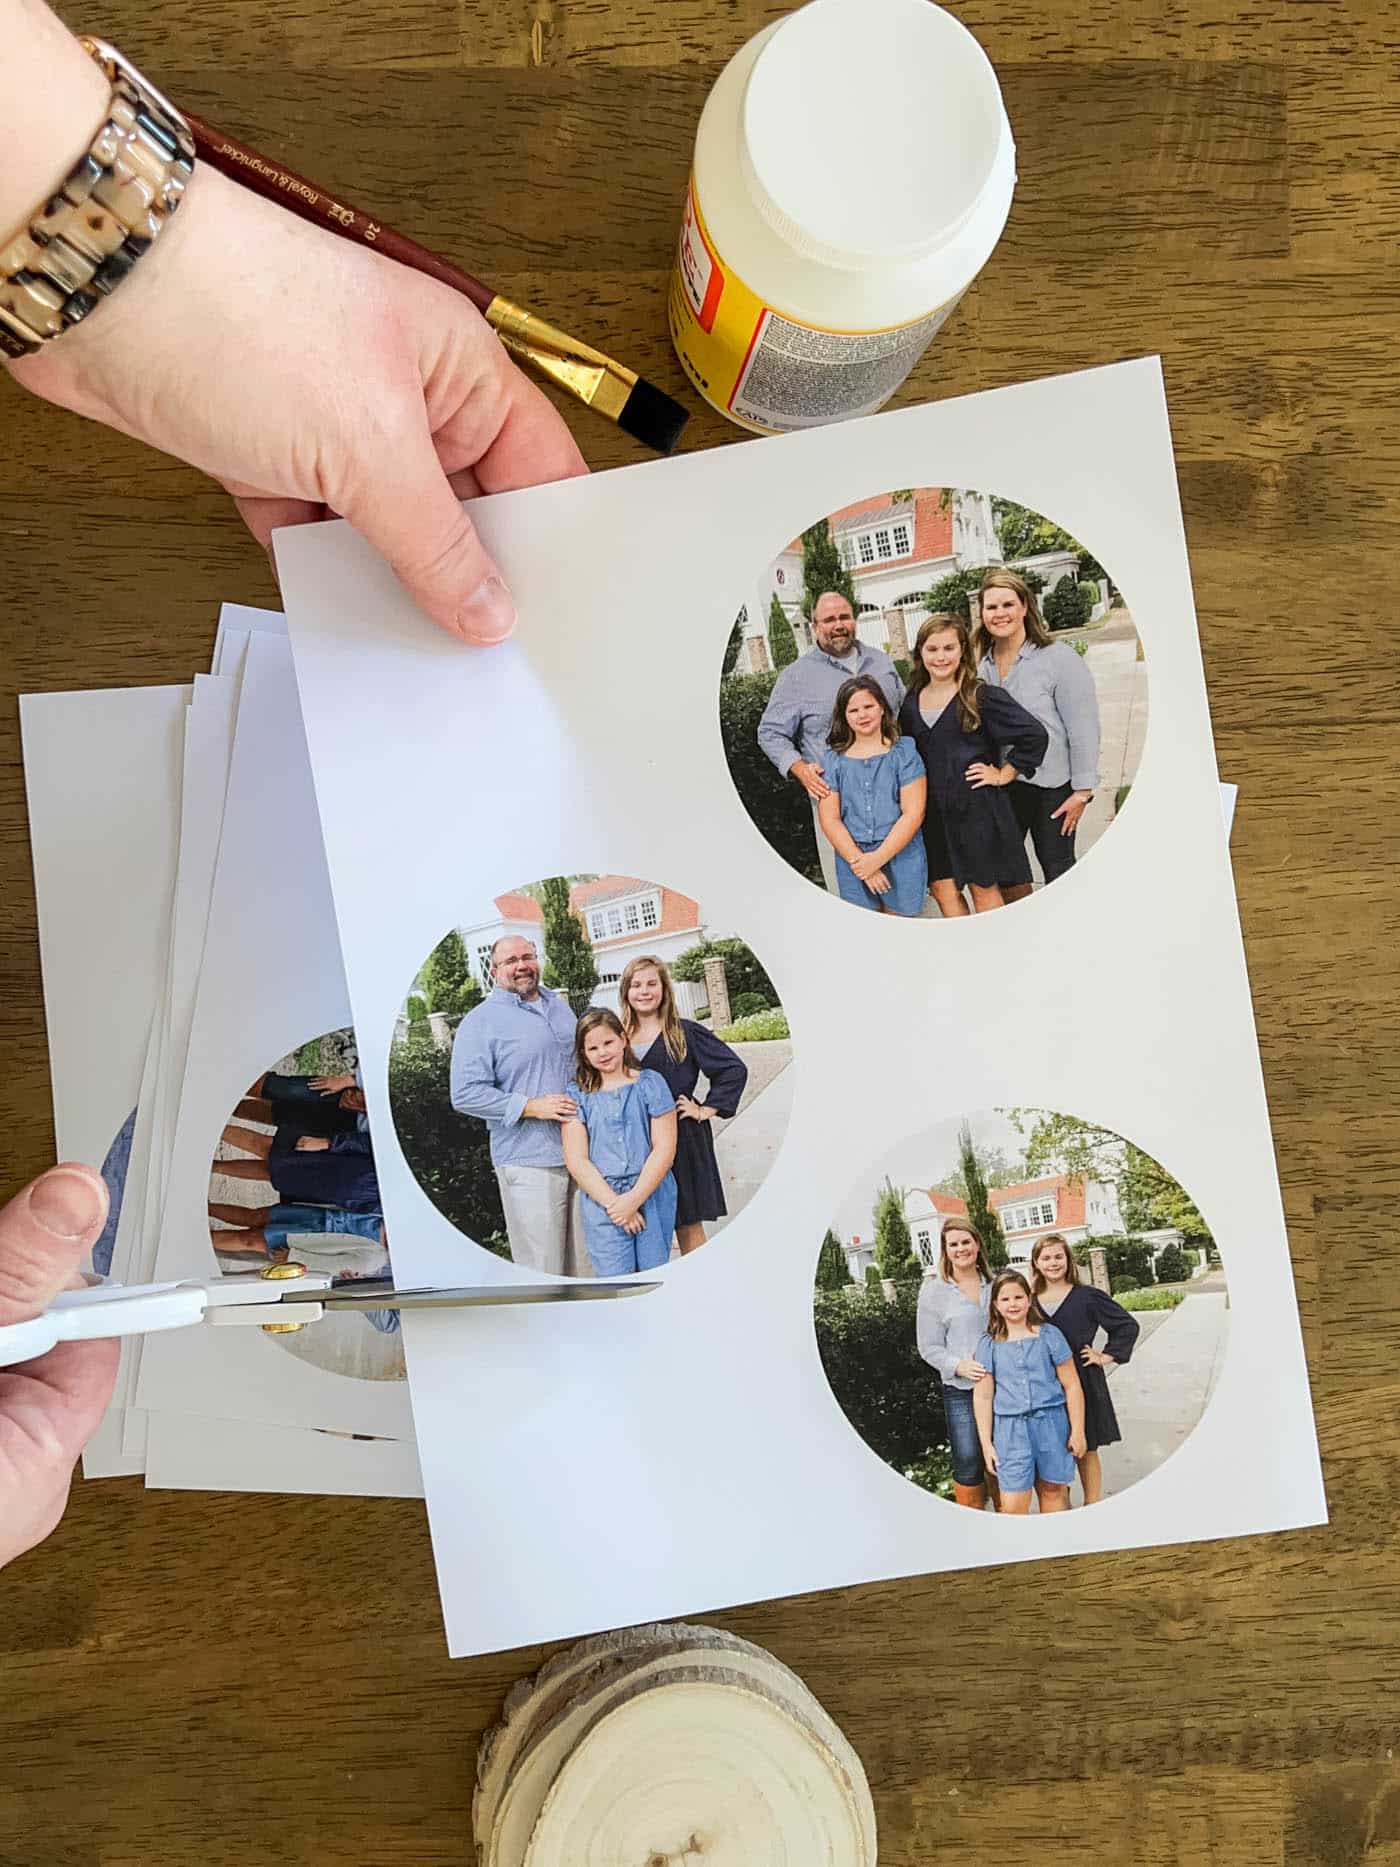
Step 2: Prepare the Photo
Cut out the photo, leaving a small border around the edges. Make sure the photo is sized to fit well on the wood.
Step 3: Apply Gel Medium
Using a brush, apply a generous layer of gel medium onto the wood. Make sure to cover the entire surface where the photo will be placed.
Step 4: Transfer the Photo
Place the photo face-down onto the gel medium. Smooth out any wrinkles or air bubbles using a sponge or cloth. Press firmly to ensure good contact between the photo and the wood.
Step 5: Let it Dry
Allow the gel medium to dry completely. This usually takes around 24 hours, but it’s best to follow the instructions provided by the manufacturer.
Method 2: Printing Photos Directly onto Wood
If you’re looking for a more polished and professional finish, printing photos directly onto wood is the way to go. Here’s what you’ll need:
- Wood printer (specifically designed for printing on wood)
- Wooden surface
- High-quality digital photo
- Computer with image editing software
Step 1: Prepare the Wood
Ensure that the wooden surface is clean and free from dust or debris. Sand it lightly to create a smooth texture if needed.
Step 2: Edit and Resize the Photo
Use image editing software to enhance your photo and adjust its size to fit the wooden surface.
Step 3: Load the Printer
Follow the manufacturer’s instructions to load the wood printer with the appropriate type of wood and ensure it is properly aligned.
Step 4: Print the Photo
Send the edited photo to the wood printer and initiate the print job. Make sure to choose the desired print settings for optimal results.
Step 5: Allow it to Dry
Once the photo is printed, let it dry completely before handling or displaying it. This may take a few minutes to an hour, depending on the printer and ink used.
Both methods provide unique ways to put pictures on wood, allowing you to unleash your creativity and add a personal touch to your living space or gift-giving. Experiment with different techniques and materials to achieve the desired results. Happy crafting!
Frequently Asked Questions
Here are some commonly asked questions about how to put pictures on wood:
How do I transfer a picture onto wood?
To transfer a picture onto wood, you can use a few different methods. One popular method is to use a gel medium, which acts as a transfer medium. Simply apply the gel medium to the wood surface, place your printed picture face down onto the medium, and press it down firmly. Allow it to dry for several hours or overnight. Once the gel medium is completely dry, wet the back of the paper with a sponge or cloth, and then gently rub away the paper to reveal the transferred image. Finish it off by applying a clear sealant to protect the image and the wood.
Another method is to use a heat transfer technique. Print your picture onto a special heat transfer paper using an inkjet printer. Place the printed image face down onto the wood, and then use a heat press or an iron to apply heat and pressure. This will transfer the image onto the wood. Make sure to follow the manufacturer’s instructions for the specific heat transfer paper you are using.
Can I use any type of wood for transferring pictures?
While you can transfer pictures onto various types of wood, some types work better than others. Smooth and flat surfaces are ideal for transferring images, so woods like birch plywood, maple, or pine are often recommended. Avoid using rough or knotty wood surfaces, as they can interfere with the transfer process and result in a less clear image. It’s also important to prepare the wood surface properly by sanding it smooth and removing any dust or debris before attempting to transfer the picture.
Additionally, keep in mind that the color and texture of the wood will affect the final appearance of the transferred picture. Lighter woods tend to produce more vibrant and true-to-color results, while darker woods may give a more rustic or vintage look to the image.
Do I need to resize the picture before transferring it onto wood?
Yes, it’s usually necessary to resize the picture before transferring it onto wood. The size of the picture should match the size of the wood surface or be slightly smaller. If the picture is larger than the wood, you’ll need to trim it down to fit. Resizing can be done using photo editing software or even through basic image editing tools available on computers or smartphones. It’s important to maintain the aspect ratio of the picture to avoid any distortion when transferring it onto the wood.
Keep in mind that if the picture has a higher resolution, it will generally result in a clearer and more detailed transfer onto the wood surface. However, make sure that the resolution is not too high, as it can make the transfer process more difficult and may not yield the best results.
How can I protect the transferred picture on wood?
To protect the transferred picture on wood, it’s recommended to apply a clear sealant or varnish. This will help to preserve the image, prevent it from fading, and protect it from moisture and UV damage. Choose a sealant or varnish specifically designed for wood surfaces and follow the instructions for application carefully. Apply multiple thin coats rather than one thick coat to achieve a smooth and even finish. Allow each coat to dry completely before applying the next one.
In addition to the sealant, it’s also a good idea to handle the wood with care and avoid placing any heavy objects on top of the transferred picture. This will help to maintain its longevity and prevent any accidental damage.
Can I transfer black and white pictures onto wood?
Absolutely! Black and white pictures can be transferred onto wood with great results. In fact, the contrasting tones of black and white can create a striking and artistic effect on the wood surface. The transfer process for black and white pictures is the same as for color images. Just make sure to choose a high-quality black and white image with good contrast to achieve the best outcome. Experiment with different wood types and finishes to enhance the overall aesthetic appeal of the transferred picture.
Remember that the final appearance of the transferred black and white picture will also depend on the color and texture of the wood used. Lighter woods may bring out more detail, while darker woods can give a more dramatic and vintage feel to the image.
DIY: Learn how to Easily Transfer your Photos onto Wood, with Mod Podge!
In conclusion, learning how to put pictures on wood is not only a creative and fun process, but it also allows you to personalize your home decor or create unique gifts for your loved ones. By following the step-by-step instructions outlined in this guide, you can confidently embark on this DIY project and unleash your inner artist.
Remember, practice makes perfect, so don’t be discouraged if your first attempt isn’t flawless. Experiment with different techniques, tools, and finishes to find what works best for you. Whether you choose to transfer images using gel medium, Mod Podge, or woodburning, the possibilities are endless when it comes to adding pictures to wood.
So gather your supplies, let your imagination run wild, and start transforming simple pieces of wood into stunning works of art. With patience, practice, and a little bit of creativity, you’ll be amazed at what you can achieve. Happy crafting!
- How to Apply Eco Wood Treatment - April 13, 2024
- How to Use Pc Woody Wood Epoxy - April 13, 2024
- How to Treat Wood Fungus - April 13, 2024