Are you tired of looking at that old, outdated tile floor in your home? Perhaps you’re ready to update your space with a fresh, new look. If so, you’ve come to the right place! In this guide, we will walk you through the step-by-step process of removing tile floor from a wood subfloor.
Removing tile floor can be a daunting task, especially if you’ve never done it before. But fear not! With the right tools and techniques, you’ll be able to tackle this project like a pro. Whether you’re planning a complete renovation or simply want to replace the tile, we’ve got you covered. So, roll up your sleeves and get ready to transform your space into a stunning oasis. Let’s dive in and learn how to remove tile floor from a wood subfloor!”
How to Remove Tile Floor from Wood Subfloor:
- Start by removing any baseboards or trim around the edges of the tile floor.
- Wear safety goggles and gloves to protect yourself.
- Use a hammer and chisel to break up a tile and remove it.
- Continue breaking and removing tiles until the entire floor is cleared.
- Scrape away any remaining adhesive or grout from the wood subfloor.
- Clean the subfloor thoroughly before installing new flooring.
How to Remove Tile Floor from Wood Subfloor
Description:
Removing tile flooring from a wood subfloor can be a challenging task, but with the right tools and techniques, it can be done efficiently. This step-by-step guide will provide you with the necessary information to successfully remove tile floor from a wood subfloor.
Tools and Materials:
Before you begin the process, gather the following tools and materials:
- Protective goggles and gloves
- Hammer
- Chisel
- Pry bar
- Utility knife
- Floor scraper
- Dust mask
- Broom
- Vacuum cleaner
- Plastic sheeting
Step 1: Preparation
Start by preparing the work area. Clear the room of any furniture or obstacles, and cover nearby surfaces with plastic sheeting to protect them from dust and debris. Put on your protective goggles, gloves, and a dust mask for safety.
Open windows or use fans to ensure proper ventilation in the room.
Step 2: Removing Baseboards

Before removing the tile floor, it is recommended to remove the baseboards to prevent any damage. Use a utility knife to cut along the top edge of the baseboard to break the paint seal. Then, use a pry bar and hammer to gently remove the baseboards.
Set the baseboards aside carefully so that they can be reinstalled later.
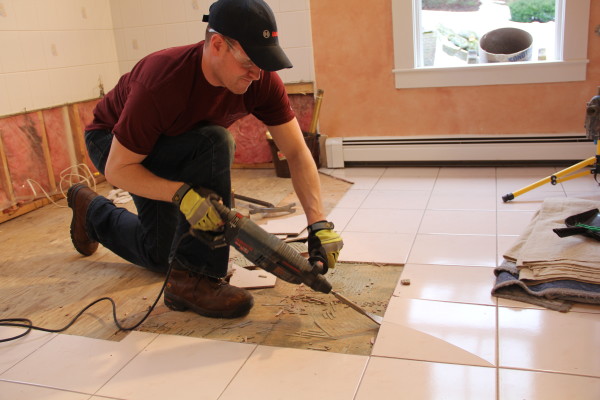
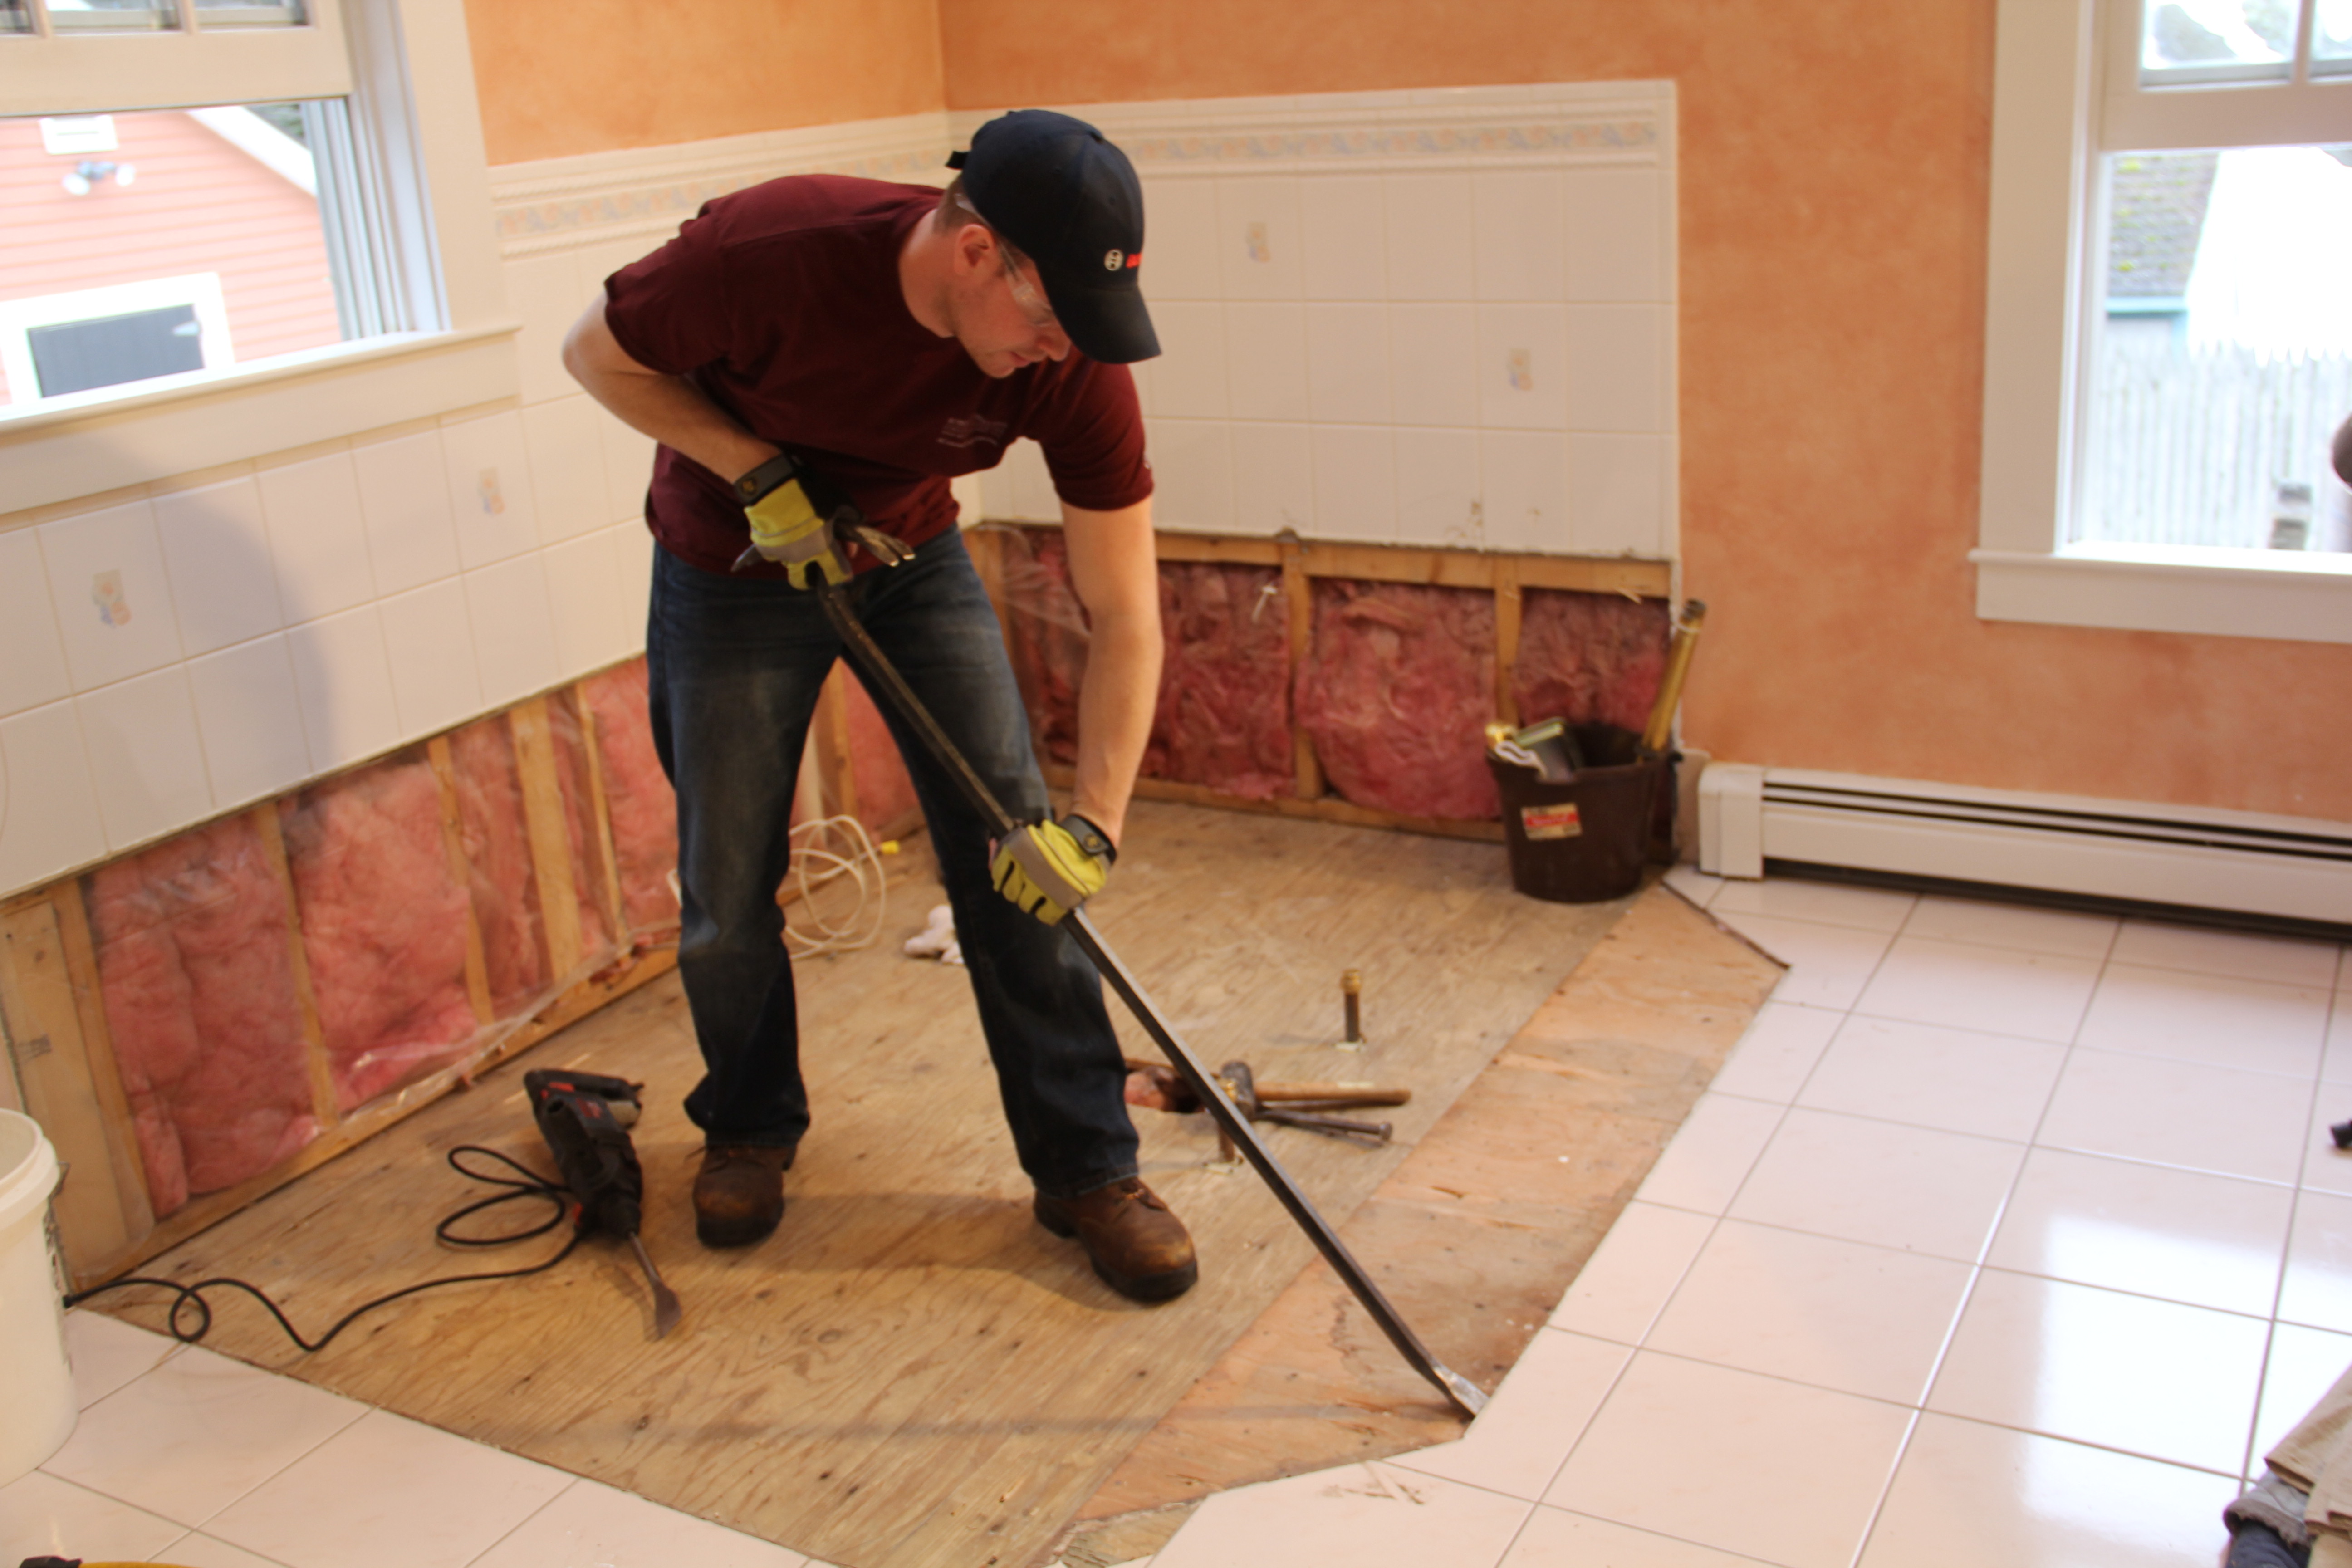
Step 3: Breaking the Tiles
Start breaking the tiles using a hammer and chisel. Begin at a corner and work your way towards the center of the room. Place the chisel at a 45-degree angle between the tile and the wood subfloor and gently tap it with the hammer to loosen the tile.
Continue this process until all the tiles have been loosened and removed. Be cautious not to damage the wood subfloor in the process.
Step 4: Removing Tile Adhesive
Once the tiles are removed, you will be left with tile adhesive on the wood subfloor. Use a floor scraper or a chisel to scrape away the adhesive. Work in small sections and be careful not to gouge or damage the wood subfloor.
If the adhesive is stubborn, you can soften it by using a heat gun or adhesive remover. Follow the manufacturer’s instructions for the best results.
Step 5: Clean up and Final Steps
After removing the tile and adhesive, thoroughly clean the wood subfloor using a broom and a vacuum cleaner. Remove any remaining debris or dust to ensure a clean surface.
Inspect the wood subfloor for any damage and make any necessary repairs before installing a new flooring material.
Conclusion:
Removing tile floor from a wood subfloor requires careful planning and the right tools. By following these step-by-step instructions, you can successfully remove the tile floor and prepare the wood subfloor for a new flooring installation.
Frequently Asked Questions
Here are some commonly asked questions about removing tile floor from a wood subfloor:
Question 1: What tools are needed to remove tile floor from a wood subfloor?
Answer: To remove tile floor from a wood subfloor, you will need the following tools:
– Safety goggles and gloves for protection
– Pry bar or chisel to lift and remove the tiles
– Hammer to help with the tile removal
– Floor scraper or floor stripper to remove any remaining adhesive or mortar
– Vacuum cleaner or broom and dustpan to clean up the debris
Question 2: How do I prepare the area before removing the tile floor?
Answer: Before removing the tile floor from a wood subfloor, it is important to prepare the area properly. Follow these steps:
1. Clear the room of any furniture or obstacles.
2. Cover nearby surfaces and furniture with plastic sheets to protect them from dust and debris.
3. Turn off any electrical sources near the work area.
4. Remove any baseboards or moldings around the edges of the floor.
Question 3: How do I remove the tiles from a wood subfloor?
Answer: To remove the tiles from a wood subfloor, follow these steps:
1. Put on safety goggles and gloves for protection.
2. Use a pry bar or chisel to lift and remove the tiles. Start at an edge or corner and work your way across the floor.
3. Tap the pry bar or chisel gently with a hammer to loosen stubborn tiles.
4. Place the removed tiles in a safe area away from the work space.
Question 4: How do I remove adhesive or mortar from the wood subfloor?
Answer: After removing the tiles, you may need to remove adhesive or mortar from the wood subfloor. Follow these steps:
1. Use a floor scraper or floor stripper to scrape away the adhesive or mortar. Work in small sections at a time.
2. Apply gentle pressure and use a scraping motion to remove the residue. Be careful not to damage the wood subfloor.
3. Repeat the process until all the adhesive or mortar is removed.
4. Clean the subfloor thoroughly with a vacuum cleaner or broom and dustpan.
Question 5: How do I repair any damages to the wood subfloor?
Answer: If the wood subfloor is damaged during the tile removal process, you will need to repair it. Here’s what you can do:
1. Assess the extent of the damage. If it’s minor, you can use wood filler or putty to fill in the gaps or cracks.
2. For larger damages or rotting wood, you may need to replace the affected area of the subfloor. Cut out the damaged section and install a new piece of plywood or OSB board.
3. Secure the new subfloor piece with screws or nails, ensuring it is level and flush with the surrounding area.
4. Once the repairs are done, you can proceed with installing a new flooring material on the subfloor.
Remember, safety should always be a top priority when undertaking any home improvement project. Make sure to wear protective gear such as goggles, gloves, and a dust mask to prevent any injuries or exposure to harmful substances. Additionally, take your time and be patient throughout the process, as rushing can lead to mistakes and damage to your subfloor.
By following the tips and guidelines provided here, you can confidently remove tile flooring from a wood subfloor and achieve a professional-looking result. Whether you are looking to update your home’s aesthetic or repair a damaged floor, this guide will equip you with the knowledge and skills needed to tackle the task at hand. So roll up your sleeves, gather your tools, and get ready to transform your space one tile at a time!
- How to Design Wood Carving - May 7, 2024
- How to Carve Wood - May 7, 2024
- How to Remove Cat Urine From Wood Furniture - May 7, 2024