I know what you're thinking – rubbing wood sounds strange. But let me tell you, it's a game-changer.
If you want to bring out the natural beauty of your wooden furniture or floors, rubbing wood is the way to go. It's a simple technique that involves gently buffing the surface to smooth out scratches and enhance the shine.
In this article, I'll guide you through the step-by-step process of how to rub wood and achieve stunning results. Get ready to unleash the true potential of your wood!
Introduction: Wood Rubbing
I love the way the article explains the art of wood rubbing in the introduction. It provides a comprehensive overview of this ancient practice, which has been used for centuries to bring out the natural beauty of wood. Wood rubbing, also known as wood graining or faux wood finishing, involves creating the appearance of wood grain on surfaces that aren't made of wood. It's a technique that requires skill and precision, but the results can be truly stunning.
To achieve the desired effect, the first step is to prepare the surface by sanding it smooth and applying a base coat of paint. Once the base coat is dry, the real magic begins. Using a variety of tools such as brushes, sponges, and even rags, the wood grain pattern is meticulously applied. This can be done by dragging the tools across the surface, stippling, or even combing the paint. The key is to create a realistic and natural-looking grain pattern.
Wood rubbing is a versatile technique that can be applied to various surfaces, including walls, furniture, and even floors. It allows you to transform ordinary objects into works of art, adding warmth and depth to any space. Whether you want to create a rustic farmhouse look or a sleek and modern aesthetic, wood rubbing offers endless possibilities.
In the subsequent section, we'll delve into the quick steps involved in wood rubbing, providing you with a handy guide to get started on your own wood rubbing projects. So let's dive in and discover the art of wood rubbing together.

quick answer
The quick answer to achieving a realistic wood grain pattern is to use a variety of tools and techniques. Here are four essential tips to help you achieve the desired effect:
- Start with the right tools: To create a convincing wood grain pattern, you'll need a wood graining tool, which is a specialized tool with teeth or grooves that mimic the texture of wood. Additionally, having a variety of brushes, sponges, and rags will allow you to create different effects and textures.
- Prepare the surface: Before applying any wood grain technique, make sure the surface is clean and smooth. Sand the wood to remove any imperfections, and apply a primer if necessary. This will ensure that the wood grain pattern adheres properly and looks realistic.
- Choose the right colors: Selecting the right paint colors is crucial for achieving a convincing wood grain effect. Start with a base color that matches the wood you're trying to replicate, and then use a darker shade and a lighter shade to create depth and dimension.
- Practice and experiment: Wood graining is a skill that requires practice to master. Experiment with different techniques, such as dragging, combing, or stippling, to achieve the desired grain pattern. Don't be afraid to try new things and make mistakes – that's how you'll learn and improve.
By following these tips and practicing regularly, you'll soon be able to create realistic wood grain patterns that will enhance the beauty of your projects.
Key Takeways
To summarize, the key takeaways for achieving realistic wood grain patterns are:
- Using the right tools and techniques
- Preparing the surface properly
- Choosing the right colors
- Practicing regularly
When it comes to tools, it's essential to invest in quality brushes and wood-graining tools. These tools will allow you to create the intricate details and textures that mimic real wood. Additionally, learning and mastering various techniques such as glazing, dry brushing, and stippling will greatly enhance the authenticity of your wood grain patterns.
Proper surface preparation is crucial for achieving realistic wood grain. This includes sanding the surface to create a smooth and even base, removing any old paint or varnish, and applying a primer specifically designed for wood surfaces. By ensuring a clean and well-prepared surface, you provide a solid foundation for the wood grain pattern to adhere to.
Choosing the right colors is another important aspect of achieving realistic wood grain. It's vital to select paint colors that closely resemble the natural wood tones you want to replicate. Experimenting with different shades and mixing colors can help you achieve the desired effect.
Lastly, practice makes perfect. Regularly practicing your wood grain techniques will refine your skills and allow you to create more realistic and detailed patterns. Don't be afraid to experiment and try new techniques to continually improve your wood-graining abilities.
Summary
Achieving realistic wood grain patterns requires a solid foundation, which can be achieved through proper surface preparation and investing in quality tools. When it comes to wood rubbing, attention to detail is crucial to achieve the desired results.
To begin, ensure that the wood surface is clean and free of any dirt or dust particles. This can be done by using a damp cloth or a gentle cleaning solution. Next, sand the surface lightly to create a smooth and even texture. This step is essential for the wood rubbing process as it helps in creating a consistent grain pattern.
Once the surface is prepared, it's time to invest in quality rubbing tools. These tools can include a soft cloth, a rubber sanding block, or even a soft-bristled brush. When rubbing the wood, it's important to apply even pressure and use smooth, circular motions. This will help in creating a natural and authentic wood grain pattern. Remember to be patient and take your time during the rubbing process, as rushing can lead to uneven results.
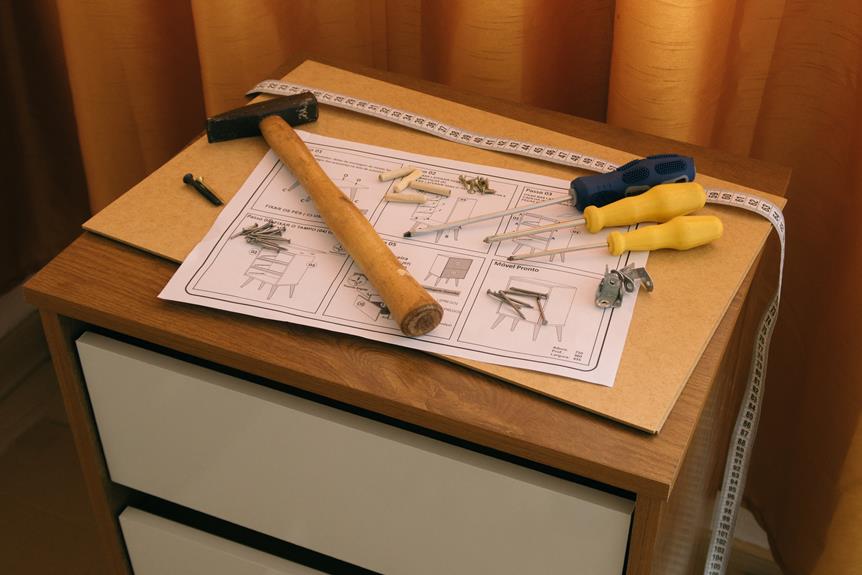
In the next section, I'll provide a step-by-step guide, complete with a list of necessary tools and a helpful YouTube tutorial, to assist you in achieving the perfect wood grain pattern.
Step-By-Step Guide
When it comes to wood rubbing, following a step-by-step guide is crucial for achieving the desired results.
First, gather the necessary tools such as sandpaper, a sanding block, and wood polish.
Next, start by preparing the wood surface by removing any dirt or debris.
Then, begin sanding the wood in a circular motion, gradually moving to finer grits of sandpaper.
Finally, apply the wood polish for a smooth and polished finish.
- Gather the necessary tools: sandpaper, sanding block, wood polish
- Prepare the wood surface by removing dirt and debris
- Sand the wood in a circular motion, using finer grits of sandpaper
- Apply wood polish for a smooth and polished finish
Wood Rubbing Techniques
I'll show you the best way to use the wood rubbing techniques for achieving a smooth finish on your furniture. Wood rubbing is a traditional method that can give your furniture a beautiful and polished look. By using a combination of sandpaper and rubbing compounds, you can remove imperfections and bring out the natural beauty of the wood.
To help you understand the process better, let me present a table that outlines the different wood rubbing techniques:
| Technique | Materials | Steps |
|---|---|---|
| Sanding | Sandpaper (various grits) | 1. Start with coarse grit sandpaper and gradually move to finer grits. 2. Sand in the direction of the wood grain. |
| Polishing | Rubbing Compound | 1. Apply a small amount of rubbing compound to a soft cloth. 2. Rub the compound onto the wood in circular motions. 3. Buff the wood to achieve a smooth finish. |
Choosing the Right Tools
As I research the topic of choosing the right tools, I realize that having the correct equipment is crucial for achieving the best results in wood rubbing. When it comes to wood rubbing, there are a few essential tools that every enthusiast should have in their arsenal.
Firstly, a high-quality rubbing pad is essential for achieving smooth and even strokes. Look for a pad made of soft, lint-free material that won't scratch or damage the wood's surface.
Additionally, a good set of rubbing oils is necessary to enhance the wood's natural beauty and protect it from drying out. Choose oils specifically designed for wood rubbing, as they'll provide the best results.
Finally, don't forget to invest in a reliable set of sandpapers with varying grits to help you achieve the desired level of smoothness. By choosing the right tools, you can ensure that your wood rubbing projects turn out beautifully.
Now that we understand the importance of choosing the right tools, it's also crucial to be aware of common mistakes to avoid in wood rubbing.
One common mistake is using too much pressure when rubbing the wood. Applying excessive pressure can result in uneven rubbing and damage the wood's surface. Instead, use a gentle touch and let the tools do the work.
Another mistake is neglecting to clean the wood before rubbing it. Dust and debris can interfere with the rubbing process and affect the final result. Always ensure that the wood is clean and free from any particles before beginning.
Lastly, it's essential to follow the grain of the wood when rubbing. Rubbing against the grain can cause scratches and ruin the overall finish.
Common Mistakes to Avoid
While researching common mistakes to avoid in wood rubbing, I realized that applying too much pressure can result in uneven rubbing and damage the wood's surface. It's important to remember that wood rubbing requires a delicate touch and a gentle hand.
When applying pressure, it's crucial to find the right balance between exerting enough force to create friction and avoiding excessive pressure that may harm the wood. By using a light touch and allowing the rubbing motion to do the work, you can ensure a smooth and even finish.
Additionally, be mindful of the direction in which you rub the wood. Going against the grain can lead to scratches and inconsistencies in the surface. Always follow the natural grain pattern to achieve the best results.
Benefits of Wood Rubbing
Sometimes, rubbing wood can provide a therapeutic and satisfying experience, while also enhancing the natural beauty of the material. When done correctly, this technique can bring out the unique grain patterns and create a smooth, polished surface. Not only does it improve the appearance of the wood, but it also offers various benefits. Firstly, it can help to relax the mind and relieve stress, similar to the effects of a massage. Secondly, it allows for a deeper connection with nature, as the tactile sensation of rubbing the wood can be grounding and calming. Lastly, it offers a sense of accomplishment and satisfaction as you witness the transformation of the wood. Overall, wood rubbing is an enjoyable and liberating practice that allows us to appreciate the beauty of nature while finding inner peace and tranquility.
| Pros | Cons |
|---|---|
| Therapeutic | Time-consuming |
| Enhances beauty | Requires skill |
| Relieves stress | Can be messy |
| Connects with nature | |
| Sense of accomplishment |
Tips for a Smooth Finish
I found that using a fine-grit sandpaper helped me achieve a smooth finish on the wood surface. The fine-grit sandpaper, usually around 220 to 320 grit, helps to remove any imperfections and unevenness on the wood surface. It smoothens out rough areas, evens out any bumps or ridges, and prepares the wood for the next steps of staining or sealing.
By using a gentle, yet thorough, sanding motion, I was able to achieve a consistent and smooth finish on various wooden surfaces. The fine-grit sandpaper allows for precision and control, ensuring that the wood's natural beauty shines through.
When it comes to achieving a polished and flawless look, sanding is an essential step in the wood rubbing process. By incorporating a fine-grit sandpaper into your process, you can achieve a liberating, smooth finish on your wood projects.
Final Thought
In conclusion, I believe that rubbing wood with a soft cloth and a gentle circular motion is the best way to bring out its natural shine. This technique not only enhances the beauty of the wood but also protects it from damage. By using a soft cloth, we avoid scratching the wood surface, ensuring a smooth and polished finish.
To further illustrate the benefits of this method, let's take a look at a comparison table:
| Method | Pros | Cons |
|---|---|---|
| Soft Cloth | Gentle and non-abrasive | Requires manual labor |
| Circular Motion | Evens out the polish | Time-consuming |
| Natural Shine | Enhances wood's beauty | May not be suitable for all wood types |
| Protection | Prevents scratching | Requires regular maintenance |
| Cost-effective | No need for expensive products | Requires effort and time |
As you can see, this technique offers numerous advantages. It is cost-effective, as it doesn't require expensive products, but rather relies on manual labor and a soft cloth. Additionally, the circular motion helps even out the polish, resulting in a smooth and consistent shine. Moreover, this method not only brings out the natural beauty of the wood but also protects it from potential scratches.
Frequently Asked Questions
Can I Use Any Type of Wood for Rubbing, or Are There Specific Types That Work Best?
You can use any type of wood for rubbing, but some types work better than others. Certain woods have a smoother texture and grain, which makes them easier to rub and achieve desired results.
How Long Should I Rub the Wood for Before I Start Seeing Results?
I usually rub the wood for about 10-15 minutes before I start seeing results. However, the duration may vary depending on factors like the type of wood and the desired outcome.
Can I Use Any Type of Cloth or Material for Rubbing, or Are There Certain Materials That Are Recommended?
Any cloth or material can be used for rubbing wood, but some may be more effective than others. It's recommended to use a soft, lint-free cloth to achieve the best results and avoid scratching the surface.
Are There Any Safety Precautions I Should Take While Rubbing Wood?
When rubbing wood, it's important to take safety precautions. Ensure proper ventilation to avoid inhaling dust or fumes. Wear protective gloves and goggles to shield against splinters or debris. Keep the work area clean and organized to prevent accidents.
Can I Apply Any Type of Finish or Sealant After Rubbing the Wood to Enhance Its Appearance and Durability?
Yes, you can definitely apply a finish or sealant after rubbing the wood. It will not only enhance its appearance but also provide durability. I highly recommend using a polyurethane finish for best results.
- How to Waterproof the Inside of a Wood Planter Box - May 11, 2024
- How to Build a Raised Garden Bed With Wood - May 11, 2024
- How to Transfer Photos to Wood With Nail Polish Remover - May 11, 2024