Are you a DIY enthusiast or a creative artist looking to add a touch of color and personality to your wooden creations? If so, you may have encountered the challenge of preserving and protecting your painted designs on wood. Whether it’s a beautifully hand-painted sign, a colorful mural, or a unique piece of furniture, it’s crucial to ensure that the paint remains vibrant and durable over time. In this guide, we will explore the art of sealing paint on wood, providing you with the knowledge and techniques to achieve long-lasting and professional-looking results.
Sealing paint on wood not only enhances its visual appeal but also safeguards it against everyday wear and tear. Without proper sealing, your paint job may be susceptible to chipping, fading, or becoming damaged by moisture or sunlight. By following the correct steps and using the right materials, you can protect your painted wood projects and extend their lifespan significantly. In this comprehensive guide, we will delve into the various types of paint sealers available, discuss their pros and cons, and provide step-by-step instructions to help you achieve a flawless finish. So, let’s dive in and discover the secrets to sealing paint on wood like a pro!
How to Seal Paint on Wood:
- Prepare the surface by sanding it lightly and removing any dust.
- Apply a coat of primer to ensure better adhesion.
- Once the primer is dry, apply your desired paint color in thin, even coats, allowing each coat to dry before applying the next.
- After the final coat of paint is dry, seal the paint with a clear polyurethane sealer for added protection and durability.
- Follow the manufacturer’s instructions for proper application and drying times.
How to Seal Paint on Wood
Sealing paint on wood is an important step to protect and preserve the painted surface. Whether you have painted a piece of furniture, a wooden deck, or any other wooden surface, sealing the paint will enhance its durability and ensure a long-lasting finish. In this guide, we will walk you through the step-by-step process of sealing paint on wood, providing you with all the information you need to achieve professional results. Read on to learn how to properly seal paint on wood.
Step 1: Prepare the Surface
Before you begin the sealing process, it is crucial to prepare the surface properly. Start by cleaning the painted wood with a mild detergent and water solution. Gently scrub the surface using a soft brush or sponge, removing any dirt, dust, or grease. Rinse the wood thoroughly and allow it to dry completely before moving on to the next step. If there are any imperfections, such as cracks or rough patches, you may need to sand the surface lightly to ensure a smooth and even finish.
Once the surface is clean and dry, protect any adjacent areas or surfaces that you don’t want to get sealed. Use painter’s tape or plastic sheets to cover these areas, ensuring that only the painted wood is exposed and ready for sealing.
Step 2: Choose the Right Sealer
Choosing the right sealer is crucial for achieving optimal results. There are various types of sealers available, including polyurethane, varnish, lacquer, and shellac. Consider factors such as the type of wood, the desired finish (matte, satin, or glossy), and the level of protection required. Each type of sealer has its own application method and drying time, so make sure to carefully read the manufacturer’s instructions before proceeding.

It is also essential to select a sealer that is compatible with the type of paint you have used. If you have used an oil-based paint, choose a sealer that is specifically designed for oil-based paints. Similarly, if you have used a water-based paint, opt for a water-based sealer. Using the wrong sealer can lead to poor adhesion, discoloration, or even damage to the painted surface.
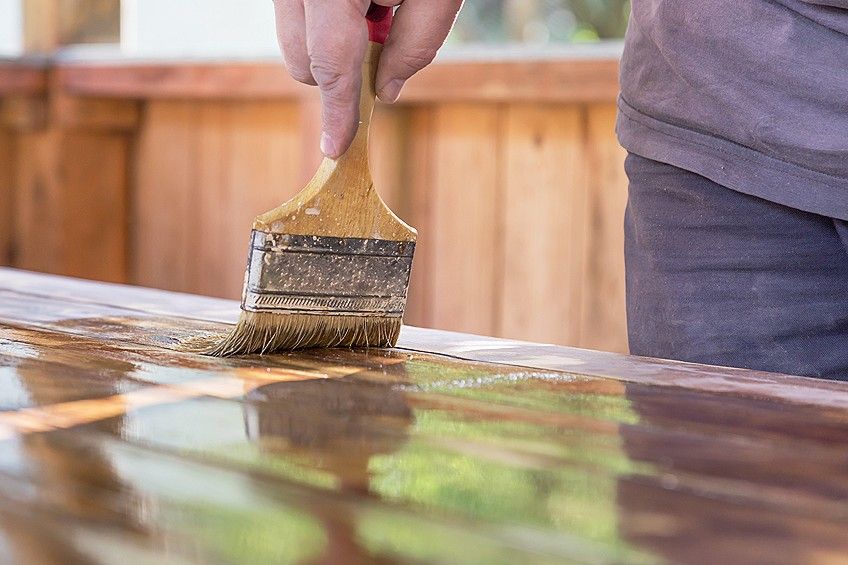
Step 3: Apply the Sealer
Now it’s time to apply the sealer to the painted wood. Start by stirring the sealer thoroughly to ensure that it is well mixed. Use a clean brush or a foam applicator to apply a thin and even coat of sealer onto the painted surface. Work in long, smooth strokes, following the grain of the wood. Avoid overbrushing or applying too much sealer, as this can lead to streaks, bubbles, or an uneven finish.
Allow the first coat of sealer to dry according to the manufacturer’s instructions. This usually takes a few hours. Once dry, lightly sand the surface with fine-grit sandpaper to remove any imperfections and create a smooth surface for the next coat. Apply additional coats of sealer as needed, allowing each coat to dry and sanding between coats. The number of coats required will depend on the type of sealer and the desired level of protection.
Step 4: Finish and Maintain
After applying the final coat of sealer and allowing it to dry completely, inspect the painted wood for any flaws or areas that may need touch-ups. Use a fine brush to carefully touch up any imperfections, ensuring a flawless finish. Once the sealer is fully cured, typically after 24-48 hours, you can remove the protective coverings and enjoy your beautifully sealed paint on wood.
To maintain the sealed paint on wood, avoid using harsh chemicals or abrasive cleaners that can damage the sealer. Instead, clean the surface regularly with a mild soap and water solution, gently wiping it with a soft cloth or sponge. If necessary, you can reapply a thin coat of sealer after a few years to maintain the protection and enhance the appearance of the painted wood.
Frequently Asked Questions
Below are some common questions about how to seal paint on wood:
1. How do I prepare the wood surface for sealing paint?
Before sealing paint on wood, it is important to properly prepare the surface. Start by cleaning the wood with a mild detergent and water to remove any dirt or grease. Once the surface is clean, sand it lightly to create a smooth and even finish. Use a fine-grit sandpaper and sand in the direction of the wood grain. After sanding, wipe away any dust with a damp cloth or tack cloth. Finally, ensure that the wood is completely dry before applying the sealer.
By following these steps, you will create a clean and properly prepared surface that will help the paint adhere better and provide a more durable finish.
2. What type of sealer should I use for sealing paint on wood?
The type of sealer you should use depends on the specific requirements of your project. There are various options available, such as polyurethane, varnish, lacquer, and shellac. Polyurethane is a popular choice for its durability and resistance to moisture and UV rays. Varnish offers a glossy finish and is also known for its protective properties. Lacquer provides a smooth and durable finish, while shellac offers a traditional and natural look.
Consider factors such as the desired appearance, level of protection needed, and the specific characteristics of each type of sealer. It is recommended to read the product labels and instructions to choose the most suitable sealer for your project.
3. How do I apply the sealer to the painted wood?
When applying the sealer to painted wood, it is important to follow a few steps to ensure a successful outcome. First, ensure that the paint is completely dry before applying the sealer. If necessary, allow the paint to cure for the recommended time specified by the paint manufacturer.
Next, use a clean brush or roller to apply the sealer in thin and even coats. Start from one end of the wood and work your way towards the other, following the direction of the wood grain. Avoid over-applying the sealer as it can lead to drips or an uneven finish. Allow each coat to dry completely before applying additional coats, following the drying time specified by the sealer manufacturer.
4. How many coats of sealer should I apply?
The number of coats of sealer you should apply depends on the level of protection and the desired finish. In most cases, applying two to three coats of sealer is recommended. However, it is important to read the instructions provided by the sealer manufacturer, as some products may require more or fewer coats for optimal results.
Applying multiple coats will create a more durable and protective finish. Ensure that each coat is dry before applying the next to avoid any issues with adhesion or the appearance of the finish.
5. How do I maintain and care for sealed paint on wood?
To maintain and care for sealed paint on wood, it is important to follow a few simple steps. Regularly clean the surface using a mild detergent and water to remove any dirt or grime. Avoid using harsh chemicals or abrasive cleaners that can damage the sealer or the paint.
Additionally, protect the surface from excessive exposure to sunlight and moisture, as these can cause the paint to fade or the sealer to deteriorate over time. If necessary, apply a fresh coat of sealer every few years to maintain the appearance and protective properties of the finish. Finally, promptly address any spills or stains to prevent them from penetrating the sealer and potentially damaging the wood underneath.

HOW TO SEAL PAINTED OR UNPAINTED FURNITURE for a LOT OF USE
In conclusion, learning how to properly seal paint on wood is a crucial skill for anyone involved in woodworking or DIY projects. Not only does it enhance the appearance of the finished piece, but it also provides essential protection against moisture, UV rays, and other elements that can cause damage over time. By following the steps and techniques outlined in this guide, you can ensure that your painted wood surfaces remain vibrant and durable for years to come.
Remember, the key to a successful paint seal is thorough preparation and attention to detail. From properly cleaning and sanding the wood to selecting the right type of sealant for your project, each step plays a vital role in achieving optimal results. So, whether you’re working on a small craft project or transforming a piece of furniture, taking the time to seal your paint will not only preserve your hard work but also add a professional touch to your creations. So go ahead, unleash your creativity, and seal your paint on wood with confidence!
- How to Operate Wood Burning Fireplace - April 26, 2024
- How to Build Wooden Shed Floor - April 26, 2024
- How to Lay Linoleum on Plywood - April 26, 2024