Welcome to the exciting world of DIY crafts! Have you ever wondered how to transfer your favorite images onto wood? Well, you’re in luck because today we’re going to show you exactly how to do it!
Transferring an image to wood can be a fun and creative way to personalize your crafts and give them a unique touch. Whether you want to create a custom piece of wall art or a personalized gift, this technique is sure to impress.
So, grab your materials and get ready to unleash your creativity as we dive into the step-by-step process of how to transfer an image to wood. Let’s get started!
Looking to transfer images onto wood? Follow these simple steps to achieve stunning results:
- Choose a wood surface and sand it for a smooth finish.
- Print your desired image using a laser printer.
- Apply a generous coat of gel medium to the wood surface.
- Place the printed image face down onto the gel medium.
- Smooth out any air bubbles and let it dry overnight.
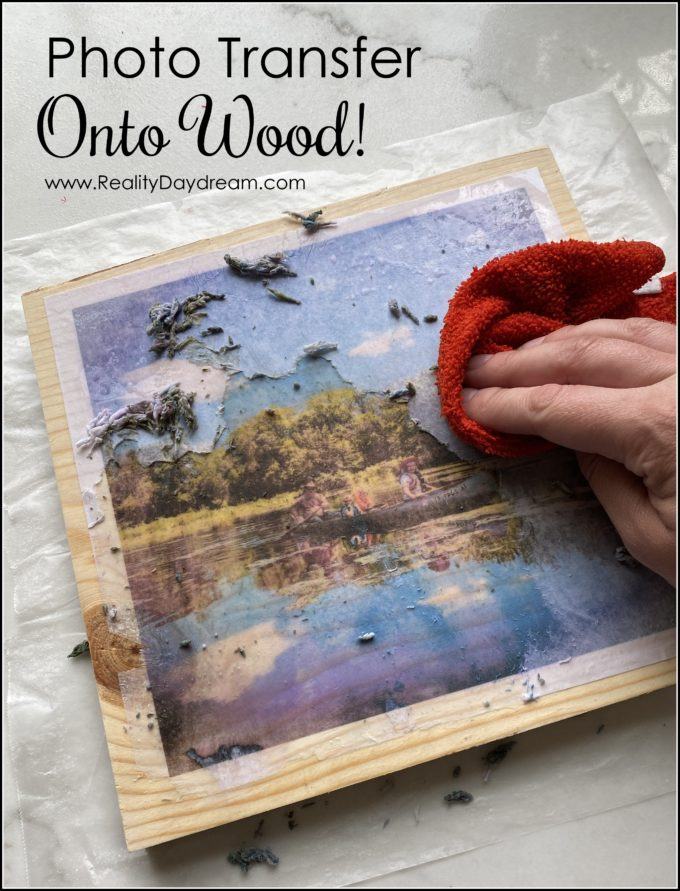
- Gently rub off the paper to reveal the transferred image on wood.
Try this fun and creative DIY project today!
How to Transfer an Image to Wood: A Step-by-Step Guide
Are you looking to add a personal touch to your wooden crafts? One way to do that is by transferring an image onto wood. Whether you want to create personalized gifts or unique pieces of artwork, transferring an image to wood is a fun and creative process that anyone can learn. In this guide, we will walk you through the step-by-step process of transferring an image to wood, from selecting the right materials to applying the final touches. Let’s dive in!
Materials You’ll Need
Before we begin, it’s essential to gather all the necessary materials. Here are the items you’ll need for this project:
- Wooden surface: Choose a smooth and untreated piece of wood for the best results. You can use pre-cut wooden panels, a wooden box, or any other wooden item of your choice.
- Image: Select the image you want to transfer to wood. It can be a photograph, a drawing, or any design of your choice.
- Printer: You’ll need a printer to print the image. Make sure you have a color printer for full-color transfers.
- Wax paper or freezer paper: This will act as the transfer medium.
- Scissors: To cut the image and transfer paper to the desired size.
- Paintbrush: A small paintbrush will be used to apply the transfer medium onto the wood.
- Sandpaper: Use sandpaper to prepare the wooden surface by smoothing it.
- Clear varnish or sealant: This will help protect the transferred image and give it a finished look.
Step 1: Prepare the Wood Surface
The first step in transferring an image to wood is to prepare the wooden surface. Start by sanding the wood to ensure it’s smooth and free from any rough edges. This will help create a clean and even surface for the image transfer. Once sanded, wipe away any dust or debris using a damp cloth.

Next, apply a thin layer of clear varnish or sealant to the wood. This will enhance the image transfer and protect the wood from any moisture or damage. Allow the varnish to dry completely before moving on to the next steps.
Tip: If you want a rustic or distressed look, you can skip the varnish and leave the wood untreated.
Step 2: Print and Cut the Image
After prepping the wooden surface, it’s time to print and cut the image you want to transfer. Adjust the size of the image to fit the wood surface, keeping in mind that it will be mirrored during the transfer process. You can use photo editing software or a simple print settings adjustment to achieve the desired size.
Once you have the image printed, carefully cut around the edges using scissors. Take your time to ensure clean and precise edges, as they will determine the final outcome of the transfer.
Step 3: Apply the Transfer Medium
With the image ready, it’s time to apply the transfer medium to the wooden surface. Here’s how to do it:
- Cut a piece of wax paper or freezer paper slightly larger than the size of the image.
- Place the wax paper or freezer paper on top of the wood, with the shiny side facing down.
- Position the image on top of the transfer paper, facing up.
- Secure the image and the transfer paper onto the wood with tape, making sure they don’t move during the transfer.
- Using a small paintbrush, apply medium pressure to transfer the image onto the wood. Start from the center and work your way outwards, making sure to cover the entire image.
- Once you’ve applied the transfer medium, carefully lift the image and transfer paper from the wood.
Step 4: Finishing Touches
After transferring the image, you may notice that some areas didn’t transfer completely or have slight imperfections. Don’t worry! You can easily fix these by using a fine-tip brush and some acrylic paint. Simply touch up the areas that need improvement, matching the colors as closely as possible.
Once the image is fully transferred and any touch-ups are complete, allow the wood to dry completely before moving on to the final step.
Step 5: Seal the Image
The last step in the process is to seal the transferred image to protect it and give it a finished look. Apply a coat of clear varnish or sealant over the entire wooden surface, including the transferred image. This will protect the image from fading, moisture, and general wear and tear.
Allow the varnish to dry according to the manufacturer’s instructions, and your transferred image is now ready to be displayed or gifted!
Additional Tips and Ideas for Image Transfers on Wood
Tip 1: Experiment with Different Transfer Mediums
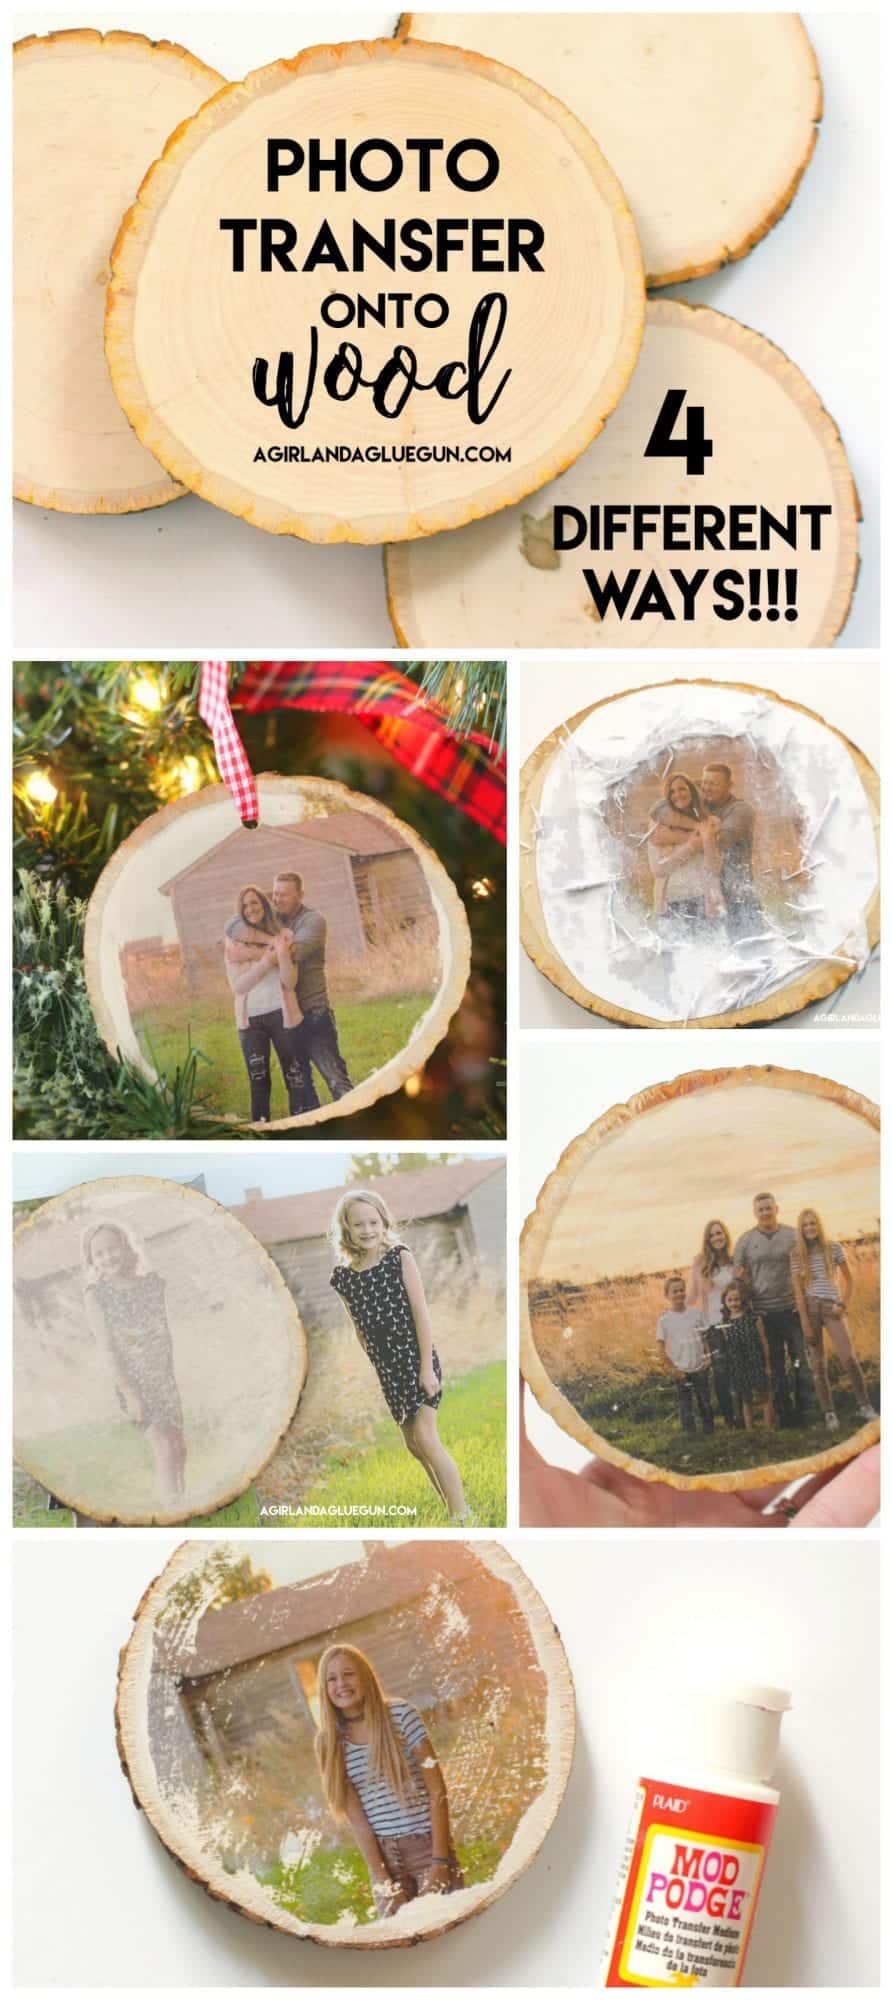
While wax paper and freezer paper are commonly used transfer mediums, don’t be afraid to experiment with other options. Some crafters have had success using gel mediums, Mod Podge, or even adhesive vinyl for image transfers.
Try out different methods and see which one works best for your desired outcome and the materials you have on hand.
Tip 2: Add a Background or Multiple Images
Instead of transferring a single image, consider creating a collage or adding a background to enhance the visual appeal of your wooden piece. You can transfer multiple images onto different parts of the wood or create a background using stencils, stamps, or hand-painted designs.
Get creative and experiment with different compositions to make your wood transfer truly unique.
Tip 3: Protect the Back of the Wood
While protecting the front of the wood with varnish or sealant is essential, don’t forget to coat the backside of the wood as well. This will ensure that the wood remains stable and is less likely to bend or warp over time.
Apply a coat of varnish or sealant to the back of the wood, allowing it to dry completely before displaying or using the piece.
With these tips and the step-by-step guide, you’re well equipped to start transferring images onto wood. Embrace your creativity, experiment with different techniques, and have fun crafting unique and personalized wooden pieces.
Key Takeaways: How to Transfer an Image to Wood
- Gather your supplies: wood, image, transfer gel, brush, and a flat tool.
- Prepare the wood surface by sanding it lightly and removing any dust.
- Print your image in reverse on a regular printer.
- Apply a generous amount of transfer gel on the wood and smooth it out.
- Place the printed image face down on the wood and press firmly.
Frequently Asked Questions
Welcome to our FAQ section on how to transfer an image to wood! Below, you’ll find answers to common questions to help guide you through the process. Whether you’re a beginner or have some experience, we’ve got you covered with these helpful insights.
1. What materials do I need to transfer an image to wood?
For transferring an image to wood, you’ll need the following materials:
Firstly, you’ll need a piece of wood, preferably smooth and unfinished. Next, you’ll require a printed image of your choice, ensuring it is the right size for your wood. You’ll also need gel medium or Mod Podge for transferring the image. Other materials include a brush for application, a clean cloth or sponge for smoothing, and a sealant or protective coat for finishing.
2. How do I prepare the wood for image transfer?
Before transferring the image, it’s essential to prepare the wood properly. Start by sanding the surface of the wood to make it smooth and remove any imperfections. Then, wipe away any dust using a clean cloth. If desired, you can also apply a layer of wood stain or paint to enhance the background color or create a distressed effect. Once the wood is ready, you can proceed with the image transfer.
3. What is the best method for transferring an image to wood?
There are a few methods you can use to transfer an image to wood, but one popular technique is using gel medium:
Start by applying a thin, even layer of gel medium to the wood using a brush. Then, place the printed image face down onto the gel medium. Ensure there are no air bubbles and smooth out any wrinkles or creases using a clean cloth or sponge. Let it dry completely, usually overnight. Once dry, moisten the paper with water and gently rub it off using your fingertips or a soft sponge. The image will gradually appear on the wood surface. Finally, seal the transferred image with a protective coat.
4. Can I transfer colored images to wood?
Absolutely! You can transfer colored images to wood and create vibrant, eye-catching designs. When selecting an image, keep in mind that the colors may appear slightly muted or rustic due to the wood’s texture and natural variations. Experiment with different types of wood to see which ones enhance the colors best. Remember to use a protective coat to seal and preserve the transferred image.
5. Are there any additional tips for a successful image transfer to wood?
Here are a few helpful tips to ensure a successful image transfer:
Firstly, choose a high-quality image with good contrast and sharp details for the best results. Avoid images that are too dark or heavily shaded, as they may not transfer well. Secondly, when applying the gel medium or Mod Podge, make sure it is evenly spread over the entire image area to prevent uneven transfers. Lastly, be patient and allow sufficient drying time between each step. Rushing the process may result in smudged or incomplete transfers.
Summary
If you want to transfer an image to wood, here’s a simple guide for you. First, gather your materials – a printed image, wood, gel medium, and a brush. Next, apply gel medium to the wood and place the image face down on top. Smooth out any bubbles and let it dry overnight. Then, use a damp cloth to gently rub off the paper, revealing the transferred image. Finally, seal it with a protective coat and admire your beautiful wooden artwork.
In conclusion, transferring an image to wood is a fun and creative way to personalize your crafts. By following these steps, you can easily create unique decorations or gifts with your favorite pictures. So go ahead and try it out – you’ll be amazed at what you can create!
- How to Frame a Wooden Jigsaw Puzzle - May 12, 2024
- How to Glue a Wooden Jigsaw Puzzle - May 12, 2024
- How to Decoupage Wood - May 12, 2024