Are you tired of displaying your favorite photos in traditional picture frames? Looking for a unique and creative way to showcase your memories? Well, look no further! In this guide, we will explore the fascinating art of transferring pictures onto wood. Whether you’re a DIY enthusiast or simply want to add a personal touch to your home decor, this technique is sure to captivate your imagination and leave you with stunning, one-of-a-kind artwork.
Transferring pictures to wood is a versatile technique that allows you to transform ordinary photographs into rustic, vintage-inspired masterpieces. Whether you want to create a personalized gift for a loved one or add a touch of charm to your own living space, this process offers endless possibilities. With just a few simple materials and a bit of creativity, you can bring your favorite images to life on a unique and unexpected canvas. So, let’s dive into the world of image transfer onto wood and discover the magic that awaits!
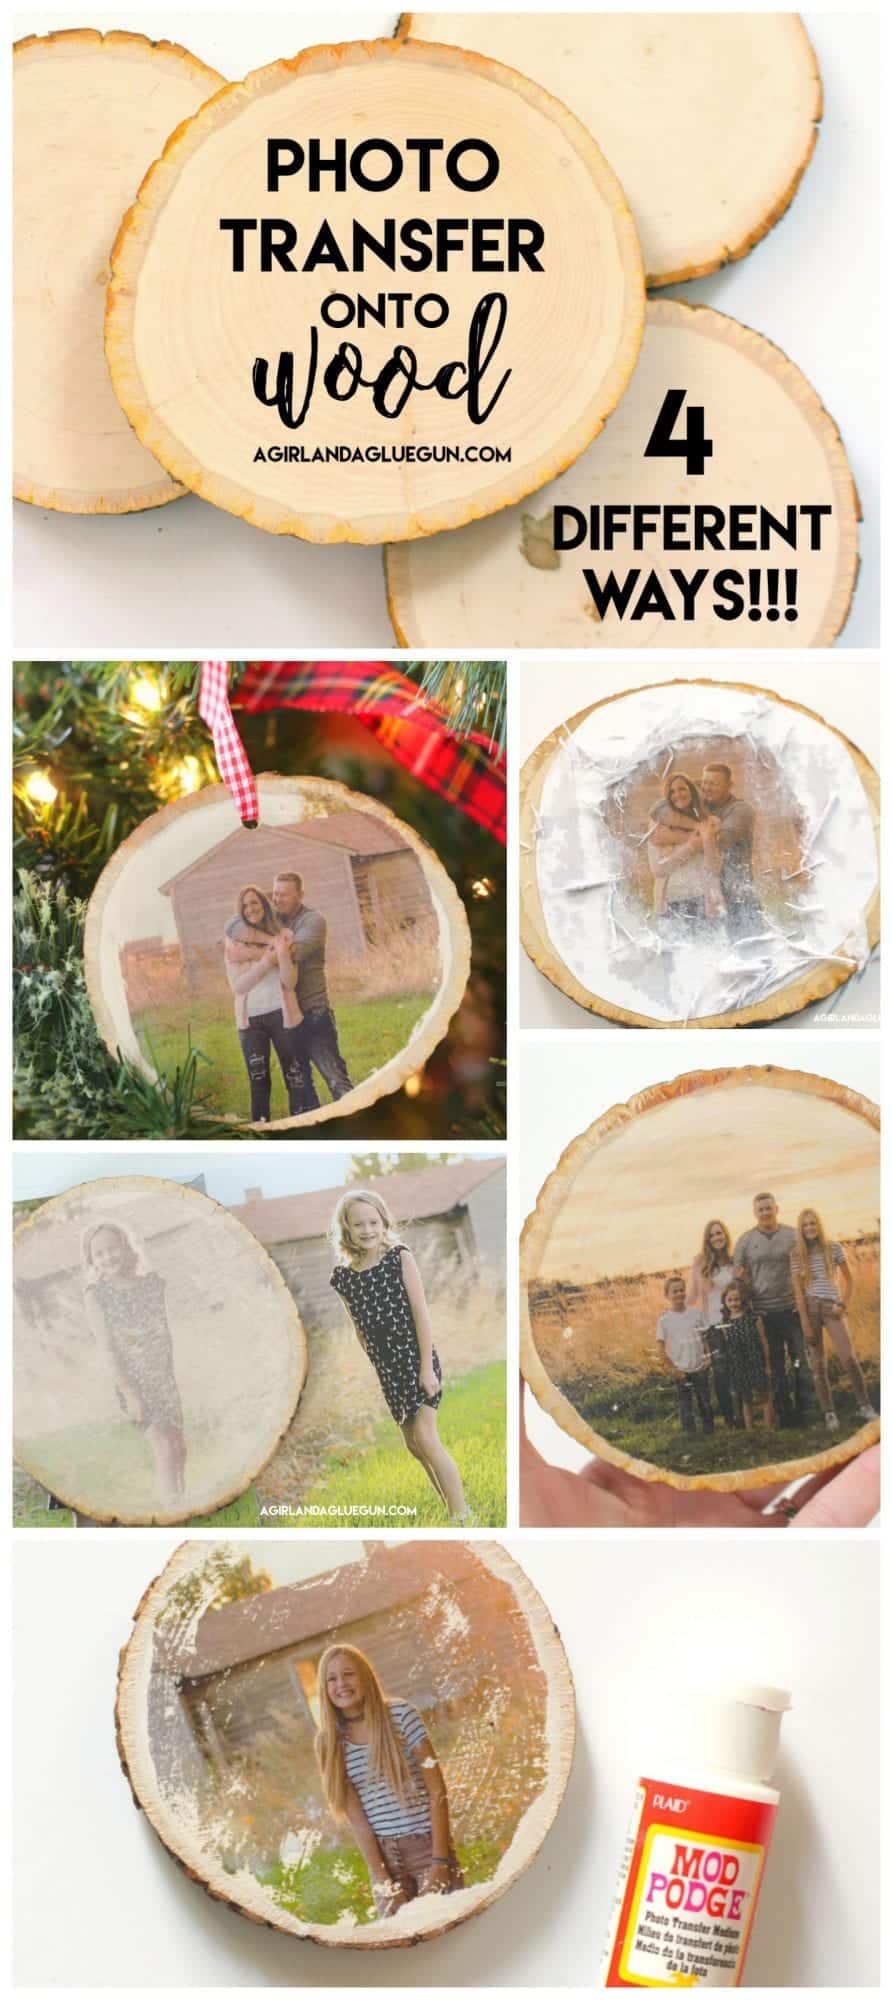
- Print the picture on a regular printer using wax paper.
- Place the picture face down on the wood surface.
- Smooth out any bubbles or wrinkles.
- Use a credit card or similar object to firmly press the picture onto the wood.
- Let it dry for a few hours.
- Carefully peel off the wax paper, revealing the transferred picture on the wood.
- Seal the wood with a clear varnish or polyurethane for protection.
Introduction
In this tutorial, we will guide you through the process of transferring pictures to wood. Whether you want to create personalized gifts or add a unique touch to your home decor, transferring pictures to wood can be a fun and creative project. With the right materials and techniques, you can achieve professional-looking results. Follow the step-by-step instructions below to learn how to transfer pictures to wood.
Materials Needed
Before you begin, gather the following materials:
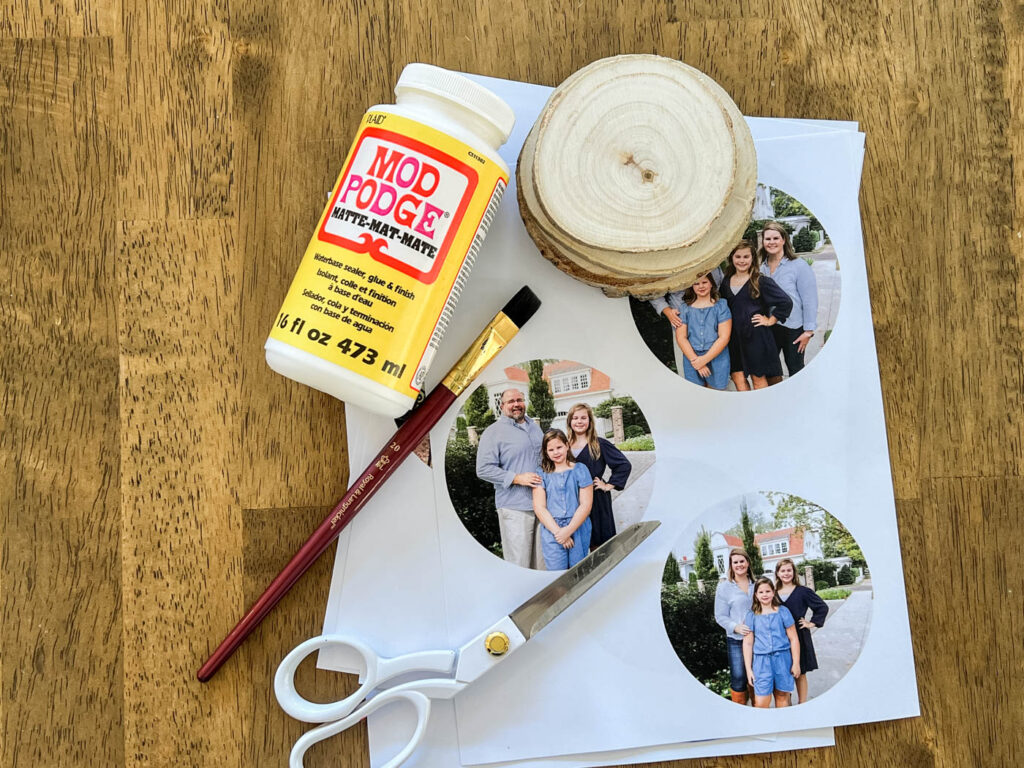
- A piece of wood (smooth and sanded)
- A laser-printed or photocopied picture
- Gel medium or Mod Podge
- A foam brush or paintbrush
- A credit card or squeegee
- A bowl of water
- A cloth or sponge
- A clear sealer (optional)
Step 1: Prepare the Wood
Start by preparing the wood surface. Ensure that it is clean, smooth, and sanded. If there are any rough spots or imperfections, sand them down gently. This will provide a smooth surface for the picture transfer.
Once the wood is ready, decide on the size and orientation of your picture. Measure and mark the desired area on the wood. This will help you position the picture accurately during the transfer process.
Step 2: Prepare the Picture
Print or photocopy the picture you want to transfer onto the wood. Make sure to use a laser printer or photocopier, as inkjet prints will not work for this technique. Ensure that the picture is the same size or slightly smaller than the marked area on the wood.

Trim any excess paper around the picture, leaving a small border if desired. This will help you align the picture on the wood more precisely.
Step 3: Apply the Gel Medium
Using a foam brush or paintbrush, apply a generous layer of gel medium or Mod Podge to the marked area on the wood. Ensure that the entire area is covered evenly and thoroughly.
Place the picture face down onto the wet gel medium, aligning it with the marked area. Press down firmly to remove any air bubbles and ensure good contact between the picture and the wood.
Step 4: Smooth and Remove Excess
Using a credit card or squeegee, gently smooth the picture from the center outwards. This will help remove any remaining air bubbles and excess gel medium.
Once you’re satisfied with the smoothness, use a damp cloth or sponge to gently wipe away any excess gel medium that may have seeped out from under the picture. Be careful not to smudge or shift the picture during this process.
Step 5: Let it Dry
Allow the transferred picture to dry completely. This typically takes around 24 hours, but drying times may vary depending on the type of gel medium used and the humidity level in your environment. Avoid touching or moving the wood during this time to prevent any smudging or shifting of the picture.
If desired, you can apply a clear sealer to protect the transferred picture and enhance its longevity. Follow the instructions provided with the sealer for the best results.
Step 6: Enjoy Your Transferred Picture
Once the transferred picture is fully dry and sealed (if applicable), your project is complete! You can now proudly display your picture on wood, whether it’s a cherished memory, a piece of artwork, or a personalized gift.
Experiment with different types of wood, picture sizes, and finishes to create a variety of effects. Remember to have fun and let your creativity shine through!
Frequently Asked Questions
Here are some commonly asked questions about how to transfer pictures to wood:
Question 1: What materials do I need to transfer a picture to wood?
To transfer a picture to wood, you will need the following materials:
– A wooden surface or object
– A laser printed or photocopy of the picture you want to transfer
– Acrylic gel medium or Mod Podge
– A foam brush or paintbrush
– A credit card or squeegee
– Sandpaper (optional)
Question 2: How do I prepare the wood surface for the picture transfer?
Before transferring the picture to wood, it is essential to prepare the wood surface properly. Here’s how you can do it:
– Start by sanding the wood surface lightly to create a smooth and even texture.
– Wipe away any dust or debris from the surface using a clean cloth or brush.
Question 3: What is the process for transferring a picture to wood?
The process for transferring a picture to wood involves these steps:
1. Apply a generous amount of acrylic gel medium or Mod Podge to the wood surface.
2. Place the printed picture face down onto the wood surface and smooth it out using a credit card or squeegee.
3. Allow the transfer to dry completely for several hours or overnight.
4. Moisten the paper with water and gently rub it off using your fingertips or a damp cloth.
5. Let the wood dry again, and if desired, apply a clear sealant for added protection.
Question 4: Can I transfer colored pictures to wood?
Yes, you can transfer colored pictures to wood using the same process. However, keep in mind that the colors may appear slightly muted or vintage-like after the transfer.
If you want the colors to be more vibrant, you can enhance them by applying a layer of white paint or a light-colored base coat to the wood surface before transferring the picture.
Question 5: How can I ensure a successful picture transfer to wood?
To increase the chances of a successful picture transfer to wood, consider the following tips:
– Use a laser printer or photocopy for the image transfer, as inkjet prints may not work as effectively.
– Make sure the wood surface is clean and free from any oils or dirt.
– Apply an even and generous layer of acrylic gel medium or Mod Podge, ensuring the entire surface is covered.
– Smooth out any air bubbles or wrinkles using a credit card or squeegee.
– Allow ample drying time for each step of the transfer process.
– Be gentle when removing the paper to avoid damaging the transferred image.
As technology continues to advance, it’s important to remember the beauty and value of traditional art forms. Transferring pictures to wood not only provides a tangible and lasting result, but it also requires patience, precision, and a personal touch. So why not give it a try? Whether you’re a seasoned artist or a beginner looking to explore a new hobby, transferring pictures to wood is a creative and rewarding process that will surely leave you with a sense of accomplishment and a unique piece of art to cherish. So gather your materials, let your imagination run wild, and start creating your very own wood transfer masterpiece today.
- How to Design Wood Carving - May 7, 2024
- How to Carve Wood - May 7, 2024
- How to Remove Cat Urine From Wood Furniture - May 7, 2024