When it comes to woodworking and furniture making, one common question that often arises is whether or not you can stain treated wood. This is a topic of great interest for both experienced craftsmen and novice DIY enthusiasts alike. The idea of staining treated wood opens up a world of possibilities, allowing for a personalized touch and the ability to enhance the natural beauty of the wood. In this article, we will explore the answer to this question, examining the various factors to consider and providing valuable insights for anyone interested in staining treated wood.
At first glance, it may seem counterintuitive to stain wood that has already been treated. After all, isn’t the purpose of treating wood to protect it from the elements and prolong its lifespan? While this is true, many people still desire the rich, warm tones that can be achieved through staining. The good news is that staining treated wood is indeed possible, but it requires careful consideration and proper preparation. In the following paragraphs, we will delve into the specific types of treated wood that can be stained, the steps involved in the staining process, and the best practices to achieve optimal results. So, if you are eager to add a touch of color to your next woodworking project, read on to discover the fascinating world of staining treated wood.
Yes, you can stain treated wood. However, it is important to note that treated wood is often pressure-treated with chemicals that can affect the absorption and appearance of stain. To ensure a successful staining process, it is recommended to let the treated wood dry for at least six months before staining. Additionally, using an oil-based stain is usually more effective on treated wood compared to water-based stains.
Can You Stain Treated Wood?
Staining treated wood is a common question for many homeowners and DIY enthusiasts. Treated wood, often used for outdoor projects like decks and fences, is typically treated with chemicals to protect it from rot and decay. The question arises whether it is possible to stain this type of wood to enhance its appearance while maintaining its durability. In this article, we will delve into the process of staining treated wood and provide step-by-step instructions to help you achieve the desired results.
Step 1: Choosing the Right Stain
The first step in staining treated wood is selecting the appropriate stain. It is essential to choose a stain that is specifically designed for use on treated wood. These stains are formulated to penetrate the surface of the wood and adhere properly. Look for stains that are labeled as “treated wood stain” or “exterior wood stain” to ensure compatibility. Additionally, consider the desired color and finish of the stain to achieve the look you want for your project.
Once you have chosen the right stain, it is crucial to test it on a small, inconspicuous area of the treated wood to ensure compatibility and satisfaction with the color. This step will allow you to make any adjustments or changes before applying the stain to the entire surface.
Step 2: Preparing the Wood
Before applying the stain, proper preparation of the treated wood is essential to ensure optimal results. Start by cleaning the wood surface thoroughly. Remove any dirt, debris, or mildew using a mild detergent and water solution. Scrub the wood surface gently with a soft-bristle brush, then rinse thoroughly and allow it to dry completely.
Next, inspect the wood for any rough spots or splinters. Use sandpaper or a sanding block to smooth out these imperfections. Sanding will also help open up the pores of the wood, allowing the stain to penetrate more effectively. Be sure to remove any sanding dust before proceeding.
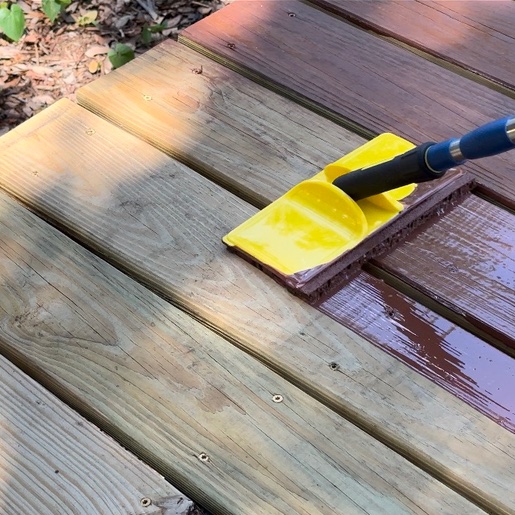
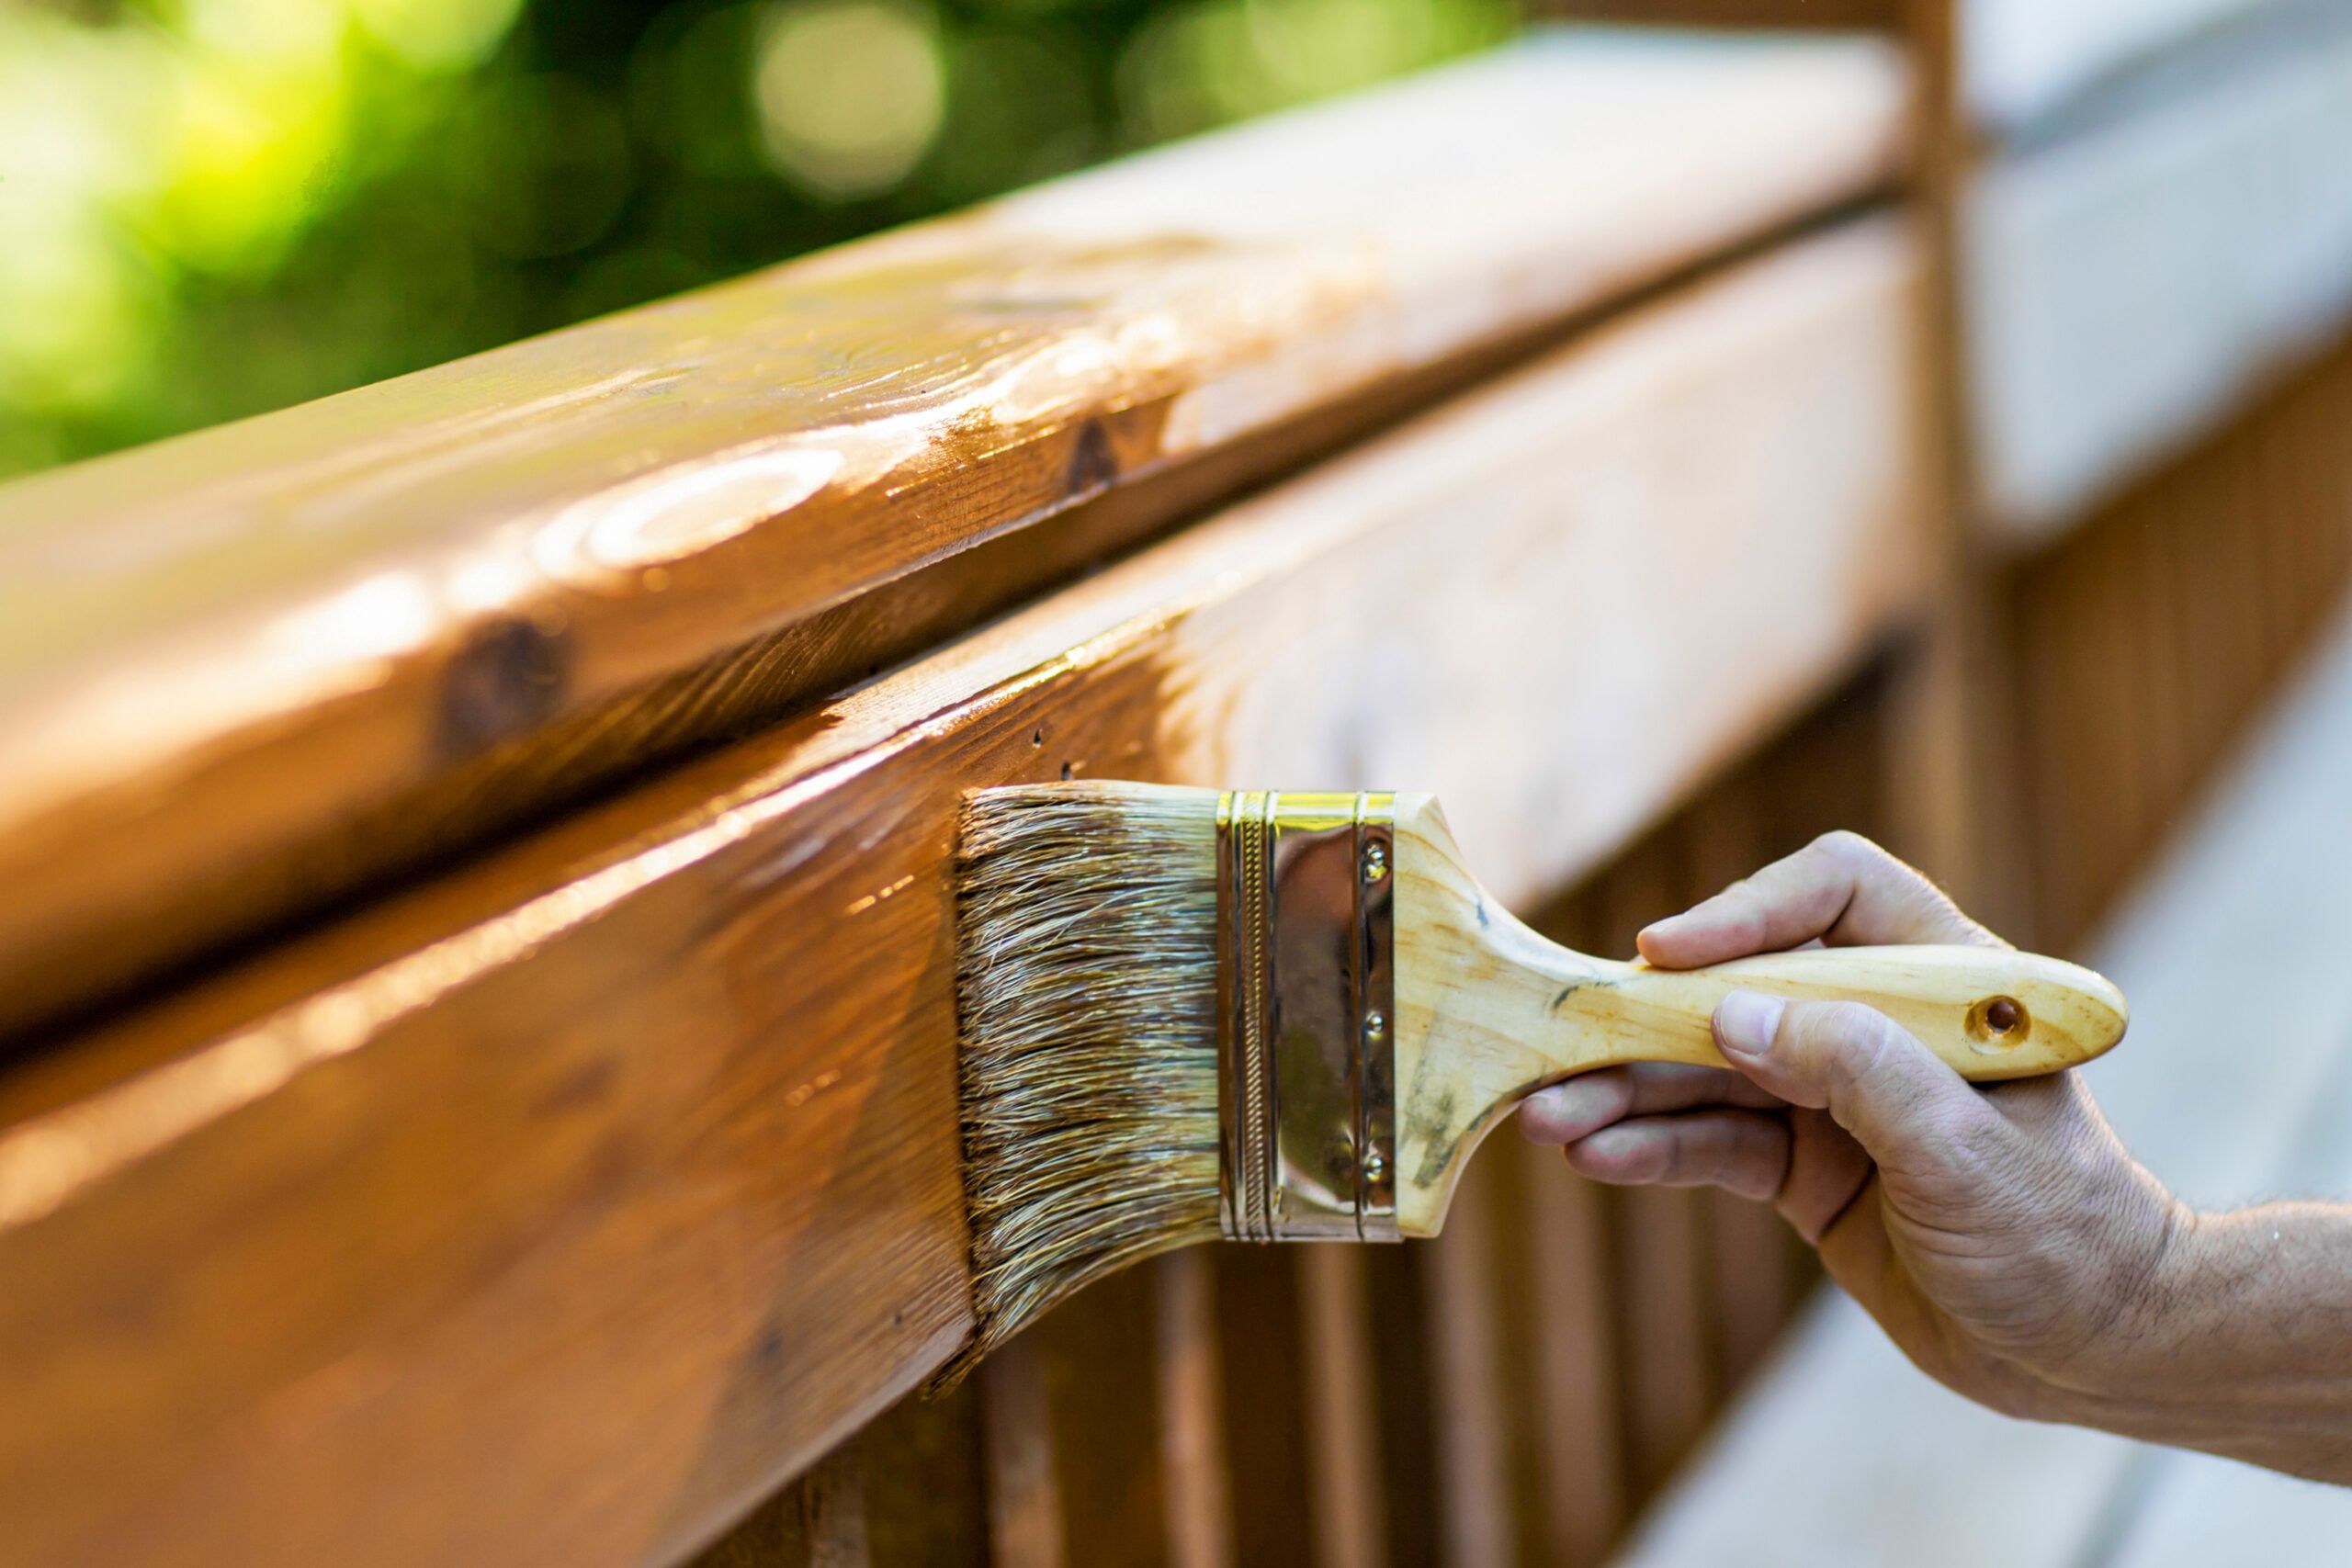
Step 3: Applying the Stain

Now that the wood is properly prepared, it’s time to apply the stain. Start by stirring the stain thoroughly to ensure an even consistency. Using a brush or a roller, apply a thin and even coat of stain to the treated wood, following the manufacturer’s instructions regarding application and drying time.
Pay attention to the wood grain and work in the direction of the grain for a more uniform finish. Apply the stain in manageable sections, working from one end to the other, to avoid visible brush or roller marks. If a darker color is desired, additional coats can be applied after allowing the initial coat to dry according to the manufacturer’s recommendations.
Step 4: Finishing Touches and Maintenance
Once the stain has dried completely, it is time to assess the final result. If you are satisfied with the color and finish, you can proceed to add any desired protective topcoat or sealer following the manufacturer’s instructions.
To maintain the beauty and longevity of your stained treated wood, regular maintenance is essential. Periodically inspect the wood for any signs of wear or damage. Clean the surface as needed and reapply a fresh coat of stain or topcoat to protect the wood from the elements.
Staining treated wood can be a rewarding project that enhances the appearance of outdoor structures while preserving their durability. By following these steps and using the right materials, you can achieve professional-looking results and enjoy the benefits of stained treated wood for years to come.
Frequently Asked Questions
Here are some commonly asked questions about staining treated wood.
Can you stain treated wood?
Yes, you can stain treated wood. Treated wood is often used for outdoor applications such as decks, fences, and furniture, and staining it can enhance its appearance, protect it from the elements, and prolong its lifespan.
However, it is important to note that not all types of treated wood are suitable for staining. Some types of pressure-treated wood, such as those that have been treated with alkaline copper quaternary (ACQ) or copper azole (CA), may not accept stain as well as other types. It is recommended to check with the manufacturer or supplier of the treated wood to determine if it is suitable for staining.
What should I do before staining treated wood?
Before staining treated wood, it is important to prepare the surface properly to ensure the best results. First, clean the wood to remove any dirt, dust, or mildew using a mild detergent and water. Rinse the wood thoroughly and allow it to dry completely.
Next, you may need to sand the wood to smooth out any rough areas or remove any existing stain or finish. Start with a coarse-grit sandpaper and gradually move to finer-grit sandpaper for a smooth finish. After sanding, remove the dust with a brush or vacuum. Finally, apply a wood conditioner to help the wood absorb the stain more evenly.
What type of stain should I use on treated wood?
When choosing a stain for treated wood, it is important to select a product specifically designed for use on outdoor or treated wood. These stains are formulated to penetrate the wood effectively and provide protection against UV rays, water damage, and mildew.
There are different types of stains available, including transparent, semi-transparent, and solid color stains. Transparent stains allow the natural grain and color of the wood to show through, while solid color stains provide more coverage and can hide imperfections. Semi-transparent stains offer a balance between the two. The type of stain you choose depends on your desired look and level of protection.
How do I apply stain to treated wood?
Before applying stain to treated wood, make sure the surface is clean and dry. Stir the stain thoroughly to ensure an even color. Apply the stain using a brush, roller, or sprayer, following the manufacturer’s instructions.
Start by applying the stain to a small, inconspicuous area to test the color and absorption. If desired, you can apply multiple coats for a deeper color or added protection. Allow each coat to dry completely before applying the next. It is important to work in a well-ventilated area and protect surrounding surfaces from overspray or drips.
How often should I re-stain treated wood?
The frequency of re-staining treated wood depends on several factors, including the type of wood, the climate conditions, and the level of exposure to the elements. As a general guideline, it is recommended to re-stain outdoor treated wood every 2-3 years.
However, it is important to regularly inspect the wood for signs of wear, fading, or water absorption. If the wood starts to lose its color or shows signs of damage, it may be time to re-stain. It is also a good idea to clean and reapply a protective finish annually to maintain the wood’s appearance and durability.
Ultimately, the key to successfully staining treated wood lies in proper surface preparation and selecting the appropriate stain and sealer. By thoroughly cleaning the wood and removing any existing finishes or coatings, you can create a receptive surface that will allow the stain to penetrate and bond effectively. Additionally, choosing a high-quality stain and sealer specifically designed for use on treated wood can provide the best results.
In conclusion, while staining treated wood may present some challenges, it is not entirely impossible. With the right approach, careful preparation, and quality products, you can achieve a stunning stained finish that enhances the natural beauty of the wood while preserving its durability and longevity. So, go ahead and unleash your creativity, as treated wood can indeed be a canvas for your staining endeavors.
- How to Circulate Wood Stove Heat - April 27, 2024
- How to Light Wood Burning Stove - April 27, 2024
- How to Install a Wood Burning Fireplace Insert - April 27, 2024