Are you tired of stacking your firewood haphazardly or watching it get damp and unusable in the corner of your yard? If you love the cozy warmth of a crackling fire during the colder months, it’s essential to have a well-organized firewood rack. Not only does it keep your firewood neatly stacked and easily accessible, but it also helps it dry out properly, ensuring a long-lasting and efficient burn. In this guide, we will take you through the step-by-step process of building your own firewood rack, allowing you to take control of your firewood storage and create a functional and aesthetically pleasing addition to your outdoor space.
Whether you’re a seasoned DIY enthusiast or a novice looking to tackle your first woodworking project, this guide is designed to provide clear and concise instructions, accompanied by helpful tips and tricks. We will cover everything from selecting the right materials and tools to constructing the rack itself, ensuring that you have all the information you need to build a sturdy and durable firewood rack. So, grab your measuring tape and get ready to dive into the world of woodworking as we show you how to build a firewood rack that will not only enhance your firewood storage but also add a touch of craftsmanship to your backyard.
- Measure and cut four pieces of lumber for the sides and two pieces for the base.
- Assemble the sides by attaching the pieces with screws or nails.
- Attach the base pieces to the sides to create the rack’s frame.
- Add additional support by attaching crossbars between the sides.
- Place the rack in a dry, well-ventilated area and stack your firewood neatly.
How to Build a Firewood Rack: A Step-by-Step Guide
Are you tired of your firewood cluttering up your backyard or garage? Building a firewood rack is a practical and efficient solution to keep your firewood organized and easily accessible. In this guide, we will walk you through the step-by-step process of building a firewood rack, from gathering the materials to putting the finishing touches. Follow these instructions and you’ll have a sturdy and stylish firewood rack in no time.
Step 1: Gathering Materials and Tools
Before you start building your firewood rack, you’ll need to gather the necessary materials and tools. Here’s a list of what you’ll need:
- 4 pieces of 2×4 lumber, each measuring 8 feet long
- 1 piece of 2×6 lumber, measuring 8 feet long
- 16 pieces of 3-inch wood screws
- Tape measure
- Pencil
- Saw
- Drill
- Screwdriver bit
- Sanding block or sandpaper
Once you have all the materials and tools ready, you can move on to the next step.
Step 2: Cutting the Lumber
Using your tape measure and pencil, mark the following measurements on your 2×4 lumber: 2 pieces at 4 feet, 2 pieces at 2 feet, and 4 pieces at 6 inches. These will be the legs and supports of your firewood rack. Cut the lumber according to the marked measurements using a saw.
Next, take the 2×6 lumber and cut it into two 4-foot-long pieces. These will be the base of your firewood rack. Make sure all the cut edges are smooth by using a sanding block or sandpaper.
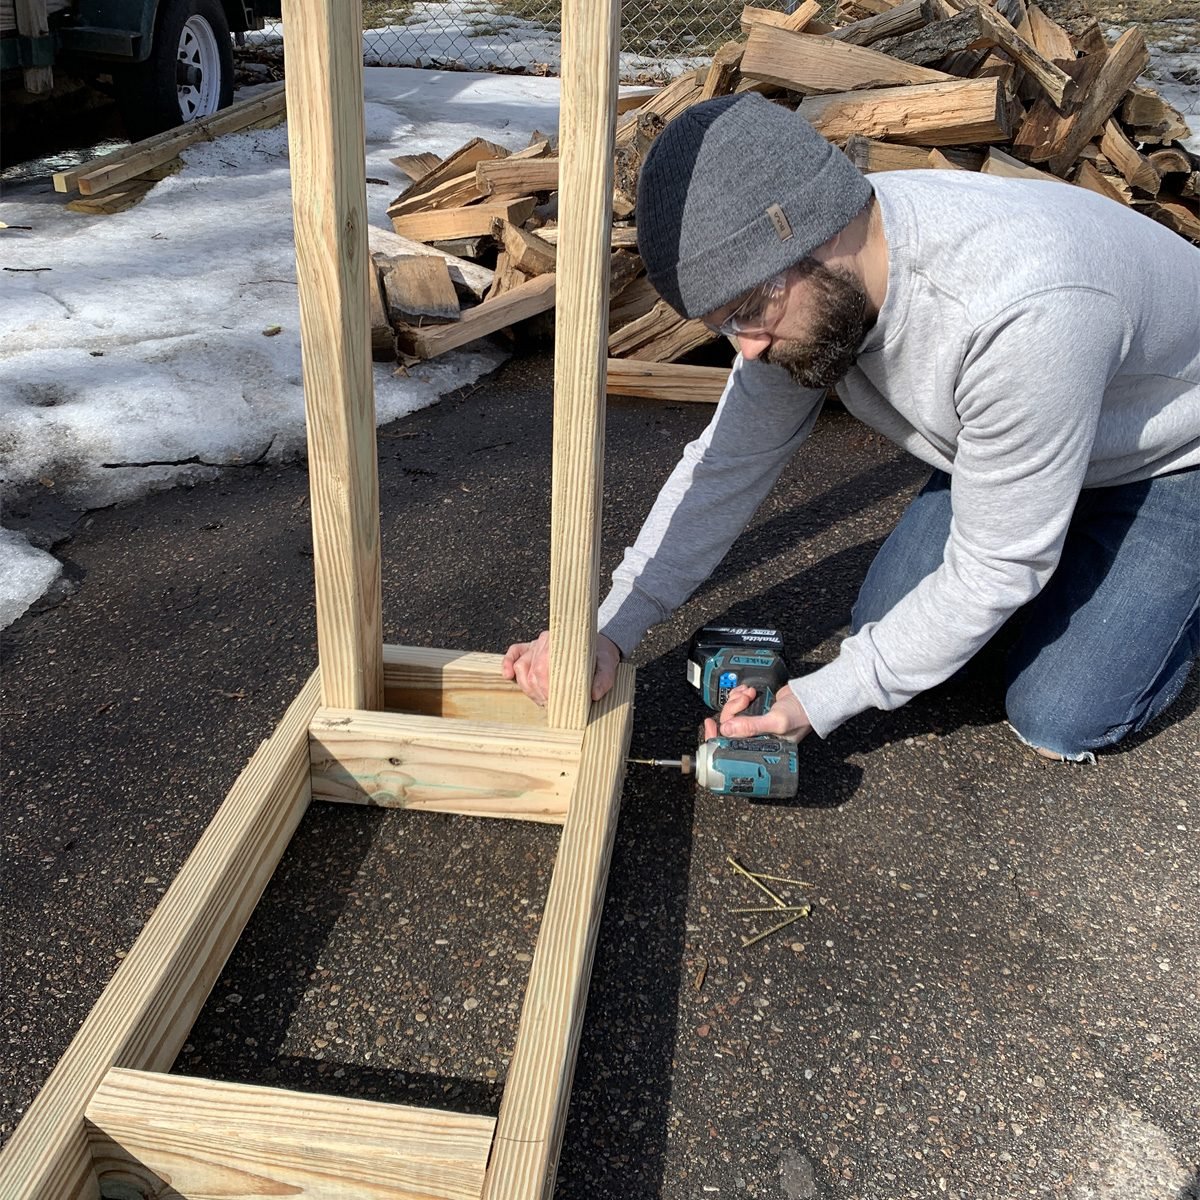
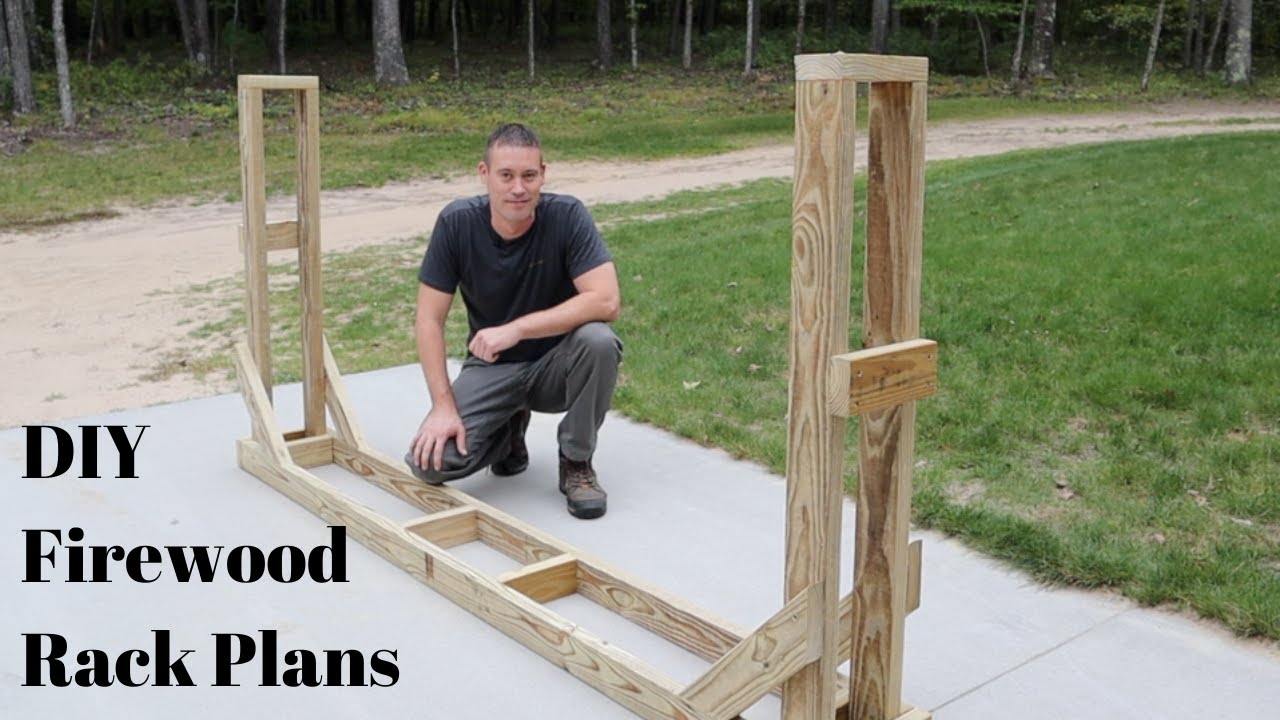
Step 3: Assembling the Rack

Now it’s time to assemble the firewood rack. Start by attaching the legs to the base. Take one of the 4-foot-long 2×4 pieces and position it at one end of a 4-foot-long 2×6 piece. Align the edges and use a drill to make pilot holes. Then, insert the wood screws to secure the leg to the base. Repeat this step for the other leg and the remaining 4-foot-long 2×6 piece.
Once the legs are securely attached to the base, it’s time to add the supports. Take the 2-foot-long 2×4 pieces and position them vertically between the legs, evenly spaced apart. Use the drill and wood screws to attach the supports to the legs. Finally, attach the 6-inch-long 2×4 pieces diagonally between the legs for added stability.
Step 4: Finishing Touches
With the main structure of the firewood rack assembled, you can add some finishing touches to enhance its durability and appearance. Use sandpaper to smooth any rough edges and ensure a polished look. You can also apply a coat of weatherproof paint or stain to protect the wood from the elements.
Once the paint or stain is dry, your firewood rack is ready to use! Place it in a convenient location in your backyard or garage and start stacking your firewood neatly on the rack.
Step 5: Maintenance
To ensure the longevity of your firewood rack, regular maintenance is essential. Check for any signs of wear and tear, such as loose screws or rotting wood, and make necessary repairs or replacements. Additionally, keep the rack clean and free from debris to prevent any potential fire hazards.
By following these steps and maintaining your firewood rack properly, you can enjoy a well-organized and easily accessible firewood storage solution for years to come.
Frequently Asked Questions
Here are some frequently asked questions about how to build a firewood rack:
Q: What materials do I need to build a firewood rack?
To build a firewood rack, you will need the following materials:
– 2×4 lumber for the frame
– Plywood for the base
– Screws or nails for assembling
– Saw for cutting the lumber
– Drill for making holes and screwing
– Measuring tape for accurate measurements
– Sandpaper for smoothing rough edges
– Paint or wood stain for a finished look (optional)
– Safety goggles and gloves for protection
Q: What are the dimensions of a standard firewood rack?
A standard firewood rack is typically around 4 feet in height, 8 feet in length, and 2 feet in width. However, you can adjust the dimensions according to your needs and available space. It is important to ensure that the rack is sturdy and stable enough to hold the weight of the firewood.
The height of the rack should allow for easy access to the firewood, while the length and width should be sufficient to hold an adequate amount of firewood for your needs. Consider the size of the firewood logs you typically use when determining the dimensions of your rack.
Q: How do I assemble the firewood rack?
Follow these steps to assemble a firewood rack:
1. Start by cutting the lumber according to the desired dimensions. You will need four pieces for the vertical posts and four pieces for the horizontal supports.
2. Attach the horizontal supports to the vertical posts, forming a rectangular frame. Use screws or nails to secure the joints.
3. Cut a piece of plywood to fit the base of the rack and attach it to the frame using screws or nails.
4. Sand any rough edges and corners to prevent splinters.
5. If desired, paint or stain the rack for a finished look. Allow it to dry completely before using.
Q: Where should I place the firewood rack?
When choosing a location for your firewood rack, there are a few factors to consider:
1. Keep the rack at a convenient distance from your fireplace or wood-burning stove for easy access.
2. Ensure that the rack is placed on a level and stable surface to prevent tipping or collapsing.
3. It is best to position the rack in a covered or sheltered area to protect the firewood from rain, snow, and excessive moisture.
4. Leave enough space around the rack to allow for proper airflow, which helps the firewood dry faster and prevents mold or mildew growth.
Q: How can I maintain and protect my firewood rack?
To maintain and protect your firewood rack, consider the following tips:
1. Regularly inspect the rack for any signs of damage or weakness. Reinforce or repair any loose joints or broken parts promptly.
2. Keep the rack clean and free from debris, such as leaves or twigs, which can attract pests or hinder airflow.
3. Apply a weather-resistant coating, such as a wood sealant or waterproof paint, to protect the rack from moisture and extend its lifespan.
4. When stacking firewood on the rack, ensure that the logs are neatly arranged to allow for proper airflow and prevent the growth of mold or mildew.
5. Rotate the firewood regularly, using older logs first, to ensure that they are used before they become too damp or rotten.
Remember, safety should always be a top priority when working with tools and materials. Take the necessary precautions, such as wearing protective gear and using proper techniques. As you embark on your firewood rack-building journey, don’t be afraid to get creative and customize the design to fit your specific needs and style preferences. With a little effort and patience, you’ll have a functional and visually appealing firewood rack that will serve you well for years to come. So grab your tools, roll up your sleeves, and start building – you’ll be enjoying cozy fires in no time!
- How to Rejuvenate Wood Veneer - April 20, 2024
- How to Fix Water Damage on Wood Coffee Table - April 20, 2024
- How to Fix Water Damaged Swollen Wood Furniture - April 20, 2024