Are you looking to add a touch of uniqueness and vibrancy to your wooden furniture or DIY projects? Look no further! In this guide, we will delve into the fascinating world of wood dyeing and explore the various techniques and tips to help you achieve stunning results. Whether you are a seasoned woodworker or a passionate DIY enthusiast, mastering the art of dyeing wood will open up a world of creative possibilities and elevate your craftsmanship to new heights.
Wood dyeing is not only a practical way to enhance the appearance of your wooden creations but also a means to express your personal style and taste. From deep and rich hues to subtle and natural tones, the possibilities are endless when it comes to transforming the color and character of wood. Join us as we uncover the secrets of achieving even color distribution, selecting the right dye for your project, and mastering different application techniques. Get ready to embark on a journey of creativity and discover the art of dyeing wood like a pro!
- Prepare the wood surface by sanding it smooth.
- Choose a wood dye color that complements your project.
- Apply the dye using a brush or cloth, following the grain of the wood.
- Allow the dye to dry completely before applying a second coat if desired.
- Seal the dyed wood with a clear finish to protect the color.
Introduction
Dyeing wood is a great way to add color and vibrancy to your woodworking projects. Whether you want to enhance the natural grain of the wood or completely transform its appearance, dyeing allows you to achieve stunning results. In this article, we will guide you through the step-by-step process of dyeing wood, providing you with all the information you need to successfully complete your project.
Step 1: Prepare the Wood
Before you begin dyeing the wood, it’s important to properly prepare the surface. Start by sanding the wood to create a smooth and even texture. This will help the dye to penetrate the wood more effectively. Use a sanding block or sandpaper with a fine grit to achieve the best results. Once you have finished sanding, make sure to remove any dust or debris from the surface before proceeding.
Next, apply a wood conditioner to the surface. This will help the wood absorb the dye more evenly, preventing blotchiness or uneven coloration. Follow the instructions on the wood conditioner product to ensure proper application. Allow the conditioner to dry completely before moving on to the next step.
Step 2: Choose the Right Dye
When it comes to dyeing wood, there are a variety of dye options available. The two main types of wood dye are water-based and solvent-based. Water-based dyes are easier to work with and have a lower odor, making them a popular choice for beginners. Solvent-based dyes, on the other hand, offer a wider range of color options and are often more vibrant. Consider your project requirements, personal preferences, and experience level when selecting the type of dye to use.
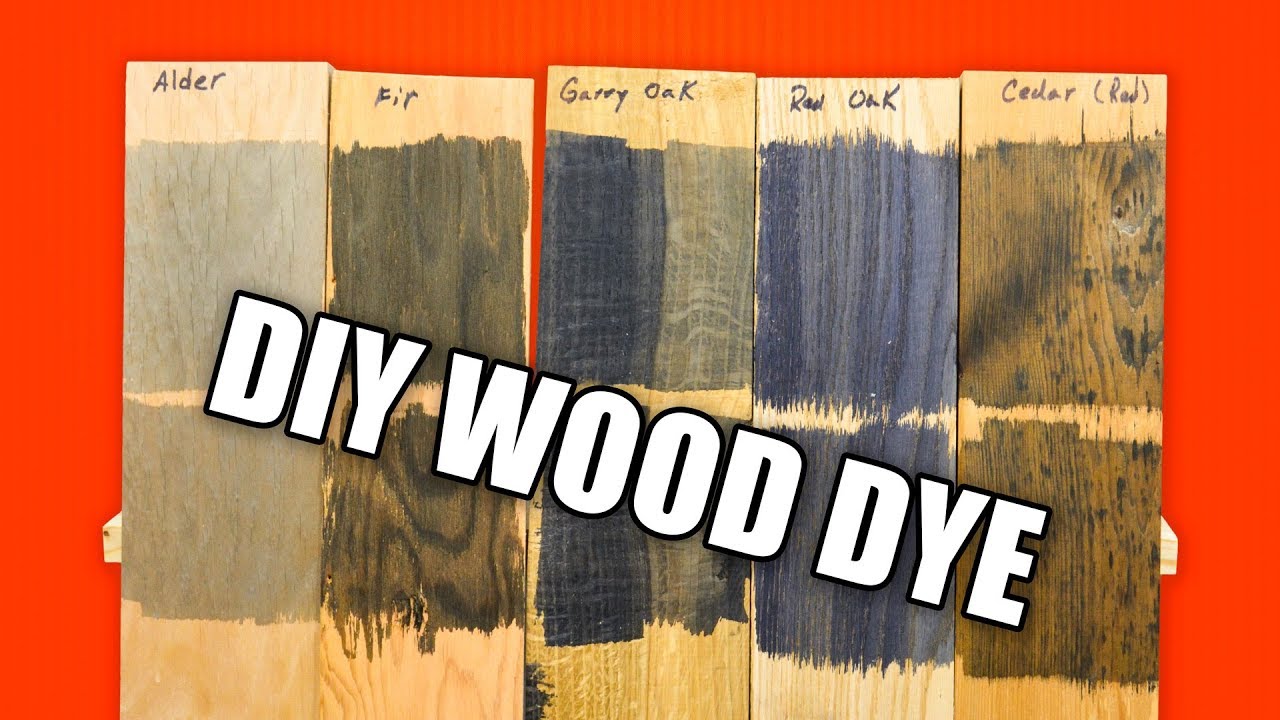
Additionally, choose the color of the dye based on the desired outcome. Consider the type of wood you are working with and how it will interact with the dye color. It’s always a good idea to test the dye on a small, inconspicuous area of the wood before applying it to the entire surface.
Step 3: Apply the Dye

Now it’s time to apply the dye to the wood. Start by stirring the dye thoroughly to ensure an even color. Then, using a clean brush or cloth, apply a thin and even layer of dye to the wood surface, following the direction of the grain. Take your time and work in small sections to ensure even coverage.
Allow the dye to penetrate the wood for the recommended amount of time, as specified by the manufacturer. This can vary depending on the type of dye used. Once the desired color intensity is achieved, wipe off any excess dye with a clean cloth. Be careful not to leave any streaks or smudges.
Step 4: Seal the Wood
After the dye has dried completely, it’s important to seal the wood to protect the color and provide a durable finish. There are various sealers available, such as lacquer, shellac, or polyurethane. Choose the sealer based on the desired level of gloss and the specific needs of your project.
Apply the sealer using a clean brush or cloth, following the manufacturer’s instructions. Allow the sealer to dry completely between coats, and apply multiple coats for a more durable finish. Sand the surface lightly between coats to ensure a smooth finish. Once the final coat is dry, your dyed wood is ready to be used or displayed.
Frequently Asked Questions
Here are some commonly asked questions about how to dye wood:
Q: What is wood dye?
Wood dye is a type of coloring agent that is used to enhance the natural beauty of wood. It penetrates the wood fibers and adds color without obscuring the grain or texture of the wood.
Wood dye is available in various forms, including liquid and powder. It is commonly used for staining furniture, flooring, cabinets, and other woodworking projects.
Q: How do I prepare the wood for dyeing?
Before dyeing wood, it is important to properly prepare the surface. Start by sanding the wood to remove any existing finish or imperfections. This will ensure that the dye penetrates the wood evenly.
Once the wood is sanded, make sure to clean it thoroughly to remove any dust or debris. You can use a damp cloth or vacuum with a brush attachment to clean the surface. Allow the wood to dry completely before applying the dye.
Q: How do I apply wood dye?
To apply wood dye, start by stirring the dye thoroughly to ensure an even color. Use a brush, sponge, or cloth to apply the dye to the wood surface. Work in the direction of the grain to achieve a uniform color.
It is recommended to apply the dye in thin layers, allowing each layer to dry before applying the next. This will help you achieve the desired depth of color. If a darker color is desired, additional layers of dye can be applied.
Q: How long does wood dye take to dry?
The drying time for wood dye can vary depending on the type of dye used and the environmental conditions. In general, wood dye dries relatively quickly, usually within a few hours.
However, it is important to allow the dye to fully dry before applying any additional finishes or handling the wood. This will ensure that the dye is properly set and will not smudge or transfer onto other surfaces.
Q: Can I mix different wood dye colors?
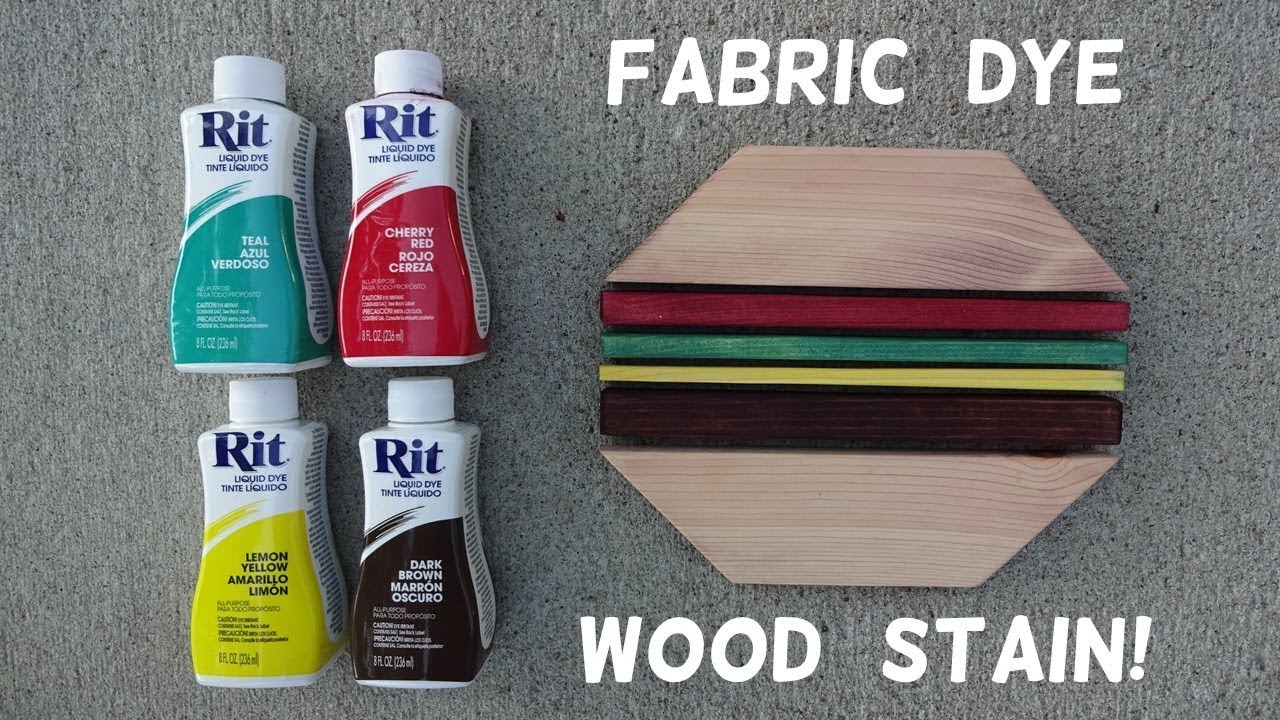
Yes, you can mix different wood dye colors to create custom shades and tones. Mixing dyes allows you to achieve unique color variations and customize the look of your wood project.
It is recommended to mix small amounts of dye at a time and test the color on a scrap piece of wood before applying it to your project. This will help you achieve the desired color and avoid any unexpected results.
Can You Dye Wood with Food Coloring?
In conclusion, learning how to dye wood can be a fascinating and rewarding journey for any woodworking enthusiast. By understanding the different types of wood dyes, their application methods, and the techniques for achieving desired colors and finishes, one can elevate their woodworking projects to new levels of beauty and sophistication. Whether it’s creating a stunning piece of furniture or adding a touch of vibrancy to a wooden craft, the art of dyeing wood offers endless possibilities for creativity and personal expression.
However, it is important to approach wood dyeing with caution and precision. Proper preparation, including sanding and conditioning the wood, is crucial to achieving even and long-lasting results. Additionally, experimenting with different dye colors and techniques on scrap wood before applying them to your actual project can help refine your skills and ensure the desired outcome. Remember, practice makes perfect, and with time and dedication, you will become adept at the art of dyeing wood, unlocking a world of limitless possibilities in your woodworking endeavors. So, embrace the beauty of dyeing wood and let your creativity shine through the vibrant and captivating colors that can transform any piece of wood into a work of art.
- How to Waterproof the Inside of a Wood Planter Box - May 11, 2024
- How to Build a Raised Garden Bed With Wood - May 11, 2024
- How to Transfer Photos to Wood With Nail Polish Remover - May 11, 2024