Cracks in wood can be a common and frustrating problem for homeowners and DIY enthusiasts alike. Whether it’s a cherished piece of furniture or a wooden floor that has seen better days, these imperfections can detract from the overall beauty and durability of the wood. But fear not! With the right knowledge and techniques, you can easily fill and repair those unsightly cracks, restoring your wood to its former glory. In this article, we will explore the step-by-step process of filling cracks in wood, providing you with the essential tips and tricks to achieve a seamless finish that will leave your wood looking as good as new.
When it comes to filling cracks in wood, it’s important to understand the underlying causes and the different types of cracks you may encounter. Whether it’s a small hairline crack or a larger gap, each requires a specific approach for effective repair. We will delve into the various materials and tools available for the job, helping you choose the right products to ensure a long-lasting and aesthetically pleasing result. So, if you’re ready to embark on a journey of craftsmanship and restoration, let’s dive into the world of wood crack repair and discover the techniques that will transform your wooden surfaces from flawed to flawless.
How to Fill Cracks in Wood:
- Prepare the cracked area by cleaning it with a brush or vacuum.
- Choose an appropriate wood filler based on the size of the crack.
- Apply the wood filler into the crack, ensuring it is completely filled.
- Smooth the surface of the filler using a putty knife or sandpaper.
- Allow the filler to dry according to the manufacturer’s instructions.
- Sand the filled area to achieve a smooth finish.
- Apply a wood sealant or paint to protect the repaired area.
How to Fill Cracks in Wood
Wood is a popular material for furniture and flooring due to its durability and natural beauty. However, over time, wood can develop cracks and splits, which not only detract from its appearance but also weaken its structure. If you have noticed cracks in your wooden furniture or flooring, don’t worry! In this article, we will guide you through the process of filling cracks in wood, restoring its integrity and enhancing its aesthetic appeal.
Step 1: Prepare the Surface
Before you can begin filling the cracks in wood, it is essential to prepare the surface properly. Start by cleaning the area around the crack with a soft cloth and a mild detergent. This will remove any dirt, debris, or old finishes that could interfere with the filling process. Once the surface is clean, use a fine-grit sandpaper to gently sand the area around the crack. The goal is to create a smooth and level surface that will allow the filler to adhere properly.
After sanding, wipe away any dust with a damp cloth and allow the surface to dry completely. It is crucial to ensure that the wood is dry before proceeding to the next step, as moisture can affect the performance of the filler.
Step 2: Choose the Right Filler
Choosing the right filler is crucial for achieving a successful repair. There are various types of wood fillers available, such as epoxy, latex, and cellulose-based fillers. Consider the size and depth of the crack when selecting a filler. For small and shallow cracks, a paste-like filler will suffice, while deeper and wider cracks may require a thicker filler or even epoxy. Read the manufacturer’s instructions carefully to determine the suitability of the filler for your specific needs.

Additionally, take into account the color of the wood and the desired outcome. Some fillers come in different shades, allowing you to match the filler to the natural color of the wood or the existing finish. This will help create a seamless and natural-looking repair.
Step 3: Apply the Filler
Now that you have prepared the surface and chosen the right filler, it’s time to apply it to the cracks in the wood. Follow the instructions provided with the filler, as application methods may vary. In most cases, you will need a putty knife or a scraper to apply the filler. Start by pressing the filler into the crack, ensuring that it fills the entire length and depth of the crack.
Once the crack is filled, use the putty knife or scraper to level the surface, removing any excess filler. Smooth the surface using long, even strokes, blending the filler with the surrounding wood. Take care not to apply too much pressure, as this can cause the filler to sink or crack. Allow the filler to dry according to the manufacturer’s instructions.
Step 4: Sand and Finish
After the filler has dried, it’s time to sand and finish the repaired area. Start by using a fine-grit sandpaper to sand the filled crack, ensuring a smooth and even surface. Be careful not to sand too aggressively, as this can damage the surrounding wood. Once the surface is smooth, wipe away any dust with a damp cloth.
Finally, apply a finish or stain that matches the rest of the wood to complete the repair. This will help blend the filled crack with the surrounding wood, making it virtually indistinguishable. Follow the instructions provided with the finish or stain for the best results.
Step 5: Maintain and Prevent
Now that you have successfully filled the cracks in your wood, it’s important to maintain and prevent future damage. Regularly clean and protect the wood by using appropriate cleaning products and avoiding excessive moisture or direct sunlight. Consider using furniture pads or area rugs to minimize wear and tear. By taking preventive measures, you can extend the lifespan of your wood and reduce the need for future repairs.
Remember, filling cracks in wood is a skill that requires patience and attention to detail. With the right tools, materials, and techniques, you can restore the beauty and functionality of your wooden furniture and flooring, ensuring that they last for years to come.
Frequently Asked Questions
Here are some common questions about how to fill cracks in wood:
Q: What are the reasons for cracks in wood?
Cracks in wood can occur due to several reasons. One common cause is natural drying and shrinking of the wood as it ages. Changes in temperature and humidity levels can also lead to cracks. Additionally, improper storage or handling of wood can cause it to crack. It’s important to identify the underlying cause of the cracks before attempting to fill them.
Another possible reason for cracks in wood is the presence of knots or other defects in the wood itself. These weak points are more likely to develop cracks over time. Understanding the cause of the cracks will help you choose the right method for filling them.
Q: How can I fill small cracks in wood?
For small cracks in wood, there are several methods you can use to fill them. One option is to use wood filler or putty. Start by cleaning the crack and removing any loose debris. Then, apply the filler or putty to the crack, smoothing it out with a putty knife. Once it dries, you can sand it down to achieve a smooth finish.
Another option is to use a combination of wood glue and sawdust. Mix the glue and sawdust together until you have a thick paste. Apply the paste to the crack, making sure to fill it completely. Allow it to dry before sanding it down. This method is particularly effective for filling small cracks that need to blend in with the surrounding wood.
Q: How do I fill large cracks in wood?
When it comes to filling larger cracks in wood, you may need to use a more robust method. One option is to use epoxy resin. Start by cleaning and preparing the crack, ensuring it is free of any debris or loose wood fibers. Then, mix the epoxy resin according to the manufacturer’s instructions and apply it to the crack. Use a putty knife or a spatula to spread the resin evenly. Allow it to cure and harden before sanding it down for a smooth finish.
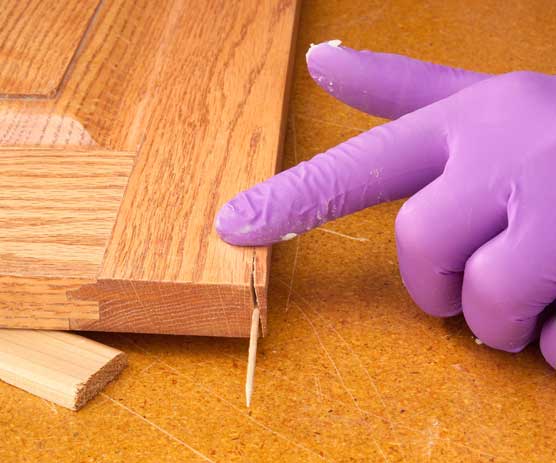
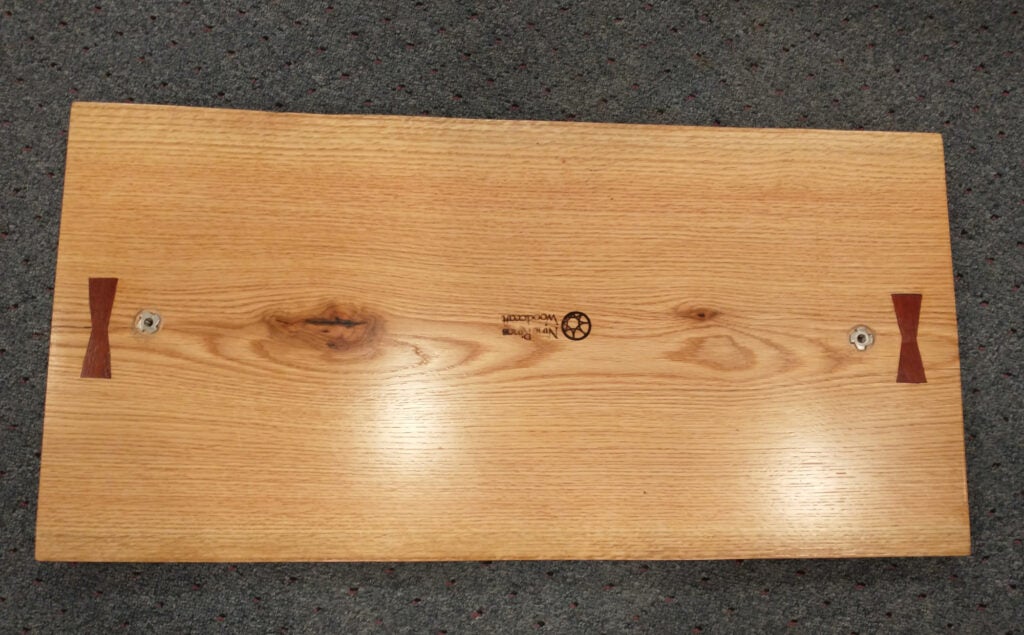
If the crack is particularly wide, you may need to fill it with wooden dowels or splines. Measure the width of the crack and cut the dowels or splines to fit. Apply wood glue to the dowels or splines and insert them into the crack. Once the glue dries, you can sand it down to achieve a seamless repair.
Q: Can I prevent future cracks in wood?
While it may not be possible to completely prevent cracks in wood, there are steps you can take to minimize the likelihood of them occurring. One important factor is controlling the humidity levels in your environment. Wood tends to expand and contract with changes in humidity, so maintaining a stable moisture level can help prevent excessive movement and cracking.
Properly sealing and finishing your wood can also help prevent cracks. Applying a protective finish, such as varnish or polyurethane, can help seal the wood and reduce the risk of moisture absorption. Regularly inspecting and maintaining your wood furniture or structures can also help identify any potential issues before they worsen.
Q: When should I seek professional help for filling cracks in wood?
If you have extensive cracks in your wood that are causing structural issues or compromising the integrity of the wood, it may be best to seek professional help. Professional woodworkers or carpenters have the experience and expertise to assess the damage and recommend the most appropriate repair method.
Additionally, if you are unsure about your own skills or lack the necessary tools and materials, it’s always a good idea to consult a professional. They can ensure that the cracks are filled properly and that the repair is long-lasting. Investing in professional help can save you time, money, and potential headaches in the long run.
Remember, patience and precision are key when it comes to filling cracks in wood. Take the time to assess the severity of the crack and choose the appropriate method of repair. Don’t rush the process, as proper preparation and application of filler will yield the best results. With practice, you will become more confident in your ability to tackle cracks in wood, and you may even discover a newfound passion for woodworking. So, don’t let those unsightly cracks diminish the beauty of your wooden surfaces – take the necessary steps to fill them and restore the natural charm of your wood.
- How to Use Osburn Wood Stove - April 28, 2024
- How to Heat Wood - April 28, 2024
- How to Burn Wood Efficiently - April 28, 2024