Are you tired of unsightly holes ruining the look of your wooden furniture or surfaces? Whether it’s a small nail hole or a larger gap, knowing how to fill wood holes can make a world of difference in restoring the beauty and integrity of your woodwork. In this guide, we will explore the step-by-step process of filling wood holes, providing you with the knowledge and techniques to tackle this task like a pro.
Wood hole filling not only enhances the aesthetics of your wooden surfaces but also ensures their longevity and durability. With the right tools and materials, you can achieve seamless results that will leave your wood looking flawless. From selecting the appropriate filler to sanding and finishing, we will cover all the essential steps, tips, and tricks to help you achieve professional-grade results. So, whether you’re a DIY enthusiast or a professional woodworker, get ready to take your woodworking skills to the next level as we delve into the art of filling wood holes.
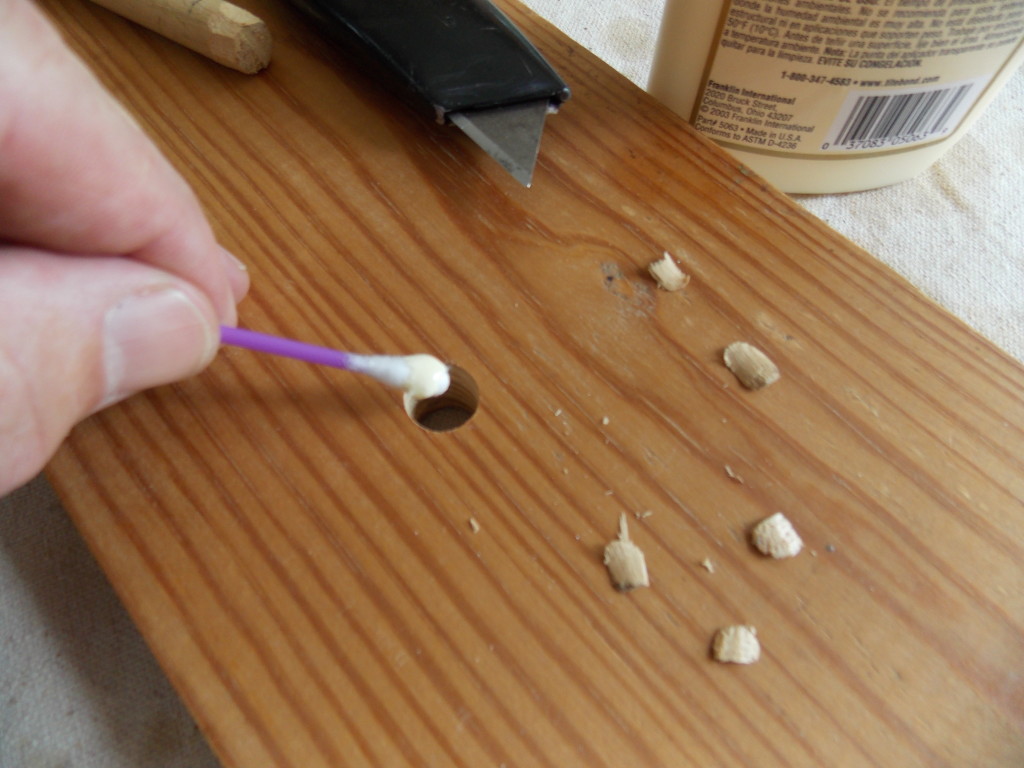
- Clean the area around the hole to remove any debris.
- Choose a suitable wood filler that matches the color and type of wood.
- Apply the filler to the hole, ensuring it is slightly overfilled.
- Smooth the surface of the filler using a putty knife.
- Allow the filler to dry completely, following the manufacturer’s instructions.
- Sand the filled area until it is flush with the surrounding wood.
- Finish by staining or painting the repaired area to match the rest of the wood.

How to Fill Wood Holes: Step-by-Step Guide
Wooden furniture or surfaces can develop unsightly holes over time due to wear and tear or accidental damage. Fortunately, filling these holes is a relatively simple task that can restore the appearance and functionality of the wood. In this guide, we will walk you through the step-by-step process of filling wood holes effectively.
1. Gather the Necessary Tools and Materials
Before you begin filling the wood holes, it is essential to gather all the necessary tools and materials. This will ensure that you have everything you need for a successful repair. Here are the items you will need:
Paragraph 1:
– Putty knife or scraper: To remove any loose debris or old filler from the hole.
– Sandpaper: To smoothen the surface after filling and ensure a seamless finish.
– Wood filler or putty: Choose a filler that matches the color of the wood or can be stained to match.
– Mixing container: If you opt for a two-part wood filler, you will need a container to mix the components.
– Putty knife or applicator: To apply the wood filler into the hole.
– Cloth or rag: For wiping away excess filler.
– Paint or stain: If necessary, to match the filled area to the surrounding wood.
Paragraph 2:
– Protective gear: It is always a good idea to wear gloves and a mask to protect yourself from any harmful dust or fumes.
– Drop cloth or newspaper: To protect the surrounding area from any spills or drips.
– Painter’s tape: If you are filling holes in a painted surface, use painter’s tape to protect the areas around the hole.
2. Prepare the Wood Surface
Before filling the holes, it is important to prepare the wood surface to ensure proper adhesion and a seamless finish.

Paragraph 1:
Start by cleaning the wood surface around the hole using a mild detergent and water. This will remove any dirt, grease, or grime that may interfere with the filler’s adhesion. Allow the wood to dry completely before proceeding.
Paragraph 2:
Next, use a putty knife or scraper to remove any loose debris or old filler from the hole. It is crucial to create a clean and stable base for the new filler. Use sandpaper to gently sand the area around the hole, ensuring a smooth surface for the filler to adhere to.
3. Apply the Wood Filler
Now it’s time to apply the wood filler and fill the hole.
Paragraph 1:
If you are using a two-part wood filler, follow the manufacturer’s instructions to mix the components in the provided container. Ensure that the mixture is homogeneous and free of lumps.
Paragraph 2:
Using a putty knife or an appropriate applicator, fill the hole with the wood filler. Press the filler firmly into the hole, ensuring it is slightly overfilled to allow for shrinkage. Smooth the surface of the filler using the putty knife or a damp cloth, removing any excess filler. Allow the filler to dry completely according to the manufacturer’s instructions.
4. Sand and Finish
Once the wood filler has dried completely, it’s time to sand and finish the filled area.
Paragraph 1:
Start by using fine-grit sandpaper to carefully sand the filled area. This will help achieve a smooth and seamless finish. Sand in a circular or back-and-forth motion, gradually blending the filled area with the surrounding wood. Wipe away any sanding dust with a clean cloth.
Paragraph 2:
If necessary, apply paint or stain to match the filled area to the surrounding wood. Use a small brush or a cloth to apply the paint or stain evenly. Allow it to dry completely before using or applying any further finish.
By following these step-by-step instructions, you can successfully fill wood holes and restore the beauty and functionality of your wooden furniture or surfaces. Remember to always work in a well-ventilated area, wear appropriate protective gear, and follow the manufacturer’s instructions for the specific wood filler you are using.
Frequently Asked Questions
Here are some commonly asked questions about how to fill wood holes:
How do I fill small wood holes?
To fill small wood holes, you can use wood filler or putty. Start by cleaning the hole and removing any loose debris. Then, using a putty knife, apply the filler to the hole, making sure to overfill it slightly. Allow the filler to dry completely and then sand it down until it is smooth and flush with the surrounding wood surface.
After sanding, you may need to apply a second layer of filler if the hole is still not completely filled. Once the surface is smooth and even, you can paint or stain the wood to match the rest of the surface.
What should I use to fill large wood holes?
For larger wood holes, it is best to use a wood patch or epoxy filler. These fillers are more durable and can provide a stronger bond. Begin by cleaning the hole and removing any loose materials. Mix the wood patch or epoxy filler according to the manufacturer’s instructions.
Using a putty knife or a trowel, apply the filler to the hole, making sure to completely fill it. Smooth out the surface of the filler and allow it to dry according to the recommended drying time. Once dry, sand the patched area until it is smooth and level with the surrounding wood surface. Finish by painting or staining the wood as desired.
Can I use wood glue to fill wood holes?
No, wood glue is not suitable for filling wood holes. Wood glue is designed to bond pieces of wood together, not to fill holes or gaps. It is not a suitable filler material as it does not have the same properties as wood filler or putty.
Using wood glue to fill holes will not provide a smooth and even surface, and it may not adhere properly to the surrounding wood. It is best to use a proper wood filler or putty for filling wood holes.
How long does it take for wood filler to dry?
The drying time for wood filler can vary depending on the brand and type of filler used. Generally, wood filler can take anywhere from a few hours to overnight to dry completely.
It is important to follow the manufacturer’s instructions for the specific wood filler you are using. Allow the filler to dry completely before sanding or applying any additional layers. Factors such as temperature and humidity can also affect drying time, so it is best to check the instructions for the recommended drying time.
Can I stain or paint over wood filler?
Yes, you can stain or paint over wood filler once it has dried completely. After the filler has dried and been sanded smooth, you can apply your chosen stain or paint to match the surrounding wood.
Before applying the stain or paint, make sure the surface is clean and free from any dust or debris. Apply the stain or paint according to the manufacturer’s instructions, and allow it to dry completely before using or applying any additional coats if necessary.
Remember, patience and attention to detail are key when it comes to filling wood holes. Take the time to properly prepare the surface, choose the right filler material, and apply it with precision. With practice, you will become proficient in this task and be able to tackle any wood repair project confidently. So, next time you encounter a hole in wood, don’t fret – armed with the knowledge and techniques shared here, you can easily restore its beauty and strength. Happy repairing!
- How to Waterproof Mdf Wood - May 10, 2024
- How to Seal Mdf Wood - May 10, 2024
- How to Waterproof a Plywood Roof - May 10, 2024