Are you looking to add an artistic touch to your home decor or create a unique personalized gift? If so, you’ve come to the right place! In this guide, we will delve into the fascinating world of transferring pictures onto wood, a technique that combines the beauty of photography with the rustic charm of wooden surfaces. Whether you’re a seasoned DIY enthusiast or a beginner looking to explore your creative side, this step-by-step tutorial will equip you with the knowledge and skills to effortlessly transform your favorite images into stunning wooden masterpieces.
Picture this: a cherished family photo, a breathtaking landscape, or a beloved pet captured forever on a wooden canvas. The process of putting a picture on wood offers endless possibilities for adding a touch of warmth and personality to any space. Not only does it add a unique and personal element to your home decor, but it also serves as a thoughtful and heartfelt gift for loved ones. So, grab your supplies and get ready to embark on an exciting journey of merging the worlds of photography and woodworking. Let’s dive in and discover the art of transferring pictures onto wood.
How to Put a Picture on Wood:
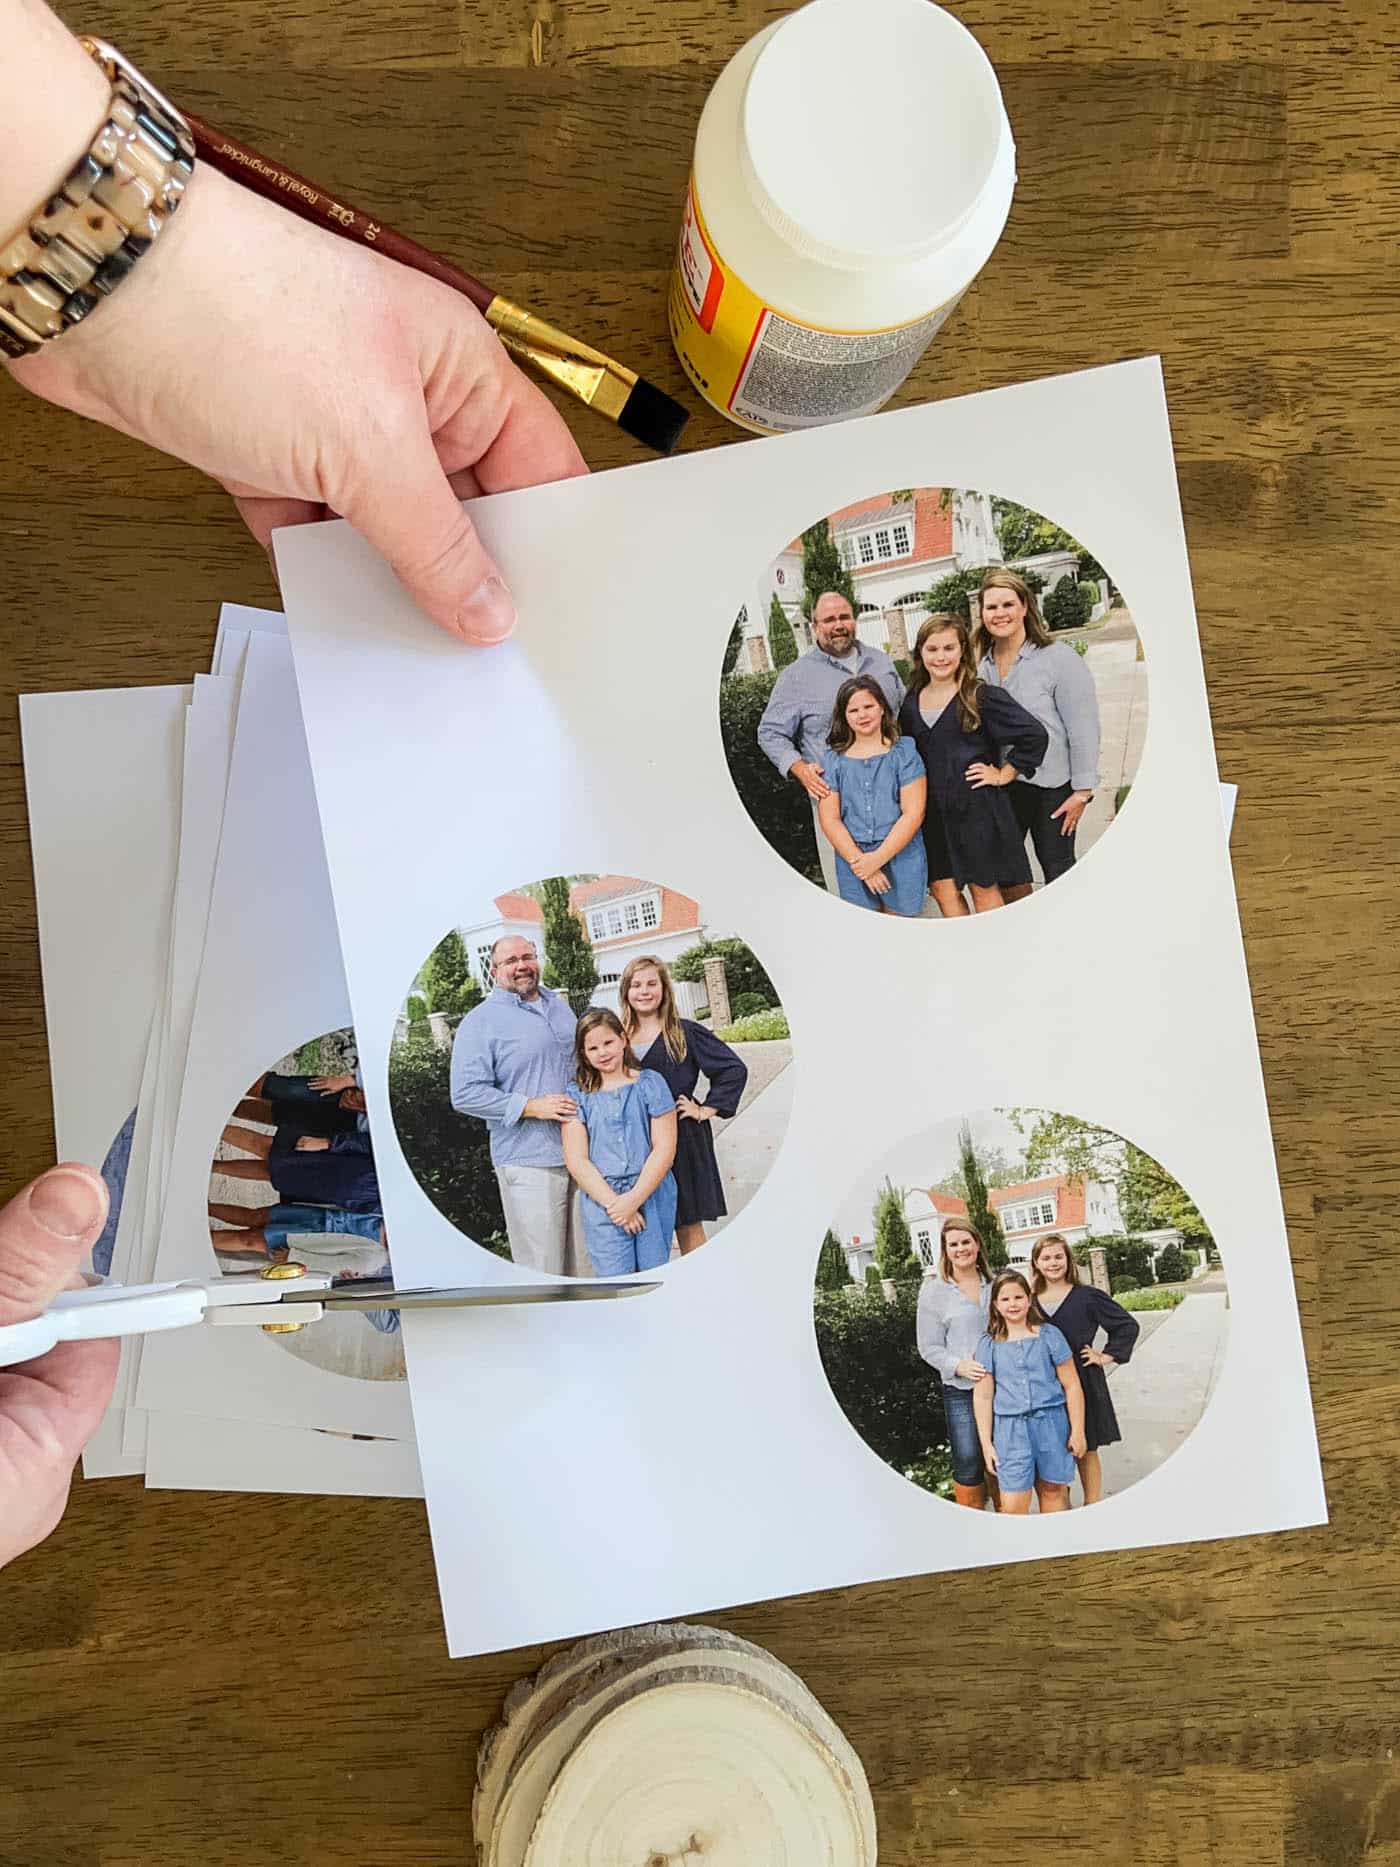
- Choose a suitable picture and print it on a regular printer.
- Apply a coat of gel medium or Mod Podge to the wood surface.
- Place the picture face down on the wood and smooth out any air bubbles.
- Let it dry completely for a few hours or overnight.
- Gently rub the paper off using a damp cloth or sponge.
- Apply a layer of varnish or sealant to protect the image.
How to Put a Picture on Wood
Adding a picture to wood can be a great way to personalize your home decor or create unique gifts for loved ones. Whether you want to transfer a cherished photograph onto a wooden plaque or create a custom wood sign with a printed image, this step-by-step guide will walk you through the process. With a few supplies and a little patience, you’ll be able to successfully put a picture on wood.
Step 1: Gather Your Materials
Before you begin, make sure you have all the necessary materials. You will need:
- A piece of wood: Choose a smooth, finished piece of wood that is suitable for your project.
- A digital image: Select a high-quality digital image that you want to transfer onto the wood.
- Transfer medium: There are different transfer mediums available, such as gel medium or Mod Podge, which will help transfer the image onto the wood.
- Sponge brush: Use a sponge brush to apply the transfer medium onto the wood.
- Scissors: You may need scissors to trim the image or transfer paper to fit the wood.
- Clear sealer: Once the image is transferred, you’ll want to protect it with a clear sealer to ensure its longevity.
Having all these materials ready before you start will make the process smoother and more efficient.
Step 2: Prepare the Wood
Before transferring the image onto the wood, it’s important to prepare the surface properly. Begin by sanding the wood to make it smooth and free from any imperfections. Wipe away any dust or debris, ensuring a clean surface for the image transfer.

Next, apply a thin, even layer of transfer medium onto the wood using a sponge brush. Make sure the entire surface is covered with the medium, extending slightly beyond the dimensions of the image you’ll be transferring.
Step 3: Transfer the Image
Now it’s time to transfer the image onto the prepared wood. Print the chosen image onto regular printer paper or specialized transfer paper, following the instructions provided with the transfer medium you’re using. If using regular printer paper, ensure that you flip the image horizontally so that it transfers correctly onto the wood.
Place the printed image face down onto the transfer medium, pressing it firmly to ensure good contact. Smooth out any wrinkles or air bubbles that may appear. Let the transfer sit undisturbed for the recommended amount of time specified by the transfer medium’s instructions.
Step 4: Remove the Paper
Once the transfer time has elapsed, carefully peel away the paper from the wood. Start by gently lifting one corner and slowly peeling it back, ensuring that the image has transferred completely onto the wood. If any parts of the image did not transfer well, you can touch them up using a fine brush and the transfer medium.
Allow the transferred image to dry completely before moving on to the next step.
Step 5: Seal the Image
To protect and enhance the transferred image, apply a clear sealer over it. Use a brush to evenly coat the entire surface of the wood, including the transferred image. This will provide a protective layer and give the image a finished look.
Allow the sealer to dry completely according to the instructions provided with the specific product you’re using.
Step 6: Display and Enjoy
Once the sealer has dried, your picture on wood is ready to be displayed and admired. You can hang it on a wall, prop it on a shelf, or gift it to someone special. Remember to handle it with care to avoid scratching or damaging the transferred image.
That’s it! With these simple steps, you can easily put a picture on wood and create beautiful, personalized pieces that will be cherished for years to come.
Frequently Asked Questions
Here are some commonly asked questions about how to put a picture on wood:
Q: What materials do I need to put a picture on wood?
To put a picture on wood, you will need the following materials:
1. A piece of wood – preferably smooth and sanded
2. Mod Podge or a similar decoupage medium
3. A laser-printed or photocopy picture on regular printer paper (not inkjet)
4. A foam brush or paintbrush
5. A pair of scissors
First, prepare the wood surface by sanding it smooth and removing any dust. Then, cut out your picture to fit the wood. Apply a generous amount of Mod Podge to the wood using the foam brush, making sure to cover the entire surface. Place the picture on the wood and smooth out any wrinkles or air bubbles. Let it dry completely before applying additional coats of Mod Podge to seal the picture.
Q: Can I use any type of wood for this project?
While you can technically use any type of wood for this project, it is recommended to use a smooth and sanded surface for the best results. This will ensure that the picture adheres properly and that the final outcome is smooth and even. Avoid using rough or uneven wood surfaces, as they may cause the picture to bubble or peel.
Additionally, lighter-colored woods such as birch or maple tend to work well because they provide a nice contrast to the picture and allow the colors to pop. However, feel free to experiment with different types of wood to achieve the desired aesthetic.
Q: Can I use an inkjet-printed picture instead of a laser-printed one?
No, it is not recommended to use an inkjet-printed picture for this project. Inkjet printers use water-based ink, which can smear and bleed when it comes into contact with the decoupage medium. This can result in a blurry or distorted image on the wood.
Instead, opt for a laser-printed or photocopy picture. Laser printers use toner, which is heat-set and won’t smudge when you apply the Mod Podge. This ensures that your picture remains crisp and clear on the wood surface.
Q: How many coats of Mod Podge should I apply?
It is recommended to apply at least two coats of Mod Podge when putting a picture on wood. The first coat acts as an adhesive, helping the picture adhere to the wood surface. Allow the first coat to dry completely before applying the second coat.
The second coat serves as a protective sealant, ensuring that the picture is preserved and protected from moisture and other environmental factors. You can apply additional coats if desired, making sure to let each coat dry completely before adding the next.
Q: How long does it take for the Mod Podge to dry?
The drying time of Mod Podge can vary depending on factors such as temperature and humidity. In general, it takes about 15-20 minutes for each coat of Mod Podge to dry to the touch. However, it is recommended to let each coat dry for at least 24 hours before applying additional coats or handling the finished piece.
Allowing the Mod Podge to fully cure ensures that the picture is securely bonded to the wood and prevents any smudging or damage. Patience is key in achieving a professional-looking result, so be sure to give it enough time to dry before moving on to the next step.

DIY: Learn how to Easily Transfer your Photos onto Wood, with Mod Podge!
In conclusion, learning how to put a picture on wood can be a rewarding and creative endeavor. Not only does it allow you to showcase your favorite memories or artwork in a unique way, but it also adds a touch of rustic charm to any space. By following the step-by-step process outlined in this guide, you can confidently create stunning wood transfers that will impress your friends and family.
Remember, practice makes perfect, so don’t be discouraged if your first attempt doesn’t turn out exactly as you envisioned. Experiment with different techniques, materials, and finishes to find what works best for you. With time and patience, you’ll develop your own signature style and create beautiful wooden masterpieces that will be cherished for years to come. So go ahead, unleash your creativity and start transforming ordinary pieces of wood into extraordinary works of art.
- How to Remove Wood Vinyl - April 15, 2024
- How to Remove Tape From Hardwood Floor - April 15, 2024
- How to Remove Floor Adhesive From Wood Subfloor - April 15, 2024