Are you tired of staring at your dull and faded wood trim? Does the sight of peeling paint make your heart sink? If so, you’re not alone. Many homeowners struggle with the task of removing paint from wood trim, unsure of where to start or how to achieve that pristine, natural look. But fear not! In this guide, we will take you step by step through the process of removing paint from wood trim, giving you the knowledge and confidence to tackle this project like a pro. So, roll up your sleeves and get ready to restore the beauty of your wood trim to its former glory!
Imagine stepping into a room with perfectly restored wood trim that exudes elegance and charm. Picture the sense of accomplishment and satisfaction that comes with completing a DIY project that transforms your space. By learning how to remove paint from wood trim, you’re not only preserving the integrity of the wood, but you’re also uncovering its true character and enhancing the overall aesthetic of your home. Whether you’re a seasoned DIY enthusiast or a beginner, this guide will provide you with the essential tips, techniques, and tools needed to achieve remarkable results. Say goodbye to unsightly paint and hello to the natural beauty of your wood trim. Get ready to embark on a journey of transformation that will leave you amazed at the stunning difference it can make in your living space!
How to Remove Paint from Wood Trim:
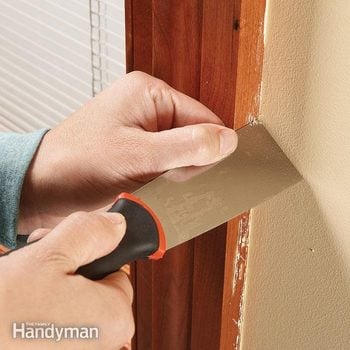
- Use a scraper to gently remove any loose paint.
- Apply a paint stripper to the painted areas and let it sit according to the instructions.
- Scrub the area with a wire brush to remove the softened paint.
- Wipe clean with a damp cloth.
- If necessary, repeat the process until all paint is removed.
- Finish by sanding the wood trim and applying a fresh coat of paint or stain.

How to Remove Paint from Wood Trim
Painted wood trim can be a beautiful addition to any home, but over time, the paint may start to chip, fade, or simply no longer match your decor. If you’re looking to restore the natural beauty of your wood trim, removing the old paint is the first step. In this article, we will guide you through the process of safely and effectively removing paint from wood trim.
Step 1: Prepare the Area
Before you begin removing the paint, it’s important to take some precautions to protect yourself and the surrounding area. Start by covering the floor and any nearby furniture with drop cloths or plastic sheets. This will prevent any paint chips or dust from settling on these surfaces. Additionally, open windows or use fans to ensure proper ventilation in the room.
Next, gather all the necessary tools and materials for the job. You will need a scraper, a heat gun or a chemical paint stripper, sandpaper, a paintbrush, and a clean cloth. Make sure to wear protective gear such as gloves, safety goggles, and a dust mask to avoid any potential health hazards.
Step 2: Test the Paint
Before proceeding with the paint removal process, it’s crucial to determine the type of paint used on your wood trim. This will help you choose the most appropriate method for removal. To test the paint, apply a small amount of paint stripper or denatured alcohol to an inconspicuous area of the trim. If the paint starts to bubble or dissolve, it is likely latex-based. If it remains unaffected, it is probably oil-based.

Knowing the type of paint will help you decide whether to use a heat gun or a chemical paint stripper. Heat guns are effective for removing latex paint, while chemical strippers are more suitable for oil-based paints. Always follow the manufacturer’s instructions when using any chemical products.
Step 3: Remove the Paint
If you are using a heat gun, plug it in and set it to a low or medium heat setting. Hold the heat gun a few inches away from the painted surface and move it back and forth to heat the paint. As the paint softens, use a scraper to gently scrape it off. Be careful not to apply too much pressure to avoid damaging the wood. Repeat this process until all the paint has been removed.
If you opt for a chemical paint stripper, carefully apply the product to the painted surface using a paintbrush. Allow the stripper to sit according to the manufacturer’s instructions, usually around 15-30 minutes. Once the paint has loosened, use a scraper to remove it. Wipe away any residue with a clean cloth. Repeat this process until the trim is free from paint.
Step 4: Sand and Clean the Wood Trim
After successfully removing the paint, it’s important to sand the wood trim to achieve a smooth and even surface. Start with a coarse-grit sandpaper to remove any remaining paint or rough spots. Then switch to a finer grit to create a polished finish. Be sure to sand along the grain of the wood for the best results.
Once you have finished sanding, use a clean cloth to remove any dust or debris from the surface. You can also use a vacuum cleaner with a brush attachment for a more thorough cleaning. Finally, wipe the wood trim with a damp cloth to remove any remaining residue and allow it to dry completely before applying any new finish or paint.
Step 5: Apply a New Finish
Now that your wood trim is paint-free and properly prepared, you can choose to leave it in its natural state or give it a new finish. Depending on your preference, you can apply a clear varnish, a wood stain, or paint the trim in a different color. Follow the instructions on the product you choose and allow sufficient drying time before handling or reinstalling the trim.
Removing paint from wood trim may require some time and effort, but the end result will be well worth it. By following these steps and taking the necessary precautions, you can restore the beauty of your wood trim and give your home a fresh and updated look.
Frequently Asked Questions
Here are some common questions about removing paint from wood trim:
Q: What is the best way to remove paint from wood trim?
To remove paint from wood trim, you have a few options. One method is to use a chemical paint stripper, following the instructions on the product label. Another option is to use sandpaper or a sanding block to gently sand away the paint. You can also try using a heat gun to soften the paint and then scrape it off with a putty knife. Whichever method you choose, be sure to wear protective gloves and eyewear.
If you are working with an older home, it’s important to test the paint for lead before removing it. If the paint contains lead, you may need to hire a professional to safely remove it.
Q: Can I use a power sander to remove paint from wood trim?
Using a power sander can be an effective method for removing paint from wood trim, but it requires caution. Make sure to use a low-grit sandpaper to strip away the paint, starting with a gentle touch and gradually increasing pressure if necessary. Be careful not to sand too aggressively, as it can damage the wood. Additionally, wear a dust mask and work in a well-ventilated area to minimize exposure to dust particles.
Remember to take breaks during sanding to check your progress and avoid overheating the sander. Once the paint is removed, use a higher-grit sandpaper to smooth out the wood surface before applying any new paint or finish.
Q: Are there any eco-friendly methods to remove paint from wood trim?
Yes, there are eco-friendly methods to remove paint from wood trim. One option is to use a soy-based paint stripper, which is biodegradable and non-toxic. Simply apply the stripper according to the instructions, wait for the paint to soften, and then scrape it off. Another eco-friendly method is to use a mixture of baking soda and boiling water. Apply the paste to the painted surface, let it sit for a few minutes, and then scrub it off with a brush or sponge.
Keep in mind that even with eco-friendly methods, it’s important to take proper safety precautions. Wear gloves, protective eyewear, and work in a well-ventilated area when using any paint removal products.
Q: How can I prevent damaging the wood trim while removing paint?
To prevent damaging the wood trim while removing paint, there are a few steps you can take. First, use a gentle touch when applying any paint removal products or using sandpaper. Start with the least aggressive method and gradually increase pressure if needed. It’s also helpful to test a small, inconspicuous area of the trim before treating the entire surface.
When using a heat gun, keep it moving at all times to avoid scorching the wood. If you’re using a chemical paint stripper, follow the instructions carefully and avoid leaving it on the surface for too long. Finally, be patient and take your time, as rushing the process can increase the risk of damaging the wood trim.
Q: Can I repaint the wood trim after removing the paint?
Yes, after removing the paint from wood trim, you can repaint it to give it a fresh look. Once the paint is completely removed and the surface is smooth, clean the trim thoroughly to remove any residue. Then, apply a primer designed for bare wood surfaces to ensure proper adhesion of the new paint.
After the primer has dried, you can proceed to paint the wood trim with your chosen color and type of paint. Use a brush or roller, applying thin, even coats for the best results. Allow each coat to dry before applying additional layers, and follow the paint manufacturer’s instructions for drying times and any additional steps, such as sanding between coats.
Remember, patience and attention to detail are key when it comes to paint removal. Take your time, use the appropriate tools, and always prioritize safety. Whether you choose to use chemical strippers, heat guns, or sanding techniques, be sure to test them in a small inconspicuous area before applying them to the entire trim. With the right approach, you can successfully remove paint from wood trim and enjoy the satisfaction of a job well done.
- How to Remove Glue From Wood Floor - April 14, 2024
- How to Dissolve Wood Glue - April 14, 2024
- How to Remove Wood Glue - April 14, 2024