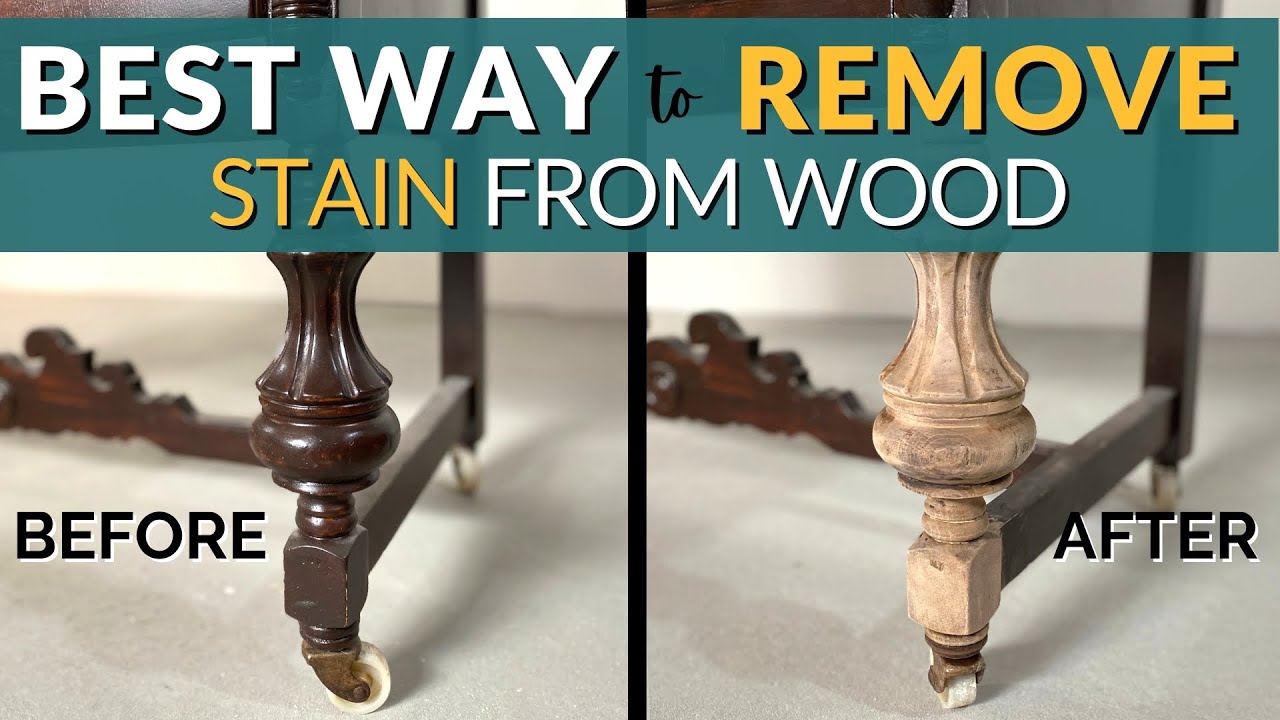
Wood stain can add a stunning touch to any piece of wooden furniture or flooring, bringing out its natural beauty and enhancing its overall appeal. However, there are times when this once-loved stain needs to be removed, whether due to a change in décor, a desire to restore the wood’s original color, or simply to fix a staining mishap. But fear not, for in this guide, we will delve into the art of wood stain removal, equipping you with the knowledge and techniques needed to tackle this task with confidence.
Removing wood stain from wood may seem like a daunting task, but with the right approach and a few tried-and-true methods, it can be a rewarding and satisfying process. Whether you are a seasoned DIY enthusiast or a novice in the world of woodworking, this guide will provide you with step-by-step instructions, tips, and tricks to ensure a successful stain removal journey. From identifying the type of stain and selecting the appropriate removal method to utilizing household items and commercial products, we will explore a range of effective techniques that will help you achieve the desired results without causing damage to the wood. So, if you are ready to embark on the adventure of restoring your wood to its former glory, let us dive into the world of wood stain removal together!
How to Remove Wood Stain from Wood:
- Prepare the area by covering it with a drop cloth.
- Apply a wood stain remover using a brush or sponge.
- Leave the remover on for the recommended time stated on the product.
- Scrub the stained area with a soft brush or cloth.
- Rinse the wood with clean water and dry it thoroughly.
- If the stain persists, repeat the process or try sanding the area gently.
How to Remove Wood Stain from Wood
Wood stain can enhance the natural beauty of wood, but there may be instances when you want to remove it. Whether you want to change the color of the wood or simply remove an old, worn-out stain, the process can be accomplished with the right tools and techniques. In this article, we will guide you through the step-by-step process of removing wood stain from wood, ensuring that you achieve the desired results while preserving the integrity of the wood.
Step 1: Prepare the Work Area
Before you begin the process of removing wood stain, it is crucial to prepare the work area properly. Start by clearing the space and ensuring good ventilation. Stains can emit strong odors and may contain harmful chemicals, so it is advisable to work in a well-ventilated area or wear a mask. Next, protect the surrounding surfaces by covering them with plastic or a drop cloth to prevent any accidental damage or staining. Gather all the necessary tools and materials, including gloves, safety goggles, a scraper or putty knife, sandpaper, and a wood cleaner or stripper.
Once the work area is ready, take a moment to inspect the wood surface. If there are any loose or damaged areas, address them before proceeding. Repair any cracks or splits and ensure the surface is clean and free from dust, dirt, or debris. This will allow the stain removal process to be more effective and ensure a smooth surface for refinishing or re-staining later.
Step 2: Test the Stain Remover
Before you apply any stain remover to the entire wood surface, it is essential to test it in a small, inconspicuous area. This will help you determine the effectiveness of the product and ensure that it does not cause any damage or discoloration to the wood. Follow the manufacturer’s instructions for the stain remover and leave it on for the recommended time. After the designated period, wipe away the remover and inspect the test area. If the stain has been successfully removed without any adverse effects, you can proceed with confidence.

If the stain remover does not yield satisfactory results or causes any damage, it may be necessary to consider alternative methods or seek professional assistance. Different types of wood and stains may require different approaches, so it is crucial to adapt your technique accordingly. Additionally, some stains may have penetrated deeply into the wood fibers, making complete removal challenging. In such cases, you may need to accept a lighter shade of stain or consider sanding down the surface to remove the remaining color.
Step 3: Apply the Stain Remover
Once you have determined the suitability of the stain remover, it is time to apply it to the entire wood surface. Begin by following the instructions provided by the manufacturer, as each product may have specific application guidelines. Generally, you will need to apply the stain remover generously using a brush or cloth, ensuring that the entire surface is covered. Allow the remover to penetrate the wood for the recommended time, which is usually between 15 to 30 minutes.
During this waiting period, the stain remover will work to break down the pigments in the wood stain, making it easier to remove. Depending on the thickness and type of stain, you may notice the stain lifting or bubbling. This is a positive sign that the remover is working effectively. After the designated time, use a scraper or putty knife to gently scrape away the softened stain. Be careful not to apply excessive pressure or damage the wood surface. Work in small sections and wipe away the removed stain with a clean cloth or paper towel. Repeat the process until the entire wood surface is free from stain.
Step 4: Clean and Refinish
Once the wood surface is free from stain, it is important to clean it thoroughly to remove any remaining residue from the remover. Use a wood cleaner or mild soap mixed with water and a soft brush or sponge to scrub the surface. Rinse with clean water and allow the wood to dry completely before proceeding to the next step.
If you plan to refinish the wood with a new stain, it is advisable to sand the surface lightly to ensure an even application. Start with a coarse-grit sandpaper and gradually move to finer grits until the wood feels smooth to the touch. Remove any dust or debris with a tack cloth before applying the new stain. Follow the instructions provided with the stain and apply it evenly, using a brush or cloth in the direction of the wood grain. Allow the stain to dry completely before applying any protective coating, such as varnish or polyurethane.
Step 5: Maintain and Protect
Removing wood stain can be a labor-intensive process, but it allows you to refresh the look of your wood and start anew. To maintain the beauty and longevity of the wood, it is important to follow proper care and maintenance practices. Avoid placing hot or wet objects directly on the wood surface, as this can cause damage or staining. Regularly clean the wood with a mild cleaner and a soft cloth, avoiding abrasive materials or harsh chemicals. Applying a protective coating periodically can help preserve the wood and enhance its resistance to stains and scratches.
By following these steps, you can successfully remove wood stain from wood and achieve the desired results. Remember to exercise caution, work in a well-ventilated area, and wear appropriate protective gear throughout the process. With patience and careful attention to detail, you can restore the natural beauty of your wood and enjoy a fresh, pristine finish.
Frequently Asked Questions
Here are some frequently asked questions about how to remove wood stain from wood:
Question 1: What is the best method to remove wood stain from wood?
The best method to remove wood stain from wood is to use a chemical wood stain remover. These removers are specifically designed to break down and remove the stain from the wood’s surface. To use a wood stain remover, you will need to apply it to the stained area and let it sit for the recommended amount of time. Afterward, you can use a scrub brush or a cloth to remove the loosened stain. Repeat the process if necessary until the stain is completely gone.
In some cases, sanding the stained wood surface may also be an effective method to remove the stain. However, sanding should be done with caution, as it can remove a layer of wood along with the stain. It is recommended to start with a fine-grit sandpaper and gradually work your way up to a coarser grit if needed.
Question 2: Can I use household items to remove wood stain from wood?
Yes, there are some household items that can be used to remove wood stain from wood. One common household item is vinegar. Vinegar is an acidic substance that can help break down the stain. To use vinegar, you can mix equal parts vinegar and water and apply it to the stained area. Let it sit for a few minutes, then use a cloth or scrub brush to remove the stain. Repeat the process if necessary.
Another household item that can be used to remove wood stain is baking soda. Baking soda is mildly abrasive and can help lift the stain from the wood’s surface. To use baking soda, create a paste by mixing it with water and apply it to the stained area. Gently scrub the stain with a cloth or sponge, then rinse with water. Repeat the process if needed.
Question 3: How long does it take to remove wood stain from wood?
The time it takes to remove wood stain from wood can vary depending on the method used and the severity of the stain. If you are using a chemical wood stain remover, it is recommended to follow the instructions provided with the product. Typically, you will need to let the remover sit on the stained area for a specific amount of time, which can range from a few minutes to several hours. Afterward, you will need to scrub or wipe off the loosened stain. In general, the process may take a few hours to complete.
If you are using household items such as vinegar or baking soda, the time it takes to remove the stain can also vary. It may take multiple applications and some scrubbing to completely remove the stain. Patience and persistence are key when using household items for stain removal.
Question 4: Can wood stain be removed from all types of wood?
Wood stain can be removed from most types of wood, but it may be more challenging to remove from certain types of wood or certain finishes. Hardwoods such as oak, maple, and cherry are generally easier to remove stains from compared to softer woods like pine or cedar. Additionally, removing stain from wood with a glossy or sealed finish may require more effort and a different approach compared to unfinished or porous wood.
It is important to note that removing wood stain from wood may also affect the natural color and appearance of the wood. In some cases, the wood may need to be refinished or re-stained after the stain removal process to restore its original look.
Question 5: Are there any safety precautions to take when removing wood stain?
Yes, there are some safety precautions to take when removing wood stain. If you are using a chemical wood stain remover, make sure to read and follow the instructions provided by the manufacturer. Some removers may contain harsh chemicals that can be harmful if not used properly. It is recommended to work in a well-ventilated area and wear protective gloves, goggles, and a mask to avoid direct contact with the remover and fumes.
When using household items such as vinegar or baking soda, it is still advisable to wear gloves to protect your skin. Additionally, be cautious when scrubbing or sanding the stained wood to avoid any injuries. If you have any concerns or allergies, it is best to consult a professional or seek guidance from a hardware store before attempting to remove wood stain yourself.
With the right tools, materials, and a little patience, you can tackle even the most stubborn wood stains. Whether you are dealing with an accidental spill, an old stain that needs refreshing, or simply wish to change the color of your wood, these techniques will empower you to confidently take on the task. By removing wood stain effectively, you can breathe new life into your furniture, cabinetry, or flooring, and enjoy the natural elegance that wood brings to your home. So, roll up your sleeves, get ready to put your newfound knowledge into practice, and watch as your wood surfaces transform into stunning focal points that enhance the overall aesthetic of your living space.
- How to Dry Wood Fast - May 2, 2024
- How to Fix Sagging Hardwood Floors - May 2, 2024
- How to Fix Uneven Wood Floors - May 2, 2024