Are you tired of staring at a worn-out or damaged screen on your wooden porch? Do you long for a refreshed and inviting outdoor space where you can relax and unwind? Look no further! In this comprehensive guide, we will walk you through the step-by-step process of replacing the screen on your wooden porch, helping you transform it into a stunning and functional area that you can enjoy for years to come.
Whether you’re a seasoned DIY enthusiast or a novice looking to take on a new project, this guide is designed to provide you with all the information you need to successfully replace the screen on your wooden porch. From gathering the necessary tools and materials to removing the old screen and installing the new one, we will cover each stage in detail. With our easy-to-follow instructions and helpful tips, you’ll be able to tackle this project with confidence, saving both time and money. So, let’s get started and give your wooden porch the upgrade it deserves!
- Remove the damaged screen by gently prying it off the frame.
- Measure the dimensions of the opening and cut a new screen to fit.
- Secure the new screen onto the frame using staples or a screen spline tool.
- Trim any excess screen material and ensure it is taut and properly aligned.
- Reattach any trim or molding that was removed during the process.
Replacing the Screen on a Wooden Porch
Is the screen on your wooden porch looking worn out or damaged? Don’t worry, replacing it is easier than you might think. With just a few simple steps, you can have a brand new screen that not only looks great but also keeps out pesky bugs and debris. In this guide, we’ll walk you through the process of replacing the screen on your wooden porch, from gathering the necessary tools to finishing up with a professional-looking result.
Gather the Tools and Materials
The first step in replacing the screen on your wooden porch is gathering the necessary tools and materials. Here’s what you’ll need:
- Replacement screen material
- Spline roller
- Utility knife
- Screen spline
- Scissors
- Tape measure
- Screwdriver
- Staple gun
- Staples
- Work gloves
Make sure you have all these items before you begin, as it will save you time and frustration later on.
Remove the Old Screen
Once you have your tools and materials ready, it’s time to remove the old screen from your wooden porch. Start by carefully prying off any trim or molding around the edges of the screen using a screwdriver. Be gentle to avoid damaging the wood.
Next, locate the staples or nails that are holding the old screen in place. Use a staple remover or a pair of pliers to remove them. Once all the fasteners are removed, carefully pull out the old screen, making sure not to tear it.
Measure and Cut the New Screen

With the old screen removed, it’s time to measure and cut the new screen material. Lay the replacement screen material over the porch frame and use a tape measure to determine the dimensions needed. Add a few inches to each side to allow for securing the screen.
Once you have the measurements, use a pair of scissors or a utility knife to cut the screen material to size. Be sure to cut it slightly larger than the measurements to ensure a proper fit.
Install the New Screen
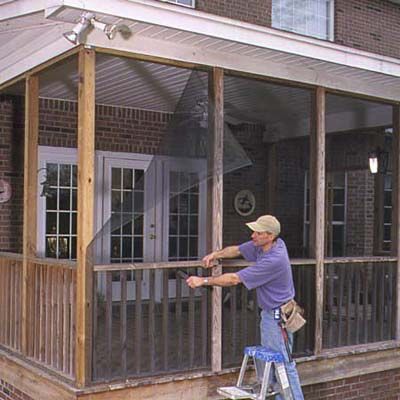
Now that you have the new screen material cut to size, it’s time to install it on your wooden porch. Start by laying the screen material over the frame, making sure it covers the entire area. Use a staple gun to secure the screen to the wooden frame, starting at one corner and working your way around.
As you staple the screen, pull it taut to ensure a smooth and wrinkle-free finish. Be careful not to pull too hard, as it may cause the screen to tear. Continue stapling until the entire perimeter of the screen is securely fastened to the frame.
Finishing Touches
With the screen securely in place, it’s time to add the finishing touches. Use a spline roller to press the screen into the groove along the edges of the frame. This will help keep the screen in place and give it a professional look.
Finally, trim any excess screen material using a utility knife or scissors. Take your time and make clean, straight cuts to achieve a neat and polished appearance. Once you’re done, step back and admire your newly replaced screen on your wooden porch.
Maintenance Tips
To ensure the longevity of your newly replaced screen, it’s important to perform regular maintenance. Inspect the screen periodically for any signs of damage or wear and replace any torn or damaged areas promptly. Additionally, keep the screen clean by gently wiping it with a damp cloth or sponge.
By following these steps and taking proper care of your screen, you can enjoy a beautiful and functional wooden porch for years to come.
Frequently Asked Questions
Below are some commonly asked questions and answers about replacing the screen on a wooden porch.
1. How do I remove the old screen from my wooden porch?
Removing the old screen from your wooden porch is a relatively simple process. Start by carefully removing any trim or molding that may be holding the screen in place. Use a pry bar or a screwdriver to gently pry it off. Once the trim is removed, you can then remove the old screen by pulling it away from the frame. Be careful not to damage the surrounding wood or the frame itself in the process.
After the old screen is removed, you may need to clean the porch frame to ensure a smooth surface for the new screen. Use a mild detergent and water to remove any dirt or debris. Allow the frame to dry completely before proceeding with the installation of the new screen.
2. What tools do I need to replace the screen on my wooden porch?
To replace the screen on your wooden porch, you will need a few basic tools. These include a utility knife or scissors to cut the screen material, a spline roller to press the screen into the frame, a screwdriver or pry bar to remove any trim or molding, and a staple gun or nails to secure the screen to the frame. Additionally, you may need a measuring tape, a level, and a pencil to ensure accurate measurements and alignment during the installation process.
It is important to use the appropriate tools for the job to ensure a successful and secure installation. If you do not have the necessary tools, they can often be rented from a local hardware store or home improvement center.
3. What type of screen material should I use for my wooden porch?
When choosing screen material for your wooden porch, it is important to consider factors such as durability, visibility, and insect resistance. Two popular options are fiberglass and aluminum screens.
Fiberglass screens are a common choice due to their affordability, flexibility, and resistance to rust and corrosion. They also provide good visibility and are relatively easy to install. Aluminum screens, on the other hand, offer greater durability and strength. They are resistant to sagging and provide excellent insect protection. However, aluminum screens may be more expensive and can reduce visibility slightly compared to fiberglass screens.
4. How do I measure and cut the screen material for my wooden porch?
Measuring and cutting the screen material for your wooden porch requires precision to ensure a proper fit. Start by measuring the dimensions of each section of the porch frame that needs screen replacement. Use a measuring tape to measure the width and height of each section, adding a few inches to allow for overlap and securing the screen to the frame.
Once you have the measurements, transfer them to the screen material and mark the dimensions using a pencil. Use a straight edge or a square to ensure straight lines and then cut the screen material using a utility knife or scissors. It is important to cut the screen slightly larger than the dimensions to ensure a proper fit. Trim any excess screen material after installation.
5. How do I secure the new screen onto my wooden porch frame?
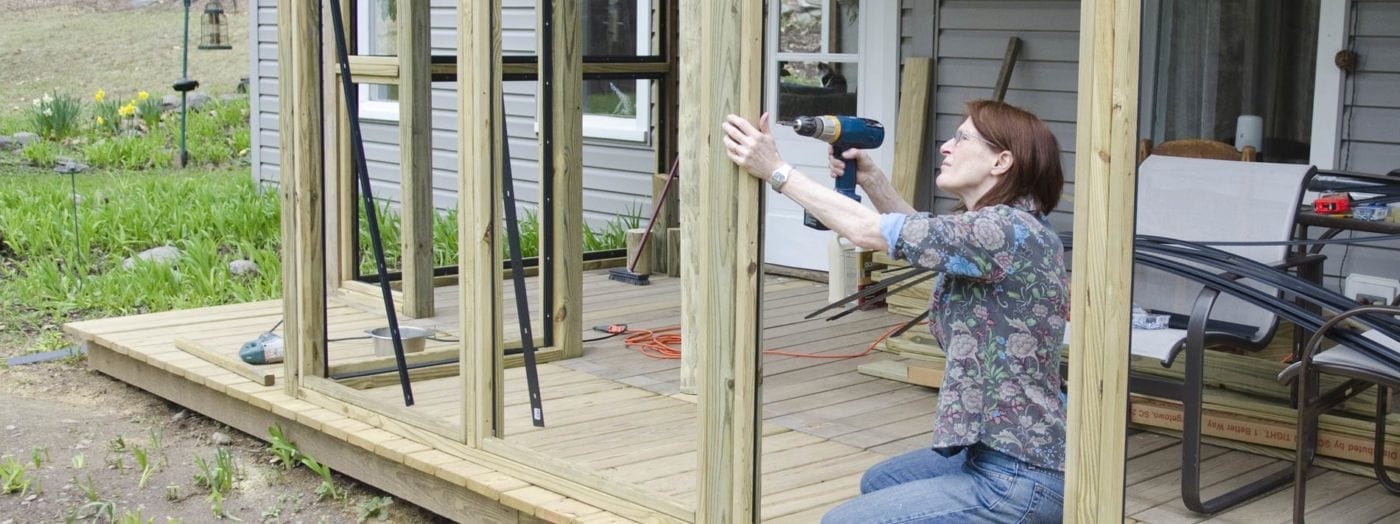
Securing the new screen onto your wooden porch frame requires the use of a spline roller, staple gun, or nails. Start by placing the screen over the frame, ensuring that it is centered and aligned properly. Use a spline roller to press the screen into the frame’s grooves, starting from one end and working your way around the entire perimeter.
If using a staple gun, position it at a slight angle and carefully staple the screen to the frame, making sure the staples are evenly spaced and secure. Alternatively, you can use nails to secure the screen by hammering them into the frame, again ensuring even spacing and a secure attachment. Trim any excess screen material and reattach any trim or molding that was removed during the installation process.
Taking the time to replace the screen on your wooden porch is an investment in both the aesthetics and functionality of your outdoor living area. Not only will a new screen protect against insects and debris, but it will also provide a fresh, clean look that enhances the overall appeal of your porch. So, gather your supplies, follow the instructions, and enjoy the satisfaction of a job well done as you transform your porch into a more inviting and enjoyable space.
- How to Use Osburn Wood Stove - April 28, 2024
- How to Heat Wood - April 28, 2024
- How to Burn Wood Efficiently - April 28, 2024