Wood is a versatile and timeless material, cherished for its natural beauty and durability. Whether you are a seasoned woodworker or a DIY enthusiast, understanding how to properly stabilize wood is crucial for ensuring its long-term structural integrity. In this guide, we will delve into the art of stabilizing wood, exploring the techniques and tools that will help you preserve the beauty and strength of this remarkable material.
Stabilizing wood involves fortifying it against external factors such as moisture, temperature changes, and the natural aging process. Without proper stabilization, wood can warp, crack, or even rot, diminishing its aesthetic appeal and functional value. By learning the ins and outs of wood stabilization, you will not only enhance the longevity of your projects but also unlock a world of possibilities for creating stunning pieces that stand the test of time. So, let’s dive in and discover the secrets to achieving a stable and reliable foundation for your woodworking endeavors.
How to Stabilize Wood:
- Prepare the wood by removing any dirt or moisture.
- Apply a wood stabilizer solution using a brush or spray bottle.
- Allow the solution to penetrate the wood for the recommended time.
- Remove any excess solution and let the wood dry completely.
- Sand the wood to achieve a smooth finish.
- Apply a wood finish or sealant to protect the stabilized wood.
How to Stabilize Wood
Wood is a versatile and beautiful material that can be used for a variety of projects. However, sometimes wood can be unstable, prone to warping, cracking, and other forms of damage. In this informative article, we will guide you through the process of stabilizing wood, ensuring that it remains strong, durable, and resistant to these issues. Whether you are a woodworking enthusiast or a professional carpenter, these step-by-step instructions will help you achieve the best results for your projects.
Step 1: Prepare the Wood
The first step in stabilizing wood is to prepare it properly. Start by selecting a piece of wood that is free from knots, cracks, or other imperfections. It’s important to work with a clean and smooth surface as this will ensure better penetration of the stabilizing materials. Next, remove any existing finishes or coatings from the wood using sandpaper or a paint stripper. This will allow the stabilizing solution to penetrate the wood more effectively.
Once the wood is prepared, check for any signs of moisture. Wood with high moisture content should not be stabilized as it can lead to ineffective results. Use a moisture meter to determine the moisture content of the wood. Ideally, the moisture content should be below 10% for optimal stabilization.
Step 2: Apply the Stabilizing Solution
After preparing the wood, it’s time to apply the stabilizing solution. There are various types of stabilizing solutions available in the market, such as resin-based or acrylic-based stabilizers. Choose a stabilizer that is suitable for your specific project and follow the manufacturer’s instructions for application.

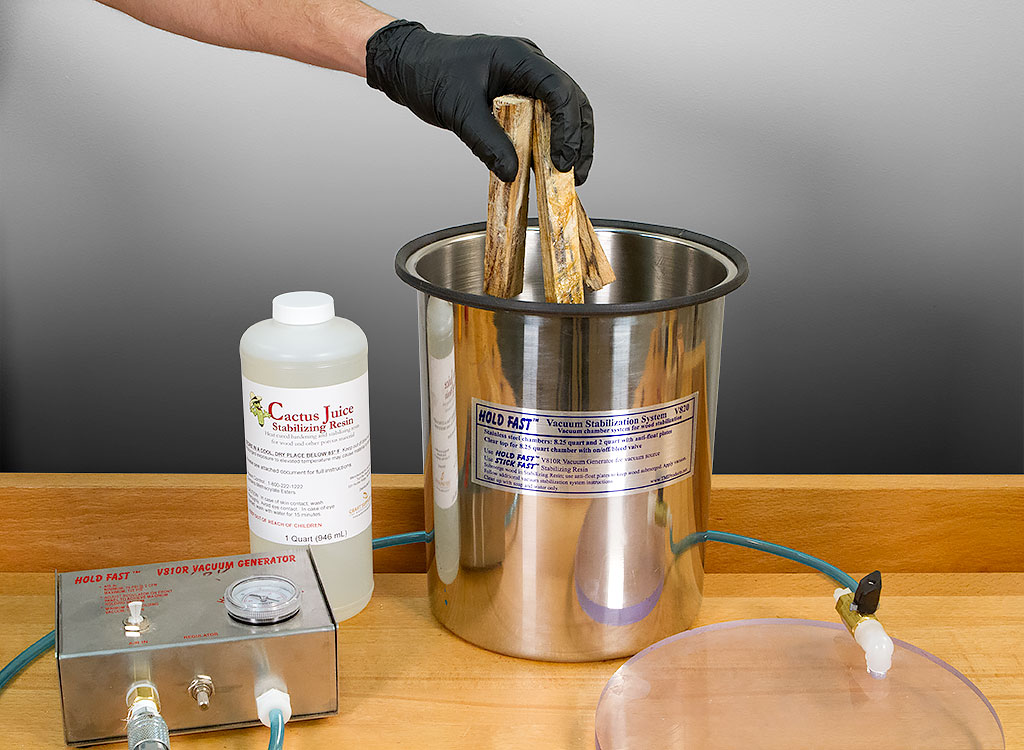
Start by wearing protective gloves and safety goggles to ensure your safety during the application process. Pour the stabilizing solution into a container and immerse the wood into it. Allow the wood to soak in the solution for the recommended amount of time, ensuring that all surfaces are fully covered. This will allow the stabilizer to penetrate deep into the wood, strengthening its structure.
After the recommended soaking time, remove the wood from the solution and allow it to dry. Depending on the type of stabilizer used, the drying time may vary. It’s important to follow the manufacturer’s instructions regarding drying time to ensure proper stabilization.
Step 3: Finishing Touches
Once the wood is dry, it’s time to give it the finishing touches. Sand the wood using fine-grit sandpaper to achieve a smooth and polished surface. This will remove any roughness or unevenness caused by the stabilizing process.
After sanding, you can apply a finish of your choice to protect the wood and enhance its appearance. There are various types of finishes available, such as oils, varnishes, or lacquers. Choose a finish that suits your project and follow the manufacturer’s instructions for application.
Finally, allow the finish to dry completely before using or further processing the wood. This will ensure that the stabilization process is fully effective and the wood remains stable for a long time.
Step 4: Maintenance
Once the wood is stabilized, it’s important to maintain its stability over time. Avoid exposing the wood to extreme changes in temperature or humidity, as this can cause it to expand or contract, leading to potential damage. Regularly inspect the wood for any signs of wear or damage and take prompt action to address any issues.
Additionally, periodic reapplication of a stabilizing solution or finish may be necessary, depending on the type of wood and its intended use. Follow the manufacturer’s instructions for reapplication to ensure the continued stability of the wood.
Step 5: Enjoy the Benefits
By following these steps, you can successfully stabilize wood and enjoy the benefits of a strong, durable, and long-lasting material. Stabilized wood is less prone to warping, cracking, and other forms of damage, making it ideal for various woodworking projects. Whether you are creating furniture, decorative items, or anything else, the stability of the wood will ensure the longevity and quality of your creations.
Remember to always prioritize safety during the wood stabilization process, wearing appropriate protective gear and following all instructions carefully. With proper preparation, application, and maintenance, you can achieve excellent results and create stunning pieces that will stand the test of time.
Frequently Asked Questions
Here are some commonly asked questions about how to stabilize wood:
Question 1: What is wood stabilization?
Wood stabilization is a process that involves impregnating the wood with a stabilizing solution to strengthen and harden it. This helps to prevent the wood from warping, cracking, or deteriorating over time. Stabilizing wood can be particularly useful for projects involving items that are exposed to moisture or high humidity, such as outdoor furniture or kitchen utensils.
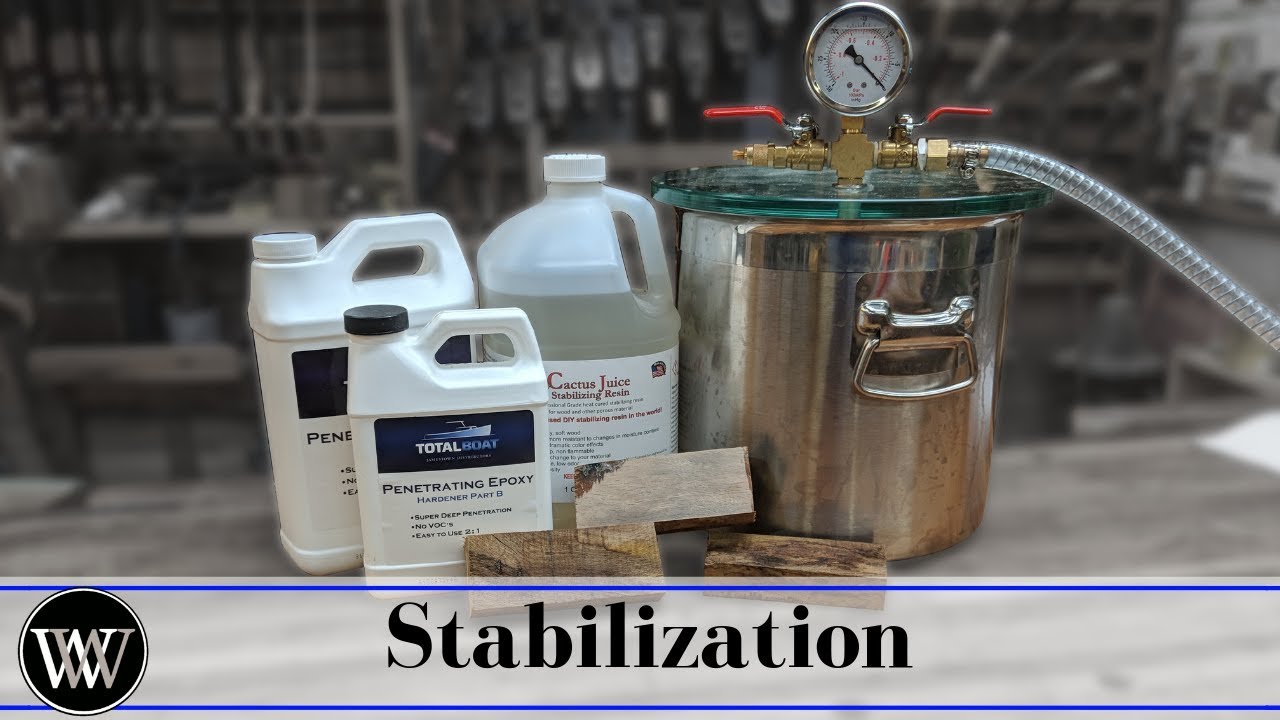
The stabilizing solution typically consists of a combination of resin and a vacuum or pressure chamber. The wood is submerged in the solution, and the vacuum or pressure helps to draw the solution into the wood fibers, replacing the air and creating a solid and stable material.
Question 2: Why is wood stabilization necessary?
Wood stabilization is necessary to enhance the strength and durability of wood, especially in applications where the wood is exposed to moisture or temperature fluctuations. Unstabilized wood is prone to warping, cracking, and other forms of damage, which can compromise the integrity of the final product.
By stabilizing wood, you can also enhance its resistance to insects, fungi, and other forms of decay. This is particularly important for outdoor projects or items that come into contact with water, as these conditions can accelerate the deterioration of untreated wood.
Question 3: How is wood stabilization done?
The process of wood stabilization involves several steps. First, the wood is prepared by removing any loose bark, dirt, or debris. It is then placed in a vacuum or pressure chamber.
Next, the stabilizing solution is prepared by mixing the resin with a catalyst or hardener. The wood is submerged in the solution, and the vacuum or pressure is applied to draw the solution into the wood fibers. This step helps to ensure that the entire piece of wood is thoroughly impregnated with the stabilizing solution.
Question 4: Can any type of wood be stabilized?
Most types of wood can be stabilized, although some species may require additional preparation or may not respond as well to the process. Generally, woods with open grain structures, such as oak or walnut, are more suitable for stabilization as they can absorb the stabilizing solution more effectively.
It is recommended to consult with a professional or conduct a small test piece before stabilizing an entire project to determine how well the wood will respond to the process.
Question 5: What are the benefits of stabilizing wood?
Stabilizing wood offers several benefits. Firstly, it significantly increases the strength and durability of the wood, making it less prone to warping, cracking, or splitting. This makes stabilized wood ideal for projects that require stability, such as turning blanks or knife handles.
Additionally, stabilized wood is more resistant to moisture and temperature changes, making it suitable for outdoor applications. It also enhances the natural beauty of the wood, as the stabilizing process can enhance the colors and patterns within the grain. Finally, by stabilizing wood, you can extend its lifespan and ensure that your projects remain intact for years to come.
How to Stabilize Wood and What is Stabilization
In conclusion, stabilizing wood is a crucial process that not only enhances the durability and longevity of the material but also allows for endless creative possibilities. By understanding the science behind wood stabilization and employing the right techniques, woodworkers and hobbyists can transform ordinary pieces of timber into stunning works of art. Whether you are a seasoned professional or a beginner in the field, mastering the art of stabilizing wood will undoubtedly elevate your woodworking projects to new heights.
So, let us embrace the world of wood stabilization, exploring the various methods and materials available. From vacuum chambers to resin impregnation, each technique offers its own unique advantages and challenges. As you embark on this journey, remember to prioritize safety and carefully follow the instructions provided by manufacturers or experts. With patience, practice, and a willingness to learn, you will soon find yourself creating beautiful, stable wood pieces that will withstand the test of time. So, go ahead and unleash your creativity, and let the wonders of stabilized wood inspire your next woodworking masterpiece.
- How to Make Wooden Pyramid Puzzle - May 13, 2024
- How to Solve Wooden Pyramid Puzzle - May 13, 2024
- How to Wooden Puzzle - May 13, 2024