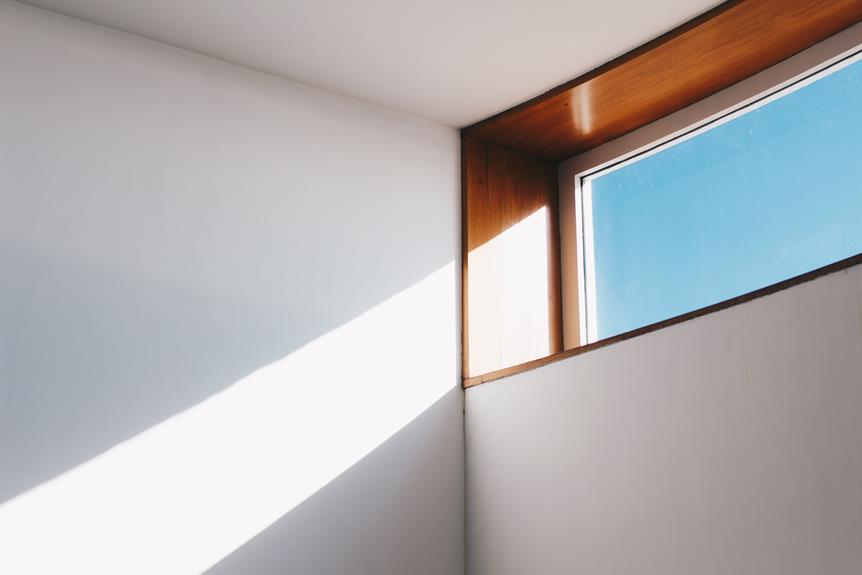
I'm gonna show you how to bring new life to your wood ceiling with a little whitewashing magic. Forget about those dull and boring ceilings – it's time to transform your space into something fresh and inviting.
In just a few simple steps, you'll learn how to create a beautiful, light-washed look that'll have your friends and family in awe. Get ready to unleash your creativity and make your ceiling the star of the show.
Let's dive in!
Overview
I'll give you an overview of how to whitewash a wood ceiling. It's a simple yet transformative process that can breathe new life into your space, giving it a fresh and airy feel. Whitewashing involves applying a thin layer of diluted paint to the surface, allowing the natural grain and texture of the wood to shine through.
First, you'll need to gather your materials. You'll need a primer, white paint, water, a paintbrush, and a drop cloth to protect your floors. Make sure to choose a paint color that complements your existing decor and enhances the overall aesthetic of the room.
Next, prepare the wood surface by cleaning it thoroughly. Remove any dust, dirt, or cobwebs using a soft cloth or a vacuum cleaner. If there are any stains or discolorations, you may need to sand the wood lightly to ensure a smooth and even finish.
Once the surface is clean and dry, mix your primer and paint in a ratio of 1:1. Add water gradually until you achieve the desired consistency. The mixture should be thin enough to allow the wood's natural texture to show through, but not so thin that it drips or runs.

Now, it's time to apply the whitewash. Start by cutting in the edges with a brush, and then use a roller or a large brush to cover the rest of the surface. Work in small sections, applying the paint in long, even strokes. Remember to follow the wood grain to achieve a more authentic look.
After the first coat is dry, you can choose to apply a second coat for a more opaque finish. Allow the paint to dry completely before moving any furniture back into the room.
Whitewashing your wood ceiling is a liberating experience. It can transform a dull and outdated space into a bright and inviting sanctuary. So go ahead, grab your supplies, and let your creativity flow as you embark on this exciting DIY project. You'll be amazed at the difference a little whitewash can make.
quick answer
Let's get straight to the point and provide a quick answer to your question. How do you whitewash a wood ceiling? Here are four simple steps to help you achieve that beautiful, airy look:
- Preparation is key:
- Start by cleaning the wood ceiling thoroughly to remove any dirt or grime.
- Sand the surface lightly to create a smooth base for the whitewash.
- Protect the surrounding areas with drop cloths or plastic sheets.
- Mix your whitewash solution:
- In a bucket, combine equal parts water and white latex paint.
- Stir the mixture until it reaches a smooth, milky consistency.
- If you want a more translucent effect, add more water. For a more opaque look, add more paint.
- Apply the whitewash:
- Use a paintbrush or roller to apply a thin coat of the whitewash solution onto the wood ceiling.
- Work in small sections, following the grain of the wood.
- Allow the first coat to dry completely before applying additional coats, if desired.
- Finishing touches:
- Once the final coat is dry, lightly sand the surface to achieve a smooth finish.
- Seal the whitewashed wood ceiling with a clear varnish or sealer for added durability and protection.
Now you're ready to enjoy your beautifully whitewashed wood ceiling, adding a touch of rustic elegance to your space.
Liberation is at your fingertips!
Key Takeways
The key takeaways from this discussion include the importance of proper preparation, the mixing of a whitewash solution, the application technique, and the finishing touches for a beautifully whitewashed wood ceiling. When it comes to whitewashing a wood ceiling, preparation is paramount. Before starting the process, it is essential to clean the surface thoroughly, removing any dirt or debris. This ensures a smooth and even application of the whitewash.
Once the surface is clean, the next step is to mix the whitewash solution. This can be done by combining equal parts of water and white latex paint. However, for a more authentic and rustic look, adding lime or chalk powder to the mixture can create a traditional whitewash effect.
Now, let's focus on the application technique. Using a wide brush, apply the whitewash solution in long, even strokes, following the grain of the wood. It's important to work in small sections to ensure that the whitewash doesn't dry before you can blend it properly.
To emphasize the key steps and techniques involved in whitewashing a wood ceiling, here is a helpful table:
| Key Steps | Techniques |
|---|---|
| Preparation | Clean the surface |
| Mixing Solution | Equal parts of water and white latex paint, add lime or chalk powder for a rustic look |
| Application | Use a wide brush, apply in long, even strokes, work in small sections |
| Finishing Touches | Allow to dry, lightly sand for a distressed look |
Lastly, don't forget the finishing touches. After allowing the whitewash to dry, you can lightly sand the surface for a distressed look, giving your wood ceiling a unique and charming appeal.
Summary
To summarize, I thoroughly discussed the key steps and techniques involved in whitewashing a wood ceiling, emphasizing the importance of preparation, the mixing of the whitewash solution, the application technique, and the finishing touches.
Whitewashing a wood ceiling can be a transformative and liberating experience. It brings a sense of freshness and lightness to a space, while still allowing the natural beauty of the wood to shine through.
The first step in the whitewashing process is preparation. This involves cleaning the ceiling thoroughly to remove any dirt, dust, or grease that may prevent the whitewash from adhering properly. It's also important to repair any damage to the wood, such as cracks or holes, before proceeding.
Next, the whitewash solution needs to be mixed. This can be done by combining equal parts water and white latex paint in a container. Adding a small amount of water to the paint will help achieve a more translucent and subtle whitewash effect.
Once the solution is mixed, it's time for the application technique. Using a brush or roller, apply the whitewash in long, even strokes, following the grain of the wood. It's important to work quickly and efficiently to avoid streaks or uneven coverage.
Finally, the finishing touches can be added to enhance the whitewashed look. This can include lightly sanding the surface to create a smoother finish or applying a clear sealant to protect the wood and give it a subtle sheen.
Step-By-Step Guide
Whitewashing a wood ceiling can transform the look of a space, giving it a fresh and rustic charm. To guide you through the process, here is a step-by-step guide to achieve the desired result:
- Benefits of Whitewashing: Understand the advantages of whitewashing, such as enhancing the natural beauty of the wood and creating a light and airy atmosphere.
- Required Materials and Tools: Gather all the necessary supplies, including brushes, sandpaper, primer, and whitewash paint, to ensure a smooth and successful project.
- Preparing the Wood: Properly prepare the wood surface by cleaning, sanding, and applying a primer to ensure the whitewash adheres properly.
- Applying the Whitewash: Follow a systematic technique to apply the whitewash, starting from one corner and working your way across the ceiling, ensuring an even and consistent coverage.
Benefits of Whitewashing
I've always loved the way whitewashing brings out the natural beauty of wood. There's something about the way it enhances the grain, creating a soft, rustic charm that's simply captivating.
Whitewashing not only adds a touch of elegance to any space but also has several benefits worth considering. Firstly, it allows the wood's natural characteristics to shine through, highlighting its unique patterns and textures.
Secondly, whitewashing can help brighten up a room, creating a sense of airiness and openness. It can also make a space feel larger and more inviting.
Additionally, whitewashing provides a protective layer to the wood, shielding it from dirt, stains, and wear. This low-maintenance technique is perfect for those who desire liberation from the constant upkeep of traditional wood finishes.
Required Materials and Tools
I only need three materials and a couple of tools to complete the whitewashing process. The materials I require are white paint, water, and a paintbrush. These simple items will help me achieve the desired look for my wood ceiling. As for the tools, I will need a bucket and a stirring stick to mix the paint and water together. In order to give you a clearer picture, here is a table summarizing the required materials and tools:
| Materials | Tools |
|---|---|
| White paint | Paintbrush |
| Water | Bucket |
| Stirring stick |
Now that we have the necessary materials and tools ready, let's move on to preparing the wood for the whitewashing process.
Preparing the Wood
To prepare the wood, I'll sand it down and wipe it clean with a damp cloth. This step is crucial to ensure a smooth surface for the whitewashing process.
I'll start by using a medium-grit sandpaper to gently sand the wood, removing any rough patches or imperfections. This will help the whitewash adhere properly and give the final result a more professional look.
After sanding, I'll wipe the wood clean with a damp cloth to remove any dust or debris. It's important to have a clean surface before applying any stain or paint. This not only ensures a better finish but also helps the whitewash penetrate the wood more effectively.
With these preparations complete, I'm now ready to move on to the next step in the process.
Applying the Whitewash
First, I'll dilute the white paint with water to create a 50-50 mixture for applying the whitewash. This step is crucial as it allows the wood grain to show through while still achieving a light, airy look.
With a wide paintbrush, I'll start at one corner of the wood ceiling and work my way across, using long, smooth strokes. The key is to apply the whitewash evenly, ensuring no drips or streaks. As I progress, I'll periodically step back to assess the coverage and make any necessary touch-ups.
Once the entire ceiling is coated, I'll let it dry completely before moving on to the next step of the process.
Now that the whitewash is applied and dried, it's important to maintain the beauty of your newly transformed wood ceiling. Regular dusting with a soft cloth or feather duster will keep the surface clean and free from debris.
Avoid using harsh chemicals or abrasive cleaners, as they can damage the finish. If you notice any scratches or scuffs, a gentle touch-up with a small amount of whitewash mixture can easily fix them.
Maintenance Tips and Tricks
After applying and drying the whitewash, it's important to regularly dust and avoid harsh chemicals to maintain the beauty of the wood ceiling.
To keep your wood ceiling looking its best, start by gently dusting the surface with a soft cloth or feather duster. This will remove any loose dirt or debris that may have settled on the surface.
Avoid using abrasive cleaners or harsh chemicals, as they can damage the whitewash and strip away its natural beauty. Instead, opt for a mild, non-abrasive cleaner specifically designed for wood surfaces. Dilute the cleaner in water according to the manufacturer's instructions and use a soft cloth or sponge to gently wipe down the ceiling.
Rinse the cloth or sponge frequently to avoid spreading dirt or residue. Finally, dry the surface thoroughly with a clean, dry cloth to prevent water spots or streaks.
Final Thought
I have one final thought on whitewashing the wood ceiling.
As we've discussed the various maintenance tips and tricks, I believe it's important to approach the process of whitewashing with a sense of liberation. Whitewashing isn't just about refreshing the look of your wood ceiling; it's about reclaiming and revitalizing the space.
When it comes to whitewashing, the key is to strike a balance between preserving the natural beauty of the wood and adding a touch of modernity. Start by preparing the wood surface, ensuring it's clean and free from any dirt or debris.
Next, mix equal parts of water and white paint, creating a semi-transparent solution. This will allow the wood grain to show through, giving it a rustic charm.
Apply the mixture using a brush or roller, working in long, even strokes. As you go, remember that imperfections are part of the beauty. Embrace the variations in color and texture, as they contribute to the overall character of the ceiling.
Once the whitewash is dry, stand back and admire the transformation. The wood ceiling now exudes a sense of liberation, breathing new life into the space.
Frequently Asked Questions
What Are the Different Types of Wood That Can Be Whitewashed?
There are several types of wood that can be whitewashed, such as pine, oak, and cedar. Each wood has its own unique grain pattern, so the whitewash will appear slightly different on each type.
Can Whitewashing Be Done on Previously Stained or Painted Wood?
Yes, whitewashing can be done on previously stained or painted wood. It's important to properly prepare the surface by removing any existing finish and ensuring it's clean and smooth before applying the whitewash.
How Long Does It Take for the Whitewash to Dry Completely?
It usually takes a few hours for the whitewash to dry completely. Depending on the humidity and ventilation, it may take longer. I recommend ensuring proper air circulation to speed up the drying process.
Can the Whitewashed Wood Ceiling Be Cleaned or Maintained in Any Specific Way?
I can clean and maintain the whitewashed wood ceiling by gently dusting it with a soft cloth or using a mild soap and water solution. It's important to avoid harsh chemicals that can damage the finish.
Are There Any Alternative Methods to Whitewashing Wood Ceilings?
There are alternative methods to whitewashing wood ceilings. I can share creative, knowledgeable, and detail-oriented insights about these methods. Let's explore different ways to transform your wood ceiling and achieve the desired liberation.
- How to Remove Glue From Wood Floor - April 14, 2024
- How to Dissolve Wood Glue - April 14, 2024
- How to Remove Wood Glue - April 14, 2024