Are you looking to add a touch of patriotism to your home decor? Or perhaps you’re searching for a unique and meaningful gift for a loved one? Look no further than crafting your very own wooden flag! In this guide, we will take you through the step-by-step process of creating a stunning wooden flag that will be the perfect addition to any space. Whether you’re a seasoned woodworker or a beginner with a passion for DIY projects, this tutorial will provide you with all the necessary instructions and tips to successfully bring your vision to life.
Making a wooden flag is not only a creative endeavor, but also a chance to showcase your love for your country or pay tribute to a special event or cause. The beauty of creating a wooden flag lies in the fact that you can personalize it to reflect your own style and preferences. From the choice of wood to the arrangement of the stripes and stars, every detail is an opportunity to infuse your flag with your unique touch. So, unleash your inner artist and join us on this exciting journey as we delve into the art of crafting a wooden flag.
How to Make a Wooden Flag:
- Measure and cut the wooden pieces to the desired flag size.
- Sand the wood to ensure a smooth surface.
- Paint or stain the wood with your chosen colors.
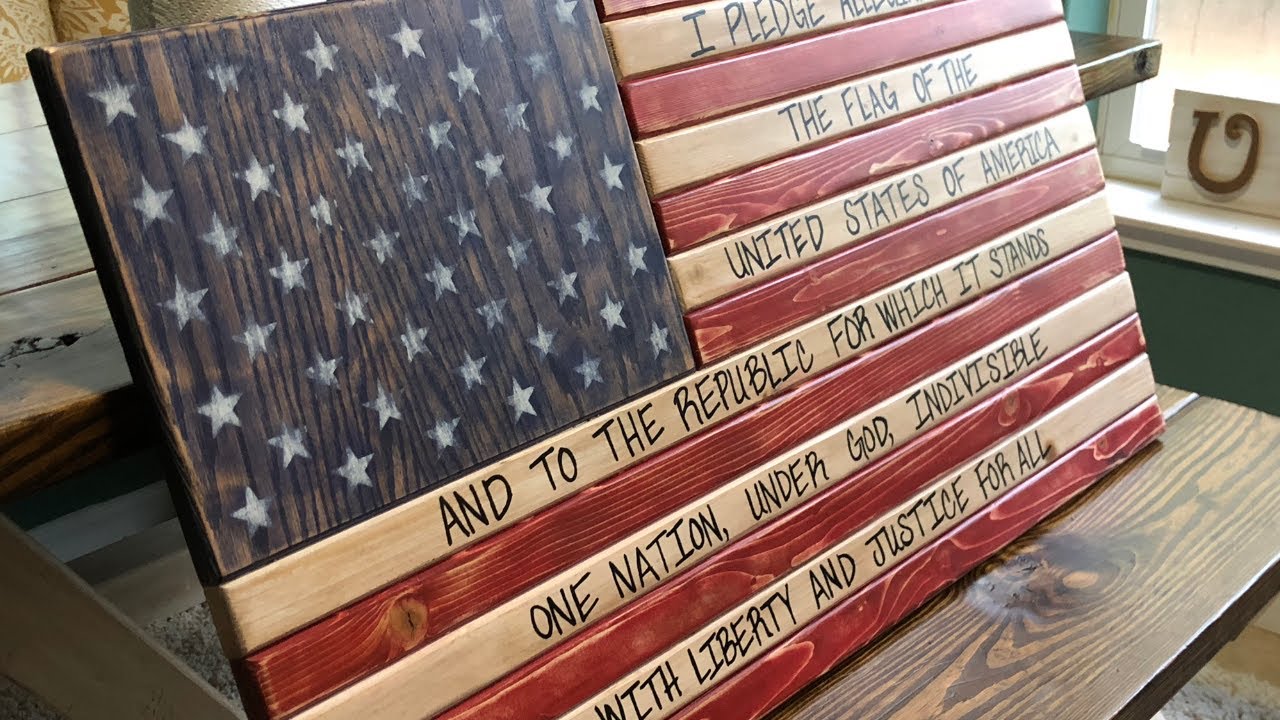
- If desired, tape off and paint a design or add stars for a patriotic touch.
- Once dry, assemble the wooden pieces using wood glue or nails.
- Attach a hanger or hooks to the back for easy display.
- Enjoy your homemade wooden flag!
How to Make a Wooden Flag: A Step-by-Step Guide
Creating a wooden flag can be a rewarding and enjoyable project for woodworking enthusiasts. Not only does it offer a chance to showcase your craftsmanship, but it also allows you to display a patriotic symbol in a unique and creative way. In this guide, we will walk you through the process of making a wooden flag, from selecting the right materials to adding the finishing touches. So, grab your tools and let’s get started!
Materials Needed
Before you begin, gather the following materials:
- Wood boards (preferably pine or cedar)
- Saw
- Sandpaper (various grits)
- Wood glue
- Clamps
- Paint (red, white, and blue)
- Paintbrushes
- Masking tape
- Star stencil
- Clear finish (optional)
Once you have all the necessary materials, you can move on to the next step.
Step 1: Cutting the Boards
Start by cutting the wood boards into the desired size for your flag. You can choose the dimensions based on your preference or use a standard size, such as 36 inches by 24 inches. Use a saw to make clean and straight cuts. Remember to wear appropriate safety gear, such as goggles and gloves, while operating the saw. Once the boards are cut, sand the edges to remove any roughness.

After sanding, arrange the boards side by side to form the flag shape. Ensure that the edges are aligned correctly. If needed, trim the boards further for a perfect fit. Once you are satisfied with the arrangement, apply wood glue along the edges and use clamps to hold the boards together firmly. Allow the glue to dry completely before proceeding to the next step.
Step 2: Painting the Flag
With the boards securely glued, it’s time to paint the flag. Start by applying a layer of white paint on the top portion of the flag, leaving space for the blue section. Once the white paint is dry, use masking tape to create straight lines for the red stripes. Apply red paint on the exposed areas, ensuring clean and even coverage. Remove the masking tape carefully while the paint is still wet to avoid any smudging.
After completing the red stripes, it’s time to paint the blue section. Use a star stencil to create a pattern of stars on the blue area. Make sure to position the stencil properly and apply the paint evenly. Once the blue paint is dry, remove the stencil to reveal the star pattern. Allow the paint to dry completely before proceeding.
Step 3: Finishing Touches
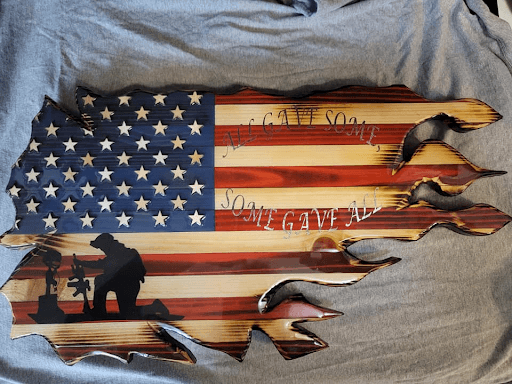
Once the paint is dry, you can add some finishing touches to your wooden flag. If desired, you can lightly sand the painted areas to give the flag a distressed or weathered look. This step is optional and depends on your aesthetic preference.
Finally, you can choose to apply a clear finish to protect the paint and enhance the wood’s natural beauty. Follow the instructions on the finish product carefully and allow it to dry completely before handling or displaying the wooden flag.
Step 4: Displaying Your Wooden Flag
Now that your wooden flag is complete, it’s time to find the perfect spot to display it. You can hang it on a wall using hooks or nails, or you can attach a bracket and display it outside your home. Whichever option you choose, make sure the flag is securely fastened to prevent accidents or damage.
Remember to periodically inspect and clean your wooden flag to maintain its appearance and durability. Enjoy the pride and satisfaction that comes with creating a beautiful wooden flag!
Frequently Asked Questions
Welcome to our FAQ section about how to make a wooden flag! Here, we have compiled some commonly asked questions to help guide you through the process. Whether you’re a beginner or an experienced woodworker, we hope you find these answers helpful.
Question 1: What materials do I need to make a wooden flag?
To make a wooden flag, you will need the following materials:
1. A piece of wood, preferably pine or cedar, with dimensions of your desired flag size.
2. Sandpaper or a sanding block for smoothing the wood surface.
3. Acrylic paint in the colors of your flag design.
4. Paintbrushes in various sizes.
5. Painter’s tape for creating clean lines.
6. A pencil or stencil for tracing the flag design onto the wood.
7. Clear coat or sealer to protect the finished flag.
8. Hanging hardware, if you plan to display your wooden flag on a wall.
These materials can be easily found at your local hardware or craft store, making it convenient to start your wooden flag project.
Question 2: How do I prepare the wood for painting?
Before you begin painting, it’s essential to prepare the wood surface properly. Follow these steps:
1. Start by sanding the wood using sandpaper or a sanding block. This will smooth out any rough edges or imperfections.
2. Remove any dust or debris from the wood by wiping it down with a clean cloth or tack cloth.
3. If desired, you can apply a wood primer to create a smooth base for the paint. This step is optional but can help the paint adhere better and provide a more even finish.
4. Once the primer is dry, lightly sand the wood again to ensure a smooth surface for painting.
By preparing the wood correctly, you’ll ensure that your paint adheres well and your wooden flag looks professional and polished.
Question 3: How do I paint the design on the wooden flag?
Painting the design on your wooden flag requires some planning and precision. Here’s how you can do it:
1. Start by deciding on the design and layout of your flag. You can draw the design on paper first or use a stencil for more precise outlines.
2. Use a pencil or stencil to trace the design onto the prepared wood surface.
3. Apply painter’s tape along the edges of the design to create clean lines and prevent color bleeding.
4. Begin painting your flag, starting with the background color and working your way up to the foreground elements. Use a small brush for intricate details and a larger brush for broader areas.
5. Let each color dry before moving on to the next one. This will help avoid smudging or mixing of colors.
6. Once the paint is completely dry, carefully remove the painter’s tape to reveal crisp lines and define your flag design.
With patience and attention to detail, you’ll be able to paint a beautiful design on your wooden flag.
Question 4: How do I protect and finish my wooden flag?
Protecting and finishing your wooden flag is essential to ensure its longevity and durability. Follow these steps for a professional finish:
1. Once your paint is completely dry, apply a clear coat or sealer to protect the wood and paint from moisture, UV rays, and general wear and tear. You can use a brush or a spray-on sealer, depending on your preference.
2. Apply the sealer in thin, even coats, following the manufacturer’s instructions. Allow each coat to dry before applying the next one.
3. After applying the final coat of sealer, let the flag dry completely in a well-ventilated area.
4. If you plan to hang your wooden flag on a wall, attach the necessary hanging hardware securely to the back of the flag, following the manufacturer’s instructions.
By properly protecting and finishing your wooden flag, you’ll ensure its beauty and longevity for years to come.
Question 5: Are there any additional tips or suggestions for making a wooden flag?
Indeed! Here are a few additional tips and suggestions to enhance your wooden flag-making experience:
1. Experiment with different flag designs and color combinations to make your wooden flag unique and personalized.
2. Practice your painting technique on a scrap piece of wood before working on your actual flag.
3. Use high-quality brushes and paints for better results and longevity.
4. Take your time and work in a well-lit and well-ventilated area.
5. Don’t be afraid to make mistakes. Woodworking is a learning process, and each project will improve your skills.
Remember, making a wooden flag is a creative and enjoyable experience, so have fun and let your imagination soar!
Most In-Depth Wood American Flag Build | Make Money Woodworking! | How to
In conclusion, crafting a wooden flag is not only a creative endeavor but also a meaningful way to showcase your patriotism. By following these step-by-step instructions, you can embark on a fulfilling and rewarding journey of woodworking. Remember to choose quality materials, plan your design carefully, and pay attention to detail in order to create a stunning wooden flag that will be cherished for years to come.
Additionally, the process of making a wooden flag can be a great opportunity to bond with loved ones or engage in a therapeutic hobby. Whether you are a seasoned woodworker or a beginner, this project allows you to unleash your creativity and test your skills. So gather your tools, grab your favorite piece of wood, and get started on your very own wooden flag. Let your imagination soar as you bring your vision to life and proudly display your handcrafted masterpiece.
- How to Waterproof the Inside of a Wood Planter Box - May 11, 2024
- How to Build a Raised Garden Bed With Wood - May 11, 2024
- How to Transfer Photos to Wood With Nail Polish Remover - May 11, 2024