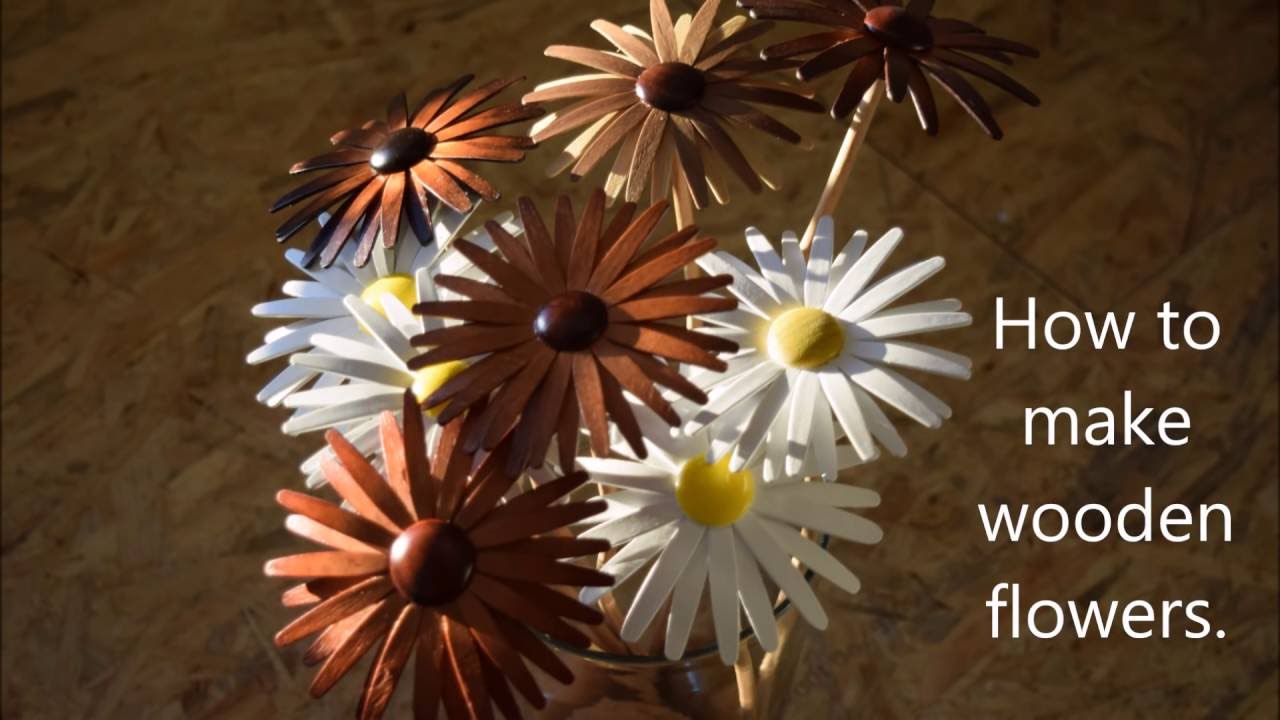
Are you looking to add a touch of natural beauty to your home decor or create personalized gifts that will last a lifetime? Look no further than the art of making wood flowers. In this guide, we will explore the fascinating world of crafting these exquisite blooms from wood, allowing you to unleash your creativity and create stunning floral arrangements that will leave everyone in awe.
Wood flowers offer a unique and timeless alternative to traditional fresh flowers. Not only are they environmentally friendly, but they also provide a lasting and low-maintenance option for those who want to enjoy the beauty of flowers without the worry of wilting or watering. Whether you are a seasoned crafter or a beginner looking to embark on a new creative journey, this guide will take you step-by-step through the process of making wood flowers, from selecting the right materials to mastering the techniques that will bring your creations to life. So, grab your tools, unleash your imagination, and let’s delve into the enchanting art of making wood flowers.
How to Make Wood Flowers:
- Gather the necessary materials: wood, cutting tools, sandpaper, and paint.
- Choose the desired flower shape and draw it on the wood.
- Carefully cut out the flower shape using the cutting tools.
- Sand the edges and surface of the wood flower to smooth out any roughness.
- Apply paint or stain to the wood flower for a desired color or finish.
- Let the paint or stain dry completely before handling or displaying the wood flower.
How to Make Wood Flowers
Wood flowers have become a popular choice for home decor, weddings, and other special occasions. Not only are they beautiful and long-lasting, but they also offer a sustainable alternative to real flowers. If you’re interested in creating your own wood flowers, follow this step-by-step guide to get started.
Step 1: Gather Your Materials
Before you begin making wood flowers, it’s important to gather all the necessary materials. You will need thin wooden sheets, preferably made from birch or balsa wood, a cutting tool such as a scroll saw or a sharp knife, a hot glue gun, floral wire, and floral tape. Additionally, you may want to have acrylic paint and paintbrushes on hand if you wish to add color to your wood flowers.
Step 2: Choose a Flower Template

Next, you’ll need to choose a flower template to guide you in cutting the wooden sheets. There are numerous templates available online, ranging from simple roses to intricate daisies. Select a design that suits your preferences and print it out. Ensure that the template is scaled appropriately to achieve the desired size for your wood flowers.
Now that you have your materials and template ready, let’s move on to the next steps in creating stunning wood flowers.
Step 3: Trace and Cut the Wooden Sheets
Place the flower template on top of the wooden sheet and secure it in place with tape if necessary. Use a pencil to trace the outline of the flower onto the wood. Once the outline is complete, carefully cut along the traced lines using a scroll saw or a sharp knife. Take your time and work slowly to ensure clean and precise cuts.
Once you have all the individual flower parts cut from the wooden sheets, use sandpaper to smooth any rough edges. This step is crucial to achieve a polished and professional look for your wood flowers.
Step 4: Assemble the Wood Flowers
Now that you have all the wooden flower parts cut and sanded, it’s time to assemble them into beautiful blooms. Begin by attaching floral wire to the back of each flower piece using hot glue. Make sure the wire is securely attached to provide stability and flexibility to the wood flower.
Once all the individual flower parts have wire attached, start layering them together, using hot glue to secure each layer. Be mindful of the design and arrangement of the petals as you assemble the wood flower. Take your time and make adjustments as needed to achieve the desired look.
Step 5: Finishing Touches
After assembling the wood flower, you may choose to leave it in its natural wooden state or add some color. If you decide to paint your wood flower, use acrylic paint and a small paintbrush to carefully apply the desired colors. Allow the paint to dry completely before handling the wood flower.
To give the wood flower a more realistic look, you can also add details such as shading or highlights using acrylic paint. Experiment with different techniques to create unique and personalized wood flowers.
Step 6: Display and Enjoy
Once your wood flowers are complete, you can display them in a vase, use them to create floral arrangements, or incorporate them into various craft projects. The beauty of wood flowers is that they require no maintenance and will last for years to come, serving as a timeless decorative element.
Now that you know how to make wood flowers, unleash your creativity and enjoy the process of crafting these unique and sustainable floral creations.
Frequently Asked Questions
Here are some commonly asked questions about how to make wood flowers:
1. How do I choose the right type of wood for making flowers?
When selecting wood for making flowers, it’s important to consider the durability and texture of the material. Hardwoods like oak, maple, and cherry are often preferred due to their strength and resilience. These woods can be easily carved and shaped into intricate flower designs. Softwoods like pine can also be used, but they may require additional treatments to prevent warping or damage over time.
It’s recommended to choose wood with a smooth surface and minimal knots or imperfections, as these can affect the final appearance of the flower. Additionally, consider the color and grain pattern of the wood to achieve the desired aesthetic for your wooden flowers.
2. What tools do I need for making wood flowers?
To create wood flowers, you will need a variety of tools. Some essential tools include a carving knife or chisel for shaping the wood, sandpaper or a sanding block for smoothing the surfaces, and a drill for creating holes or adding details. A coping saw or scroll saw can be used for intricate cutting, while a woodburning tool allows for decorative detailing and texturing.
Other useful tools may include clamps for securing the wood, a mallet for hammering in delicate pieces, and a paintbrush or airbrush for applying finishes or colors. It’s important to have proper safety equipment such as gloves, goggles, and a dust mask to protect yourself during the woodworking process.
3. How can I make wood flowers more realistic?
To make wood flowers appear more realistic, attention to detail is key. Start by studying real flowers and observing their shapes, textures, and colors. Use this knowledge as a reference when carving or shaping the wooden petals and leaves.
Add depth and dimension to the flowers by using carving techniques to create realistic contours and curves. Consider adding subtle grain lines or texture to mimic the natural patterns found in real flowers. Applying a wood stain or paint can enhance the authenticity of the flower and help to bring out the details.
4. How do I assemble the different parts of a wood flower?
Assembling the different parts of a wood flower requires careful planning and precision. Begin by carving or cutting out each individual petal, leaf, and stem. Ensure that the pieces fit together properly before moving on to the next step.
Depending on the design, you may need to create holes or slots in the petals and stems to connect them securely. Glue or adhesive can be used to hold the pieces together, but make sure to choose a strong and durable option that is compatible with wood. Allow sufficient drying time to ensure a solid bond before proceeding to the next stage of the assembly process.
5. How can I preserve and protect my wood flowers?
To preserve and protect your wood flowers, it’s important to apply a suitable finish or coating. This helps to seal the wood and protect it from moisture, UV damage, and dirt. Before applying any finish, ensure that the wood surface is clean and free from dust or debris.
Consider using a clear varnish, polyurethane, or lacquer to provide a protective layer while maintaining the natural beauty of the wood. Apply multiple thin coats rather than a single thick coat for better coverage and durability. If desired, you can also add a layer of wax or polish to enhance the shine and protect the finish over time. Regular cleaning and gentle handling will help to extend the lifespan of your wood flowers.
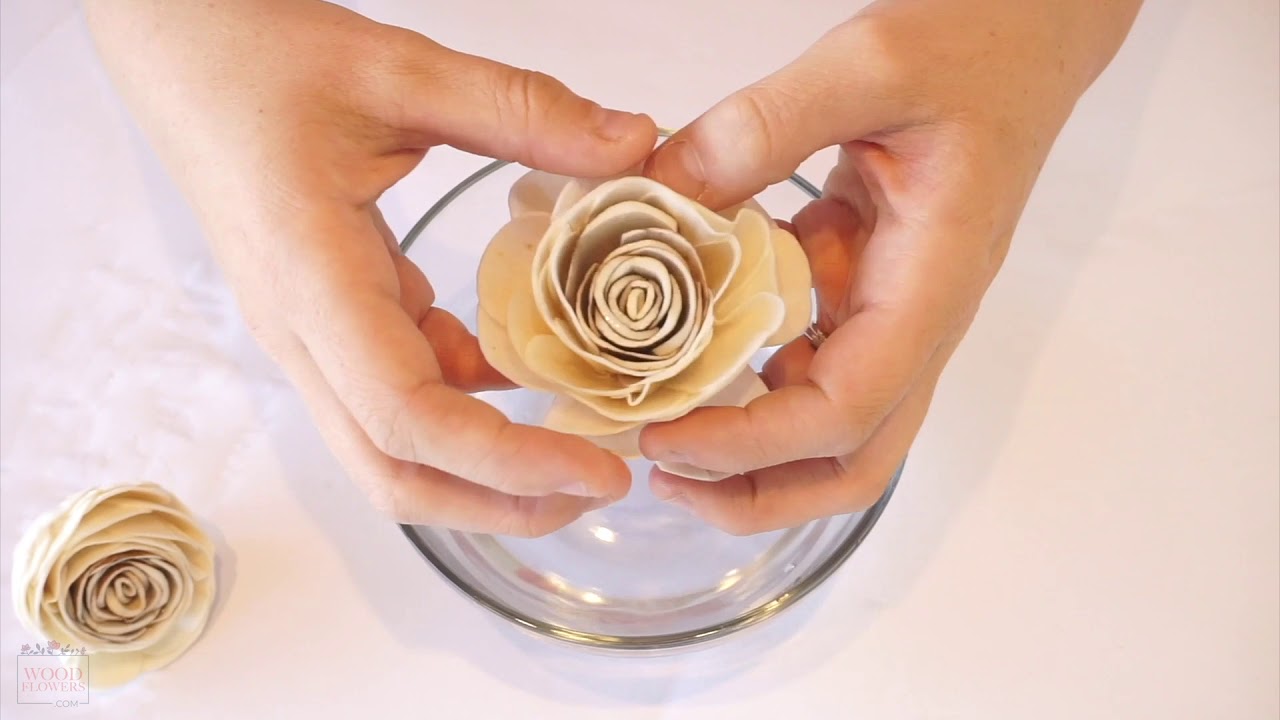
Wooden roses tutorial. FarmCraft101 Valentines flowers DIY idea.
In conclusion, learning how to make wood flowers is a delightful and rewarding craft that allows individuals to explore their creativity while adding a touch of natural beauty to any space. By following the step-by-step instructions provided, anyone can master the art of crafting these charming wooden blossoms. The versatility of wood flowers also opens up a world of possibilities, from creating unique centerpieces for special occasions to designing everlasting bouquets that can be cherished for years to come.
Moreover, the process of making wood flowers offers a therapeutic escape from everyday stress, providing a sense of accomplishment and relaxation. As one immerses themselves in the intricate details of shaping and painting each petal, they can find solace in the rhythm and focus required. Whether you are a seasoned crafter or a complete beginner, the journey of creating wood flowers promises to be a fulfilling and enjoyable endeavor.
So, why not embark on this creative adventure and discover the joy of making wood flowers? With a few basic materials and a sprinkle of imagination, you can transform simple pieces of wood into timeless works of art. Let your creativity bloom and explore the endless possibilities of this unique craft.
- How to Apply Eco Wood Treatment - April 13, 2024
- How to Use Pc Woody Wood Epoxy - April 13, 2024
- How to Treat Wood Fungus - April 13, 2024