Are you a woodworking enthusiast looking to add a touch of craftsmanship to your home? Or perhaps you’re simply seeking a creative outlet to showcase your DIY skills? Look no further, as today we embark on a journey of crafting a timeless wooden box. In this guide, we’ll explore the intricate art of woodworking, step-by-step, empowering you to create a beautiful and functional wooden box that will be admired for years to come.
Woodworking is an age-old craft that combines precision, creativity, and passion. The process of transforming raw pieces of wood into a stunning finished product is both rewarding and fulfilling. In this tutorial, we will delve into the world of woodworking, specifically focusing on the construction of a wooden box. Whether you’re a beginner or an experienced woodworker, this guide will provide you with the necessary knowledge and techniques to create a box that reflects your own personal style and showcases the beauty of natural wood. So, let’s roll up our sleeves, grab our tools, and embark on this woodworking adventure together!
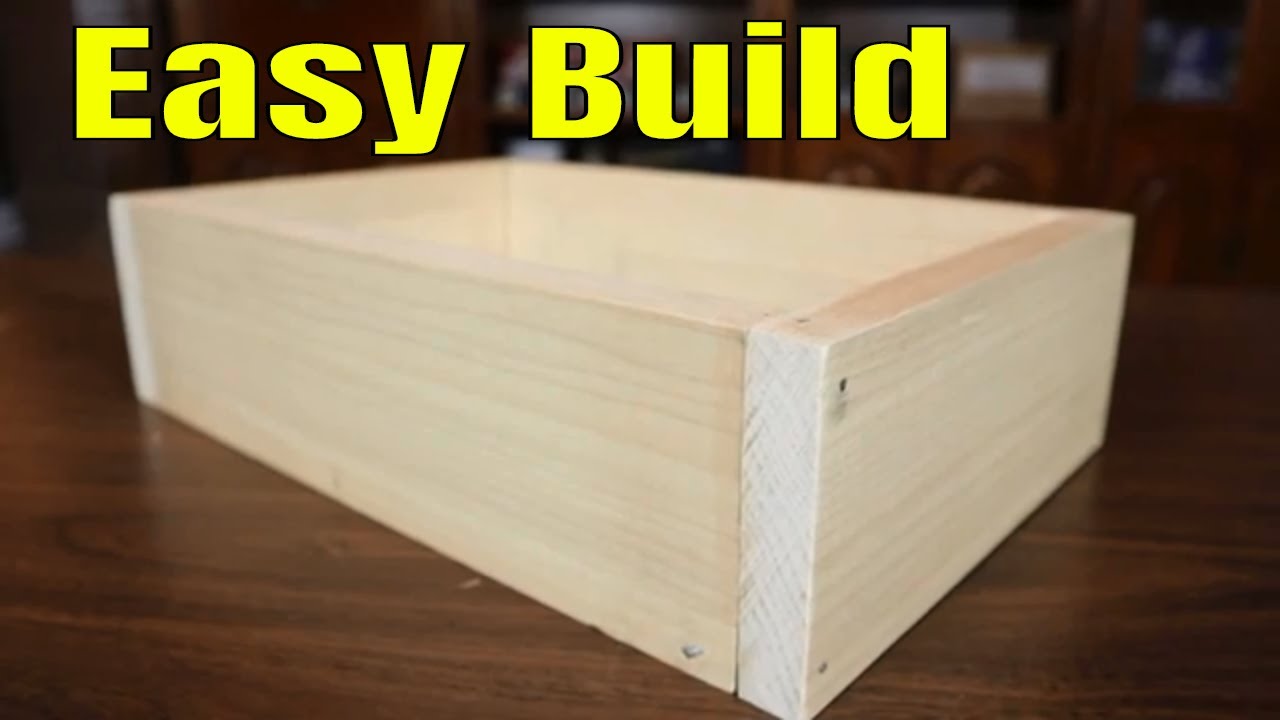
- Measure and cut the wood pieces to the desired dimensions.
- Use wood glue and clamps to join the pieces together.
- Add reinforcement with screws or nails if needed.
- Sand the box to smooth any rough edges.
- Apply a coat of wood stain or paint for a finished look.
- Allow the box to dry completely before using or decorating.
Introduction:
In this step-by-step guide, we will walk you through the process of making a wooden box. Whether you are a DIY enthusiast or just looking to create a customized storage solution, this informative article will provide you with all the necessary information to craft your very own wooden box. From selecting the right materials to assembling the pieces, we’ve got you covered. So, let’s get started!
Materials Needed:
Before diving into the construction process, gather the following materials:
– Wood boards (preferably hardwood)
– Measuring tape
– Pencil
– Saw
– Sandpaper
– Wood glue
– Clamps
– Nails or screws
– Hammer or screwdriver
– Finishing materials (stain, paint, varnish, etc.)
Step 1: Planning and Measuring
The first step in making a wooden box is to plan and measure the dimensions. Consider the purpose of the box and determine the appropriate size. Using a measuring tape, mark the desired length, width, and height on the wood boards. Double-check your measurements to ensure accuracy.
Step 2: Cutting the Wood
Once you have your measurements, it’s time to cut the wood boards accordingly. Use a saw to carefully cut along the marked lines. Take your time to make precise cuts, as they will determine the final look and functionality of the box. Remember to wear appropriate safety gear, such as goggles and gloves, while using the saw.
Step 3: Sanding the Edges
After cutting the wood, you may notice rough edges or splinters. To smoothen them out, use sandpaper to sand the edges. This step is essential not only for aesthetic purposes but also for safety, as it minimizes the risk of getting splinters while handling the box.

Step 4: Assembling the Pieces
Now that you have the individual pieces of wood, it’s time to assemble them into a box shape. Apply wood glue to the edges of the boards and join them together, ensuring they fit snugly. Use clamps to hold the pieces in place while the glue dries. If desired, you can also reinforce the joints with nails or screws for added stability.
Step 5: Finishing Touches
Once the glue has dried and the box is assembled, you can move on to the finishing touches. Sand the entire surface of the box to create a smooth finish. Then, apply your desired finishing material, such as stain, paint, or varnish, following the manufacturer’s instructions. This step not only enhances the appearance of the box but also protects it from moisture and wear.
Step 6: Final Assembly
After the finishing material has dried, you can complete the final assembly of the wooden box. Attach any additional hardware, such as hinges or handles, using the appropriate tools. Double-check that all the components are securely fastened and functioning properly.
Step 7: Enjoy Your Wooden Box
Congratulations! You have successfully made your own wooden box. Whether you use it for storage, decoration, or gifting purposes, your handmade creation is sure to bring a sense of pride and satisfaction. Feel free to personalize it further by adding decorations or embellishments to make it truly unique.
Remember, making a wooden box requires precision and attention to detail. Take your time, follow the steps carefully, and enjoy the process of bringing your vision to life. Happy woodworking!
Frequently Asked Questions
Here are some common questions about how to make a wooden box:
Q: What tools do I need to make a wooden box?
To make a wooden box, you will need a few basic tools:
1. Saw: You’ll need a saw to cut the wood into the desired dimensions for your box.
2. Hammer: A hammer will be useful for nailing or securing the pieces of wood together.
3. Sandpaper: Sandpaper will help you smooth out any rough edges or surfaces on the wood.
4. Measuring Tape: You’ll need a measuring tape to accurately measure the dimensions for your box.
Q: What type of wood should I use for making a wooden box?
The type of wood you use for making a wooden box will depend on your personal preference and the intended use of the box. Some commonly used types of wood for boxes include:
1. Plywood: Plywood is a cost-effective option and is readily available. It is great for simple, functional boxes.
2. Hardwood: Hardwood, such as oak or maple, is more durable and adds a touch of elegance to your box.
3. Softwood: Softwood, like pine or cedar, is lighter in weight and easier to work with, making it a good choice for beginners.
Q: How do I assemble the wooden box?
Here are the steps to assemble a wooden box:
1. Cut the wood: Measure and cut the pieces of wood according to the dimensions you want for your box.
2. Sand the edges: Use sandpaper to smooth out any rough edges on the wood pieces.
3. Assemble the sides: Apply wood glue to the edges of the side pieces and join them together using clamps. Allow the glue to dry.
4. Attach the bottom: Apply wood glue to the bottom edges of the assembled sides and attach the bottom piece. Secure it with nails or screws.
5. Finish the box: Sand the entire box to ensure smoothness and apply a finish or paint if desired.
Q: Can I add a lid to the wooden box?
Yes, you can add a lid to the wooden box. To make a lid, follow these steps:
1. Measure the top opening: Measure the dimensions of the top opening of your box.
2. Cut the lid piece: Cut a piece of wood according to the measured dimensions for the lid.
3. Attach hinges: Attach hinges to the back edge of the lid and the corresponding edge of the box to allow for easy opening and closing.
4. Finish the lid: Sand the lid and apply a finish or paint to match the box if desired.
Q: How do I personalize or decorate my wooden box?
There are various ways to personalize or decorate your wooden box:
1. Woodburning: Use a woodburning tool to create intricate designs or patterns on the surface of the box.
2. Stenciling: Use stencils and paint to add decorative elements or lettering to the box.
3. Inlays: Create inlays by cutting out shapes or patterns in a different type of wood and fitting them into the surface of the box.
4. Staining or painting: Use wood stains or paint to add color to the box, or enhance the natural beauty of the wood grain.

How to make a basic box. And why you need to know how. | Woodworking BASICS.
In conclusion, learning how to make a wooden box is a valuable skill that can bring immense satisfaction and practicality to your life. By following the steps and techniques outlined in this guide, you can create a beautiful and functional wooden box that will not only serve as a useful storage solution but also showcase your craftsmanship. Whether you are a beginner or an experienced woodworker, this project offers an opportunity to hone your skills and unleash your creativity.
Moreover, the process of making a wooden box allows you to connect with the rich tradition of woodworking and appreciate the beauty of natural materials. As you work with your hands, measuring, cutting, and assembling the pieces, you will develop a deep sense of accomplishment and pride in your creation. The versatility of wooden boxes also opens up endless possibilities for customization, enabling you to personalize your projects and create unique gifts for loved ones.
So, why not embark on this woodworking journey and discover the joys of creating your own wooden box? With patience, practice, and a little bit of imagination, you can transform a simple piece of wood into a cherished item that will stand the test of time. Start today and unlock your potential as a woodworker, leaving a lasting legacy of craftsmanship and creativity.
- How to Remove Glue From Wood Floor - April 14, 2024
- How to Dissolve Wood Glue - April 14, 2024
- How to Remove Wood Glue - April 14, 2024