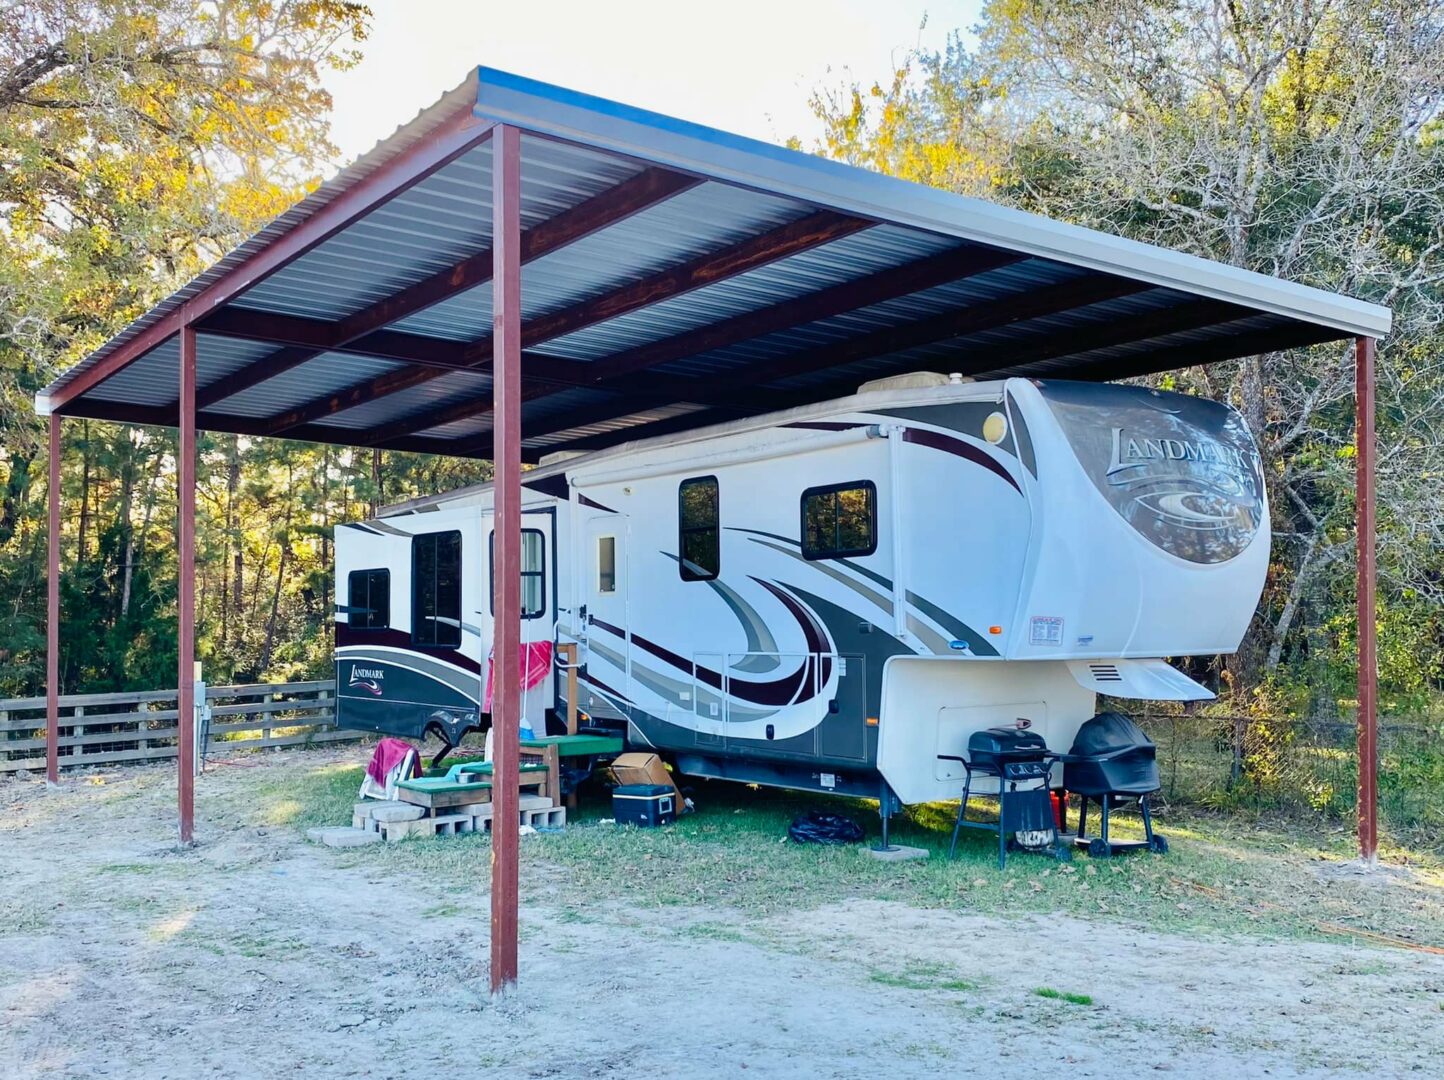
Are you looking for a cost-effective and practical solution to protect your RV from the elements? Look no further – building a wooden carport for your recreational vehicle might be the perfect project for you! Not only will it provide a safe and secure shelter for your RV, but it can also add value to your property. Whether you’re a seasoned DIY enthusiast or a novice looking to take on a new challenge, this guide will walk you through the steps of constructing a sturdy and stylish RV carport using wood.
Building a wooden RV carport offers a multitude of benefits. Not only is wood a versatile and readily available material, but it also adds a natural aesthetic appeal to any outdoor space. Additionally, wood is relatively easy to work with, making it an excellent option for those looking to embark on a DIY project. By following the step-by-step instructions in this guide, you will gain the knowledge and skills needed to construct a functional and visually appealing carport that will protect your RV for years to come. So, grab your tools and let’s get started on this exciting journey of building your very own wooden RV carport.
How to Build a RV Carport Out of Wood
- Measure and mark the dimensions of the carport on the ground.
- Clear the area and dig holes for the support posts.
- Set the posts in the holes and secure them with concrete.
- Attach the beams to the top of the posts.
- Add crossbeams for added stability.
- Install the roof trusses and secure them to the beams.
- Attach plywood sheets to the trusses for the roof.
- Paint or stain the wood to protect it from the elements.
How to Build an RV Carport out of Wood
Building a carport for your RV can provide protection from the elements and extend the lifespan of your vehicle. While there are various materials you can use, constructing an RV carport out of wood offers durability, flexibility, and a natural aesthetic appeal. In this guide, we will walk you through the step-by-step process of building a sturdy and functional RV carport using wood.
1. Planning and Preparation
Prior to starting the construction, it is essential to plan and prepare adequately. Begin by checking your local building codes and acquiring any necessary permits. Measure the dimensions of your RV and determine the appropriate size for your carport. Clear the area where the carport will be built, ensuring it is level and free from any obstructions. Gather all the required tools and materials, including wood beams, posts, concrete, screws, and roofing materials.
Next, create a detailed blueprint of your carport, indicating the dimensions, post locations, and roof design. This will serve as your guide throughout the construction process. It is crucial to have a clear plan to avoid errors and ensure a smooth building process.
2. Setting the Foundation
Start by marking the locations for the corner posts of your carport. Use a post hole digger to dig holes at least three feet deep at each corner. Place the posts in the holes and fill them with concrete, ensuring they are plumb and level. Allow the concrete to cure according to the manufacturer’s instructions.
Once the concrete has fully cured, attach anchor brackets to the top of each post. These brackets will provide a secure connection between the posts and the beams. Measure and cut the wood beams to the appropriate length, making sure they align with the dimensions of your carport. Attach the beams to the anchor brackets using screws, ensuring they are level and evenly spaced.
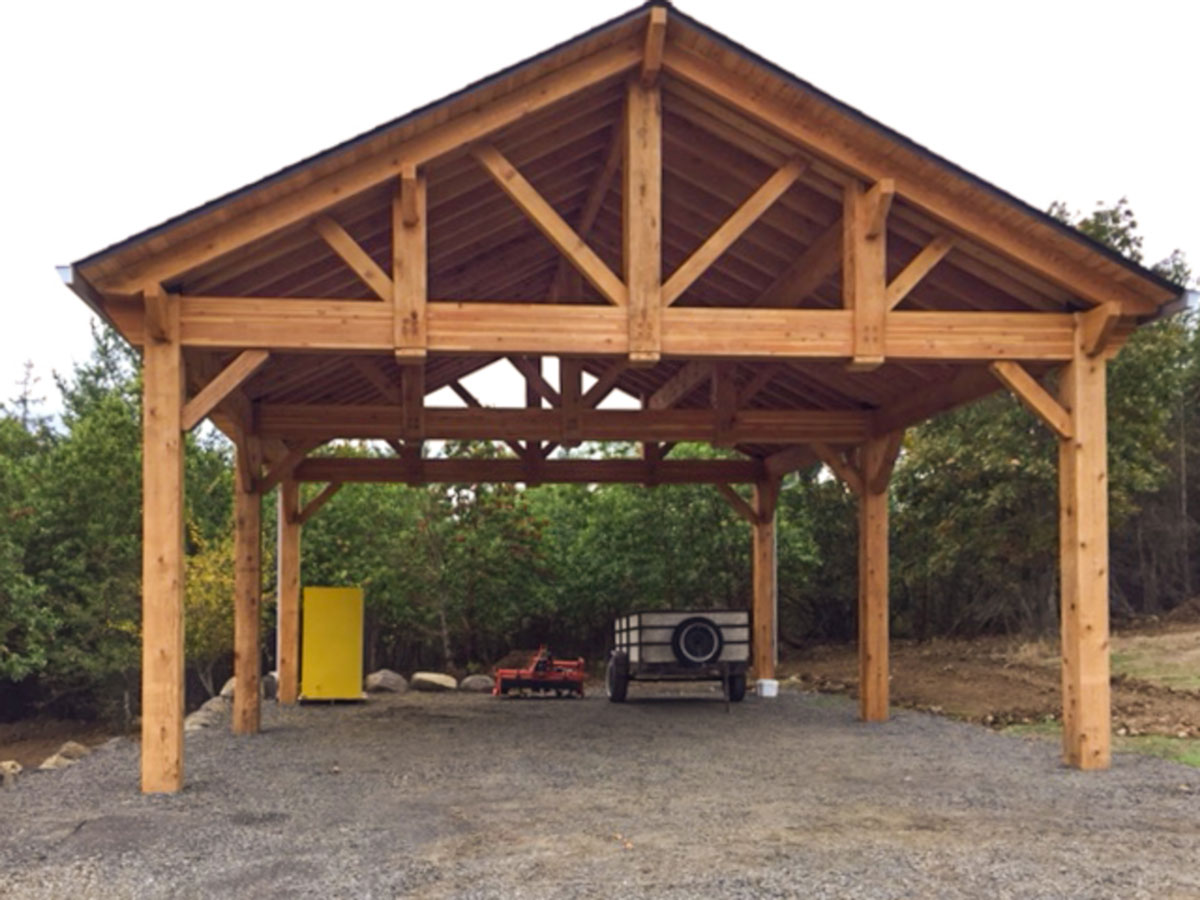
3. Framing the Structure

With the foundation in place, it’s time to frame the structure of the carport. Cut additional wood beams and attach them horizontally between the vertical beams, creating the framework for the walls. Use screws to secure the beams together, ensuring they are evenly spaced and level.
Once the walls are framed, install the roof trusses by attaching them to the top of the vertical beams. Ensure the trusses are spaced evenly and securely fastened to provide adequate support for the roof. Finally, install plywood or another suitable material on top of the trusses to create the roof deck.
4. Roofing and Finishing Touches
Cover the roof deck with roofing materials of your choice, such as asphalt shingles or metal sheets. Ensure the roofing materials are properly installed and sealed to prevent water leakage. Additionally, consider adding gutters and downspouts to redirect rainwater away from the carport.
Finish the carport by adding any desired finishing touches, such as painting or staining the wood, adding lighting fixtures, or installing storage cabinets. Regularly inspect and maintain your RV carport to ensure its longevity and to keep your vehicle protected from the elements.
5. Maintenance Tips
Regularly inspect the carport for any signs of damage or wear. Repair any loose or damaged components promptly to maintain the structural integrity. Apply a protective coating or sealant to the wood to prevent rot and decay. Additionally, remove any debris or snow buildup from the roof to prevent unnecessary stress on the structure.
By following these steps and conducting proper maintenance, you can build a durable and functional RV carport out of wood that will provide reliable protection for your vehicle for years to come.
Frequently Asked Questions
Here are some common questions about building a wooden RV carport:
1. What materials do I need to build a wooden RV carport?
Building a wooden RV carport requires the following materials:
– Pressure-treated lumber for the main structure, such as posts, beams, and rafters.
– Plywood or oriented strand board (OSB) for the roof sheathing.
– Metal roofing panels or shingles for the roof covering.
– Galvanized steel brackets and fasteners for joining the components together.
– Concrete mix for the footings and anchors.
– Various tools, including a circular saw, drill, level, tape measure, and hammer.
2. How do I prepare the site for a wooden RV carport?
Before building a wooden RV carport, you should:
– Clear the area of any obstacles, such as rocks, trees, or vegetation.
– Level the ground using a shovel or a small excavator.
– Mark the perimeter of the carport using stakes and string.
– Dig holes for the footings according to the local building codes and regulations.
– Pour concrete into the holes and embed anchor brackets to secure the posts.
3. What are the steps to build a wooden RV carport?
Here is a general outline of the steps involved in building a wooden RV carport:
– Measure and mark the dimensions of the carport on the ground.
– Install the main posts by setting them in the concrete footings.
– Attach the beams and rafters to the posts using galvanized brackets.
– Install the roof sheathing, ensuring proper alignment and overlap.
– Add the roof covering, whether it is metal panels or shingles.
– Install any additional features, such as gutters or side walls.
– Make sure all connections are secure and reinforce any weak areas.
4. Do I need a building permit to construct a wooden RV carport?
The requirement for a building permit to construct a wooden RV carport can vary depending on your local building codes and regulations. It is advisable to check with your local authorities to determine if a permit is required. Even if a permit is not necessary, it is always a good idea to follow proper building practices to ensure the safety and durability of your carport.
5. How long does it take to build a wooden RV carport?
The time it takes to build a wooden RV carport can vary based on several factors, including the size of the carport, the complexity of the design, and the level of experience of the builder. Typically, it can take a few days to a couple of weeks to complete the construction, considering the time required for site preparation, material acquisition, and the actual building process. It is essential to allocate sufficient time for each step and work at a steady pace to ensure a well-built carport.
Remember, safety should always be a top priority when undertaking any construction project. Ensure you have the necessary tools, materials, and knowledge before commencing the build. With proper planning and attention to detail, your RV carport will not only provide shelter for your vehicle but also enhance the overall aesthetics of your outdoor space. So, roll up your sleeves, gather your supplies, and enjoy the satisfaction of creating a functional and visually appealing carport for your RV. Happy building!
- How to Get Oak Wood in Minecraft - April 21, 2024
- How to Process Wood - April 21, 2024
- How to Install Wood Siding - April 21, 2024