Hey there!
Ever wanted to unleash your inner DIY guru and build your own wooden desk? Well, you're in luck! In this article, I'm going to walk you through the step-by-step process of creating a stunning and functional desk from scratch.
From selecting the perfect wood to mastering precise measurements, I've got you covered. So grab your tools and get ready to embark on a liberating journey of craftsmanship!
Let's dive in and bring your dream desk to life.
Brief Overview
I'll give you a brief overview of the current discussion topic.
Today, we'll be diving into the world of building a wooden desk. Whether you're a DIY enthusiast or simply looking to upgrade your workspace, this topic is perfect for those seeking liberation through hands-on creation.
Building a wooden desk requires careful planning and attention to detail. From selecting the right type of wood to understanding the necessary tools and techniques, there are several key factors to consider.

Throughout our discussion, we'll explore the various materials and tools needed, as well as the step-by-step process involved in constructing a sturdy and functional desk. We'll touch on topics such as measuring and cutting the wood, joining the pieces together, and adding finishing touches like sanding and staining.
quick answer
There are three quick answers that can help you solve your woodworking problems. Here they are:
- Measure twice, cut once: Precision is key in woodworking. Take the time to measure your materials accurately before making any cuts. This will ensure that everything fits together perfectly and prevents wasted materials.
- Use the right tools: Having the proper tools for the job can make all the difference. Invest in quality woodworking tools that are suited for the specific task at hand. This will ensure better results and make your work easier and more enjoyable.
- Follow a plan: Having a detailed plan or blueprint before you start can save you time and frustration. It will provide you with step-by-step instructions and measurements, guiding you through the process from start to finish.
- Practice makes perfect: Woodworking is a skill that improves with practice. Don't be discouraged if your first few projects don't turn out exactly as planned. Keep learning, experimenting, and honing your skills, and you'll soon be able to create beautiful and functional pieces of furniture.
Key Takeways
One key takeaway from this discussion is to measure materials accurately before making any cuts. This step is crucial in ensuring that the wooden desk is built correctly and meets all the necessary specifications. To help you understand the importance of accurate measurements, I have prepared a table that outlines the measurements required for each component of the desk:
| Component | Length (inches) | Width (inches) | Thickness (inches) |
|---|---|---|---|
| Desktop | 60 | 30 | 1 |
| Legs | 28 | 3 | 3 |
| Side Panels | 28 | 24 | 1 |
| Drawer Front | 28 | 6 | 1 |
| Drawer Sides | 12 | 6 | 0.75 |
Summary
As I summarize the key takeaways from our discussion on building a wooden desk, it's important to note that accurate measurements are crucial for ensuring a stable and aesthetically pleasing final product. Precision is the foundation upon which we'll build our liberation from shoddy craftsmanship.
The first step in this journey is to gather the necessary tools: a tape measure, a level, and a pencil. With these instruments in hand, we can confidently mark the dimensions of our desk, ensuring that each piece fits snugly together. Remember, the devil is in the details, so take your time when measuring.
Once the measurements are complete, it's time to move on to the cutting stage. Use a circular saw or a table saw to precisely cut the pieces according to your markings. Take extra care to make clean cuts, as any inaccuracies can lead to a wobbly desk.
With our measurements and cuts complete, we're now ready to move on to the assembly phase. Stay tuned for the detailed instructions on how to put all the pieces together and create a beautiful wooden desk that won't only serve us but also reflect our desire for liberation from mass-produced furniture.
Detailed Instructions
When it comes to building a wooden desk, detailed instructions are essential for success. Here are four key points to consider:
1) Required Materials and Tools – Make sure you have everything you need before you begin.
2) Step-By-Step Assembly Process – Follow a clear and precise sequence to avoid mistakes.
3) Tips for Measuring Accurately – Accurate measurements are crucial for a seamless final product.
4) Finishing and Staining Techniques – Learn how to properly finish and stain your desk for a professional look.
Required Materials and Tools
I have gathered all the necessary materials and tools to build a wooden desk.
To begin, I've acquired a sturdy and durable wooden plank, measuring 60 inches in length and 30 inches in width.
For the legs, I've selected four wooden posts, each measuring 28 inches in height.
Additionally, I've obtained screws, a power drill, a measuring tape, a saw, and sandpaper for a smooth finish. These materials and tools are essential for the successful construction of the desk.
With these in hand, I'm ready to embark on the step-by-step assembly process, where I'll guide you through each stage of building the desk, ensuring liberation and empowerment in creating your own functional piece of furniture.
Step-By-Step Assembly Process
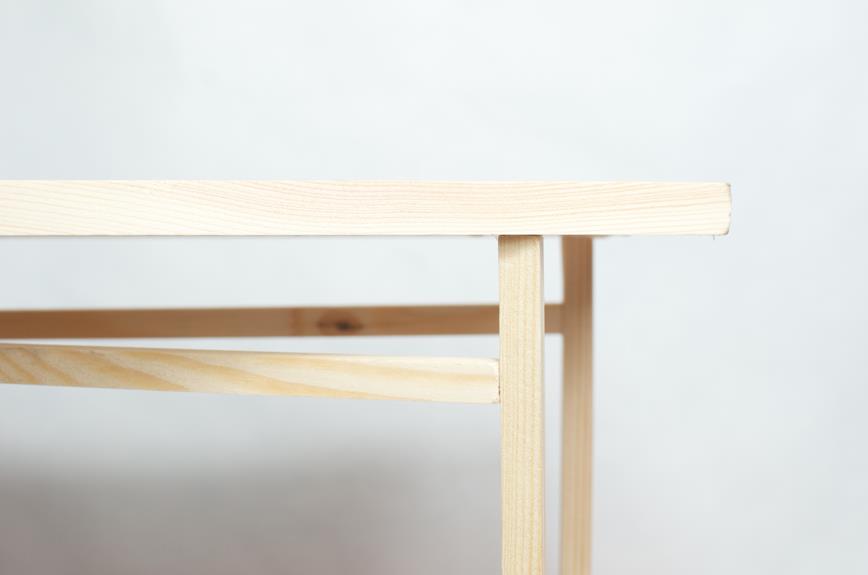
To start the step-by-step assembly process, first, attach the four legs to the wooden desk plank using screws. Make sure the legs are aligned properly with the corners of the plank before securing them. Use a screwdriver or a power drill to drive the screws into the pre-drilled holes on the legs and the plank. Ensure that the screws are tightened firmly to provide stability and support for the desk.
Once the legs are securely attached, move on to the next step. Liberating yourself from the constraints of traditional desks, this assembly process allows you to create a functional and stylish workspace tailored to your needs. Take your time and follow each step carefully to achieve the desired result.
Tips for Measuring Accurately
I always use a ruler and double-check my measurements, so that I can accurately measure and cut the wooden planks for my desk. Precision is key when building furniture, as even the slightest miscalculation can lead to a flawed final product.
To ensure accuracy, I recommend using a high-quality ruler with clear markings and a sturdy construction. When measuring, hold the ruler firmly against the edge of the material and align it with the desired measurement point. Avoid guessing or eyeballing measurements, as this can result in inconsistencies.
Double-check your measurements before making any cuts to ensure they're correct. By taking these precautions, you can ensure that your desk will be built with utmost accuracy and precision.
Now, let's move on to discussing the various finishing and staining techniques that can enhance the appearance of your wooden desk.
Finishing and Staining Techniques
There are several different finishing and staining techniques that can be used to enhance the appearance of a wooden desk, such as using a combination of varnish and stain to achieve a rich, polished look. Below is a table that outlines some popular techniques and their effects:
| Technique | Description | Effect |
|---|---|---|
| Stain | Penetrates the wood to add color | Enhances natural wood grain |
| Varnish | Creates a protective layer on top of the wood | Adds shine and durability |
| Paint | Covers the wood completely with color | Allows for customization and hides imperfections |
Each technique has its own advantages and can be used depending on the desired outcome. For a more natural look, using a stain can highlight the beauty of the wood grain. On the other hand, varnish provides a glossy finish and protects the wood from wear and tear. Lastly, painting the desk allows for endless possibilities in terms of color and design. Ultimately, the choice of finishing and staining technique depends on personal preference and the intended style of the wooden desk.
Troubleshooting Common Issues
I've found that one common issue when building a wooden desk is uneven staining, which can be resolved by properly preparing the wood surface beforehand.
To achieve a smooth and even stain, it's crucial to remove any existing finishes, such as old paint or varnish, using sandpaper or a chemical stripper. This step ensures that the wood is clean and ready to absorb the stain evenly.
After stripping, it's important to sand the wood surface using progressively finer grits of sandpaper, starting from coarse grit and ending with a fine grit. This not only smooths out any imperfections but also helps open up the wood pores for better stain absorption.
Finally, wipe the surface with a tack cloth to remove any dust or debris before applying the stain.
Final Thought
I'm confident that using quality materials and following these steps will result in a beautiful wooden desk that will last for years to come. Building a wooden desk requires careful planning and execution.
First, gather all the necessary materials, including solid wood boards, screws, sandpaper, wood glue, and a drill. Start by measuring and cutting the wood boards to the desired dimensions for the top and sides of the desk. Use a miter saw for precise cuts.
Next, assemble the frame by attaching the side boards to the top using wood screws. Reinforce the joints with wood glue for added strength. Once the frame is secure, sand the surface to remove any rough edges or imperfections.
Apply multiple coats of stain or paint to protect the wood and enhance its appearance. Finally, attach the legs to the bottom of the desk, ensuring they're level and stable. Use a drill to secure them firmly in place.
Remember to follow safety precautions throughout the process, such as wearing protective goggles and using proper ventilation when working with stain or paint.
With attention to detail and precision, your wooden desk will be a durable and beautiful addition to your home or office.
Frequently Asked Questions
Can I Use Any Type of Wood to Build a Wooden Desk?
Yes, you can use various types of wood to build a wooden desk. The choice of wood depends on factors like durability, aesthetics, and budget. Consider options like oak, maple, walnut, or cherry for your desk project.
What Tools Do I Need to Build a Wooden Desk?
To build a wooden desk, you'll need essential tools like a saw, drill, and sander. These tools are like the keys to unlock the door of creativity, allowing you to craft a desk that reflects your vision and sets you free.
How Long Does It Typically Take to Build a Wooden Desk?
It typically takes me around 10-15 hours to build a wooden desk. This includes measuring, cutting, assembling, sanding, and finishing. However, the exact time can vary depending on the complexity of the design and your level of experience.
Can I Customize the Size and Design of the Wooden Desk?
Yes, you can definitely customize the size and design of your wooden desk. You have the freedom to choose the dimensions and style that best fit your needs and preferences.
Is It Necessary to Sand and Finish the Wooden Desk After Building It?
It is necessary to sand and finish the wooden desk after building it. This process smooths out any rough surfaces and adds a protective layer, enhancing the overall appearance and durability of the desk.
- How to Laser Engrave Wood - May 5, 2024
- How to Use Ryobi Wood Splitter - May 5, 2024
- How to Split Wood Youtube - May 5, 2024