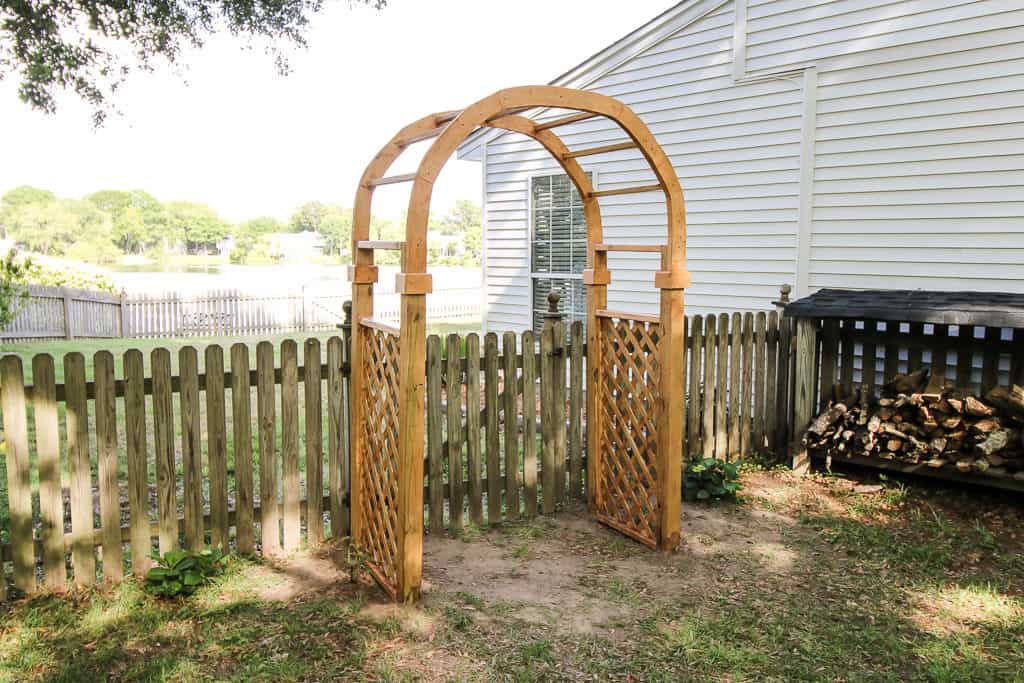
Are you looking to add a touch of elegance and charm to your garden or outdoor space? A wooden arch can be the perfect addition, providing a beautiful focal point and creating a whimsical atmosphere. Whether you’re a seasoned woodworker or a DIY enthusiast, this guide will walk you through the step-by-step process of creating your very own wooden arch, ensuring that it not only stands tall and sturdy but also showcases your craftsmanship and personal style.
From selecting the right type of wood to mastering the art of precise measurements and cuts, this comprehensive tutorial will equip you with the knowledge and skills needed to bring your vision to life. Whether you envision a classic design or a more contemporary twist, the versatility of wooden arches allows you to customize it to suit your preferences and complement the overall aesthetic of your outdoor space. So, get ready to roll up your sleeves, unleash your creativity, and embark on a woodworking adventure that will leave you with a stunning wooden arch that is sure to impress all who set eyes upon it.
How to Make a Wooden Arch:
- Measure and mark the desired height and width of the arch on your wooden board.
- Cut the board into the desired shape using a saw or a jigsaw.
- Sand the edges of the wooden arch to smoothen them.
- Apply wood glue to the joints and secure them together using clamps.
- Allow the glue to dry completely before removing the clamps.
- Apply a coat of wood stain or paint to finish the wooden arch.
How to Make a Wooden Arch
In this step-by-step guide, we will walk you through the process of creating a beautiful wooden arch. Whether you want to add a decorative element to your garden or create a stunning entrance for a special event, making a wooden arch is a rewarding and satisfying project. With some basic woodworking skills and the right tools, you can create a custom wooden arch that will enhance any outdoor space.
Step 1: Gather Materials and Tools
Before you begin, make sure you have all the necessary materials and tools. You will need:
- Pressure-treated lumber: 4×4 posts, 2×4 boards, and 1×4 slats
- Wood screws and nails
- Wood glue
- Measuring tape
- Pencil
- Saw (circular saw or miter saw)
- Drill
- Screwdriver
- Sandpaper
- Paint or stain (optional)
Once you have gathered all the materials and tools, you are ready to move on to the next step.
Step 2: Plan and Measure
Before you start cutting and assembling the wooden arch, it is important to plan and measure the desired size and shape. Consider the location where you will install the arch and the purpose it will serve. Measure the height and width you want the arch to be, and mark the measurements on the lumber.

Take into account any curves or angles you want to incorporate into the design. Use a pencil and a straight edge to draw the outline of the arch on the 2×4 boards that will form the arch’s frame.
Once you have planned and measured everything, you can move on to the next step.
Step 3: Cut and Assemble the Frame
Using a saw, carefully cut along the outline you drew on the 2×4 boards to create the frame of the arch. Make sure to follow the curves and angles precisely for a clean and professional look.
Next, position the 4×4 posts as the supports for the arch. Attach the frame to the posts using wood screws and wood glue for added stability. Make sure the frame is level and secure before moving on to the next step.
If desired, you can add additional cross supports between the posts for added strength and durability.
Once the frame is assembled, you can proceed to the next step.
Step 4: Attach the Slats
Now it’s time to attach the 1×4 slats to the frame of the arch. Start at the bottom and work your way up, spacing the slats evenly apart. Use wood screws or nails to secure the slats to the frame.
Before attaching each slat, make sure it is level and aligned with the previous one. Use a measuring tape and a level to ensure accuracy.
Continue attaching the slats until the entire frame is covered. Trim any excess length from the slats if necessary.
If desired, you can sand the wooden arch and apply a coat of paint or stain to protect it from the elements and enhance its appearance.
Step 5: Install the Wooden Arch
Finally, it’s time to install your wooden arch in its designated location. Dig two holes where the 4×4 posts will go and make sure they are deep enough to provide stability. Place the arch in the holes and fill them with concrete or soil, ensuring that the arch is level and secure.
Once the arch is installed, step back and admire your handiwork. You have successfully created a beautiful and functional wooden arch that will add charm and elegance to any outdoor space.
Frequently Asked Questions
Here are some commonly asked questions about how to make a wooden arch:
1. How do I choose the right type of wood for making a wooden arch?
When selecting wood for a wooden arch, it’s important to choose a type of wood that is both strong and weather-resistant. Some popular choices for wooden arches include cedar, redwood, and pressure-treated lumber. These types of wood are known for their durability and ability to withstand outdoor elements. Additionally, consider the aesthetic appeal of the wood and how it will complement the surrounding environment.
It’s also advisable to choose wood that is free from knots and other imperfections, as these can weaken the structure. Finally, be mindful of the size and dimensions of the wood, ensuring it is suitable for the desired height and span of the arch.
2. What tools and materials do I need to make a wooden arch?
To make a wooden arch, you will need several tools and materials. Some essential tools include a measuring tape, saw, drill, hammer, chisel, and level. These tools will help you accurately measure and cut the wood, as well as assemble and secure the arch.
In terms of materials, you will need the chosen type of wood for the arch, screws or nails for fastening the pieces together, wood glue for added strength, and sandpaper for smoothing the surfaces. Additionally, consider using a waterproof sealant or stain to protect the wood from moisture and prolong its lifespan.
3. What are the steps involved in building a wooden arch?
The process of building a wooden arch typically involves the following steps:
1. Measure and mark the desired height and width of the arch on the wood.
2. Cut the wood pieces to the appropriate length and angle using a saw.
3. Use a chisel or router to create notches or grooves in the wood pieces for proper assembly.
4. Apply wood glue to the joints and assemble the pieces, ensuring they are aligned and level.
5. Secure the joints with screws or nails, using a drill or hammer.
6. Sand the surfaces of the arch to smooth out any rough edges or imperfections.
7. Apply a waterproof sealant or stain to protect the wood and enhance its appearance.
4. How can I ensure the stability and strength of a wooden arch?
To ensure the stability and strength of a wooden arch, there are a few key considerations:
1. Use the appropriate type of wood that is known for its strength and durability.
2. Ensure the wood is free from knots and other weaknesses that could compromise the structure.
3. Properly measure and cut the wood to the correct dimensions, ensuring they fit together snugly.
4. Use wood glue and screws or nails to secure the joints, providing added strength and stability.
5. Check that the arch is level and properly aligned during assembly.
6. Consider adding additional support, such as metal brackets or braces, for added stability if needed.
5. How do I maintain and care for a wooden arch?
To maintain and care for a wooden arch, it’s important to regularly inspect it for any signs of damage or wear. Check for any loose joints or screws, and tighten or replace them as needed. Additionally, if the wood begins to show signs of weathering or fading, consider applying a fresh coat of sealant or stain to protect it.
Keep the area around the arch free from debris and vegetation, as these can cause moisture buildup and potentially lead to rot. If the arch is located in an area with extreme weather conditions, such as heavy rain or harsh sun exposure, consider providing extra protection by using a waterproof cover during inclement weather or applying a specialized wood preservative.

By using the right tools, selecting quality materials, and being patient throughout the construction process, one can create a sturdy and visually appealing wooden arch that adds charm and elegance to any outdoor space. Whether it’s for a garden, a wedding ceremony, or an architectural project, a well-crafted wooden arch is sure to impress and enhance the atmosphere. So, don’t hesitate to put your woodworking skills to the test and start building your very own wooden arch today. With dedication, practice, and a passion for craftsmanship, the possibilities are endless, and the end result will undoubtedly be a masterpiece that you can be proud of for years to come.
- How to Use Osburn Wood Stove - April 28, 2024
- How to Heat Wood - April 28, 2024
- How to Burn Wood Efficiently - April 28, 2024