I've discovered a game-changing way to make colored wood stain that will blow your mind. With just a few simple ingredients and a little bit of patience, you can transform any piece of wood into a vibrant work of art.
No more settling for the same old boring stains from the store. Now, you have the power to create unique, personalized colors that will truly set your woodworking projects apart.
Let me show you how to unleash your creativity and liberate your inner artist.
Overview
As I'm discussing the overview of making colored wood stain, it's important to understand the different techniques involved.
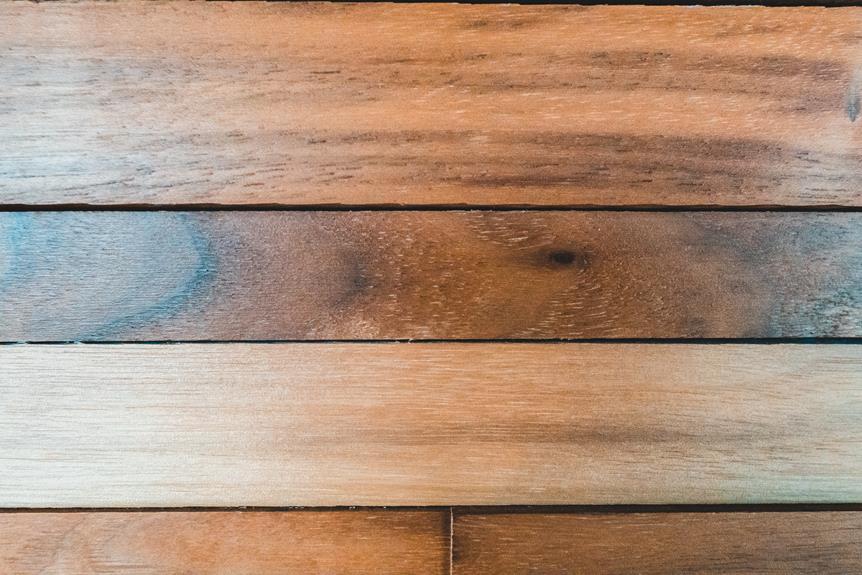
When it comes to creating colored wood stain, there are various methods that can be used to achieve the desired results. One popular technique involves using dyes to add color to the stain. Dyes are highly concentrated and can produce vibrant and intense colors. They can be mixed with a solvent, such as alcohol or water, to create a liquid dye solution that can be applied to the wood.
Another technique involves using pigments to create colored wood stain. Pigments are finely ground particles that can be mixed with a binder, such as linseed oil or varnish, to create a paste-like consistency. This paste can then be applied to the wood, allowing the pigments to adhere to the surface and create a colored finish.
Understanding these techniques is crucial in order to achieve the desired color and finish when making colored wood stain. By experimenting with different dyes and pigments, one can create unique and customized stains that will enhance the beauty of any wood project.

quick answer
I can give you a quick answer to your question. When it comes to making colored wood stain, there are a few key steps you need to follow. Here's a step-by-step guide to help you achieve the desired results:
- Choose your base stain: Start by selecting a clear wood stain as your base. This will act as a foundation for the color you want to achieve.
- Select your colorants: Decide on the color you want for your wood stain. You can use various colorants such as dyes or pigments to achieve the desired hue. Experiment with different ratios to find the perfect blend.
- Mix the colorants: Mix the colorants with the base stain in a separate container. Start with small amounts and adjust as needed until you achieve the desired color intensity.
- Test and apply: Before applying the colored wood stain to your project, test it on a scrap piece of wood to ensure you're happy with the color. Once satisfied, apply the stain using a brush or cloth, following the manufacturer's instructions.
By following these steps, you can create your own custom colored wood stain. Now, let's move on to the key takeaways from this discussion.
KEY TAKEAWAYS:
Key Takeways
One key takeaway from our discussion on Key Takeaways is that it's important to summarize the main points for easy reference.
In our quest for liberation, we often find ourselves immersed in deep discussions that challenge our perspectives and push us to think critically. These discussions are valuable opportunities to exchange knowledge, share experiences, and expand our understanding of the world around us.
By summarizing the main points, we create a concise and accessible resource that allows us to revisit and reflect upon the insights gained. This summary acts as a roadmap, guiding us on our journey towards liberation and empowering us to take action based on the knowledge we've acquired.
It serves as a reminder of the key ideas discussed and helps us stay focused on our goals. With this in mind, let's now delve into a summary of the key takeaways from our discussion on Key Takeaways.
Summary
I'll provide a concise summary of the main points discussed in our current topic, "How to Make Colored Wood Stain." During our discussion, we explored various methods of creating custom wood stains using natural ingredients. We emphasized the importance of liberation through self-expression and the ability to personalize our woodworking projects by making our own colored stains.
To further engage our audience and provide a more comprehensive understanding, let's take a look at a table outlining three different natural ingredients that can be used to create colored wood stains:
| Ingredient | Color | Benefits |
|---|---|---|
| Coffee | Rich brown | Environmentally friendly, easy to find, cost-effective |
| Turmeric | Vibrant yellow | Natural and non-toxic, adds warmth to wood, long-lasting |
| Beetroot | Deep red | Organic and safe, creates a unique and bold look, easy to prepare |
By using these natural ingredients, woodworkers can achieve a wide range of colors while avoiding harmful chemicals. It not only adds a personal touch to their projects but also aligns with their desire for liberation and eco-friendly practices.
Now that we have summarized the main points, let's dive into the detailed instructions on how to make these colored wood stains.
Detailed Instructions
When it comes to detailed instructions on making colored wood stain, there are a few key points to keep in mind.
First, gather all the required materials and tools, such as wood stain, paintbrushes, and sandpaper.
Second, follow a step-by-step application process, ensuring even coverage and smooth finish.
Third, consider tips for achieving desired colors, such as mixing different stains or diluting them with water.
Required Materials and Tools
I need the necessary materials and tools to make colored wood stain. In order to create a vibrant and personalized finish for my wood projects, I have compiled a list of essential items. Here is a breakdown of what I need:
| Materials | Tools |
|---|---|
| Natural wood stain base | Measuring cups |
| Pigment powders or liquid dyes | Mixing container |
| Denatured alcohol | Stirring stick |
| Clear shellac or varnish | Paintbrush |
| Disposable gloves | Sandpaper |
| Clean cloth or sponge | Dust mask |
These materials and tools are crucial for achieving the desired results when making colored wood stain. By having them at my disposal, I can confidently proceed with the step-by-step application process and transform plain wood into a work of art. So, let's dive into the next section and learn how to apply the stain effectively.
Step-By-Step Application Process
How can I effectively apply the colored wood stain step-by-step, and what're the specific instructions for each stage of the application process?
As someone experienced in woodworking, I understand the importance of achieving the desired colors when applying wood stain.
To begin, make sure the wood surface is clean and free from any dirt or debris.
Next, apply a thin and even coat of the colored wood stain using a brush or cloth, making sure to follow the grain of the wood.
Allow the stain to penetrate for about 10-15 minutes before wiping off any excess with a clean cloth.
For a deeper color, repeat the process, applying additional coats until the desired color is achieved.
Now, let's move on to some tips for achieving those desired colors.
Tips for Achieving Desired Colors
As someone experienced in woodworking, I understand that achieving the desired colors while applying wood stain can be challenging, but with these tips, it can become much easier.
First and foremost, it's crucial to prepare the wood surface properly. Sanding it down to a smooth finish ensures that the stain will be absorbed evenly.
Next, choose the right type of wood stain for the desired color. Oil-based stains tend to provide richer, deeper hues, while water-based stains offer more vibrant and varied options.
When applying the stain, always follow the manufacturer's instructions and work in small sections to avoid streaks or blotches. Additionally, consider experimenting with different application techniques such as wiping, brushing, or spraying to achieve unique effects.
Finally, don't forget to protect your finished project with a clear topcoat, as it enhances the color and provides long-lasting durability.
Safety Precautions to Consider
To ensure a safe woodworking experience, always wear protective goggles and gloves when handling wood stains, and be cautious of any potential hazards. Woodworking can be a fulfilling and liberating hobby, but it is important to prioritize safety to avoid accidents and injuries. Here are some key safety precautions to consider:
| Potential Hazards | Safety Precautions |
|---|---|
| Harmful fumes | Work in a well-ventilated area or wear a respirator |
| Skin irritation | Wear gloves and protective clothing |
| Eye injury | Always wear safety goggles |
| Fire hazard | Keep a fire extinguisher nearby and avoid using stains near open flames |
Alternative Natural Dye Options
I've been experimenting with using beet juice as an alternative natural dye option for my woodworking projects. It's an exciting journey to explore different ways of achieving vibrant colors without relying on synthetic chemicals.
Beet juice, derived from the humble root vegetable, offers a beautiful and eco-friendly option for staining wood. The process involves extracting the juice from the beets and then applying it to the wood surface. The natural pigments present in the beet juice penetrate the wood fibers, creating a unique and earthy hue.
The color intensity can be adjusted by varying the concentration of the beet juice or by adding other natural ingredients like vinegar or lemon juice. Not only does beet juice provide an environmentally friendly alternative, but it also adds a touch of uniqueness to my woodworking projects.
Give it a try and be amazed at the stunning results!
Final Thought
There's something about finding the perfect color for your wood stain that adds a sense of satisfaction to the final thought of any DIY project. As an experienced DIY enthusiast, I've come to appreciate the liberation that comes with customizing my wood stain to achieve the desired look and feel. When it comes to making colored wood stain, there are several options available that can help you achieve stunning results.
One of the most common methods involves using regular wood stain and adding colorants to achieve the desired hue. This method allows you to have greater control over the final color by adjusting the amount of colorant added. Additionally, you can experiment with different color combinations to create unique shades that perfectly match your vision.
Another approach is to use natural dyes, such as tea or coffee, to stain the wood. This method not only adds color but also enhances the natural beauty of the wood grain. Plus, using natural dyes aligns with the desire for liberation, as it avoids the use of harsh chemicals found in conventional wood stains.
Frequently Asked Questions
What Are Some Common Mistakes to Avoid When Making Colored Wood Stain?
Some common mistakes to avoid when making colored wood stain include using too much pigment, not testing the stain on a scrap piece of wood first, and not properly sealing the wood before applying the stain.
Can I Use Food Coloring to Make Colored Wood Stain?
Yes, I use food coloring to make colored wood stain. It's a simple and cost-effective option. Just mix the desired color with a clear wood stain or varnish until you achieve the desired shade.
How Long Does Homemade Colored Wood Stain Last?
Homemade colored wood stain can last for several months to a few years, depending on various factors such as the type of wood, the quality of the ingredients used, and the storage conditions. Regular upkeep can help prolong its lifespan.
Are There Any Safety Precautions I Should Take When Making Colored Wood Stain?
When making colored wood stain, it is important to take safety precautions. Wear protective gloves, goggles, and a mask to prevent any contact with harmful chemicals. Work in a well-ventilated area to minimize fumes.
Can I Mix Different Colored Wood Stains to Create a Custom Shade?
Yes, you can mix different colored wood stains to create a custom shade. For example, I once blended a dark walnut stain with a lighter oak stain to achieve a unique, rich brown color. It's a great way to unleash your creativity and personalize your wood projects.
- How to Install Vertical Wood Siding - April 23, 2024
- How to Build a Wooden Picnic Table - April 23, 2024
- How to Dye Wood Minecraft - April 23, 2024