Are you tired of the worn-out appearance of your old wood furniture? Do you long to give it a fresh, vibrant look that will revitalize your space? Well, you’re in luck! In this guide, we will explore the art of transforming old wood furniture through the power of paint. Whether you’re a seasoned DIY enthusiast or a beginner looking to embark on a creative project, this comprehensive tutorial will provide you with all the knowledge and inspiration you need to achieve stunning results. So, roll up your sleeves, grab your paintbrush, and let’s dive into the wonderful world of refinishing old wood furniture!
There’s something undeniably satisfying about breathing new life into an old piece of furniture, and painting it can be the perfect way to do just that. Not only does painting allow you to personalize your furniture to suit your taste and style, but it also provides an opportunity to preserve and protect the wood, ensuring its longevity. From prepping the surface to choosing the right type of paint and applying the finishing touches, we will guide you step-by-step through the process, sharing expert tips and tricks along the way. So, whether you’re looking to create a shabby chic aesthetic or a sleek, modern look, get ready to unleash your creativity and transform your old wood furniture into a stunning statement piece!
- Prepare the surface by cleaning and sanding the furniture.
- Apply a primer to help the paint adhere better.
- Choose a suitable paint color and type for your project.
- Apply several thin coats of paint, allowing each coat to dry before applying the next.
- Seal the paint with a clear topcoat for added durability.

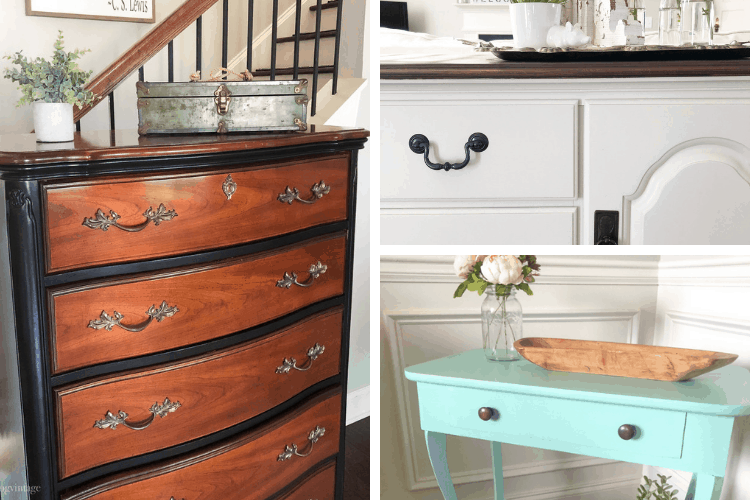
How to Paint Old Wood Furniture
Reviving old wood furniture with a fresh coat of paint can breathe new life into your space. Whether you have inherited a worn-out piece or simply want to update the look of your existing furniture, painting old wood furniture is a rewarding project that can transform the overall aesthetic of a room. In this step-by-step guide, we will walk you through the process of painting old wood furniture, from preparing the surface to applying the final coat of paint.
Step 1: Prepare the Surface
Before you begin painting, it is crucial to properly prepare the surface of the old wood furniture. Start by removing any hardware, such as handles or knobs, and set them aside in a safe place. Next, thoroughly clean the furniture using a mild detergent and warm water. This will help remove any dirt, grime, or grease that may be present on the surface. Once the piece is clean, use sandpaper or a sanding block to gently sand the entire surface. This will create a rough texture that allows the paint to adhere better.
After sanding, wipe down the furniture with a damp cloth to remove any dust or debris. If there are any imperfections or holes in the wood, fill them with wood filler and allow it to dry. Finally, use a tack cloth to remove any remaining dust particles, ensuring a smooth and clean surface for painting.
Step 2: Prime the Furniture
Applying a primer is essential when painting old wood furniture. Primer helps create a uniform surface and improves the adhesion of the paint. Choose a primer that is suitable for wood surfaces and apply it evenly using a paintbrush or roller. Make sure to follow the manufacturer’s instructions for drying time.
Once the primer has dried, inspect the furniture for any areas that may require additional sanding or filling. Sand those spots accordingly and remove any dust before proceeding to the next step.
Step 3: Apply the Paint

Now it’s time to bring your vision to life by applying the paint to the old wood furniture. Select a high-quality paint that is specifically designed for furniture. Depending on your preference, you can use a brush, roller, or spray paint for this step. Start by applying a thin and even coat of paint, working in the direction of the wood grain. Allow the first coat to dry completely before applying additional coats, following the manufacturer’s recommended drying time.
Between coats, lightly sand the surface for a smooth finish. This will help remove any brush strokes or imperfections. After applying the final coat of paint, let the furniture dry thoroughly before reattaching any hardware and placing it back in its desired location.
Step 4: Finishing Touches
Once the paint has dried completely, you can add finishing touches to enhance the durability and longevity of the painted wood furniture. Consider applying a clear topcoat or sealant to protect the paint and provide a smooth surface. This step is especially important if the furniture will be subject to heavy use or exposure to moisture.
Additionally, you can further personalize the piece by distressing it or applying decorative techniques such as stenciling or antiquing. These techniques can add character and uniqueness to your painted furniture.
Step 5: Enjoy Your Newly Painted Furniture
With the final touches complete, it’s time to enjoy your newly painted wood furniture. Place it in your desired location and admire the transformation it brings to your space. Remember to follow proper care and maintenance instructions to ensure the longevity of the paint and the beauty of your furniture for years to come.
Frequently Asked Questions
Here are some common questions about how to paint old wood furniture:
Q: What materials do I need to paint old wood furniture?
To paint old wood furniture, you will need the following materials:
– Sandpaper or a sanding block
– Primer
– Paintbrushes or a paint sprayer
– Paint in your desired color
– Clear protective finish (optional)
– Drop cloth or old sheets to protect your workspace
Q: How do I prepare the wood furniture for painting?
Preparing the wood furniture before painting is essential for a successful finish. Follow these steps:
1. Start by removing any hardware or knobs from the furniture.
2. Clean the furniture with a mild detergent and water to remove any dirt or grease.
3. Use sandpaper or a sanding block to smooth out any rough areas or old paint. This will help the new paint adhere better.
4. Wipe down the furniture with a clean, damp cloth to remove any dust from sanding.
Q: Should I use primer before painting the old wood furniture?
Using a primer before painting old wood furniture is highly recommended. Primer helps the paint adhere better to the surface and provides a smoother and more durable finish. It also helps to block any stains or discoloration that may be present on the wood.
Apply the primer evenly on the furniture, following the manufacturer’s instructions. Allow it to dry completely before applying the paint.
Q: What is the best paint for old wood furniture?
The best paint for old wood furniture depends on personal preference and the desired finish. However, it is generally recommended to use a high-quality latex or oil-based paint for durability and ease of application.
Choose a paint with good coverage and a finish that suits your style, such as satin, semi-gloss, or matte. Consider the color and texture you want to achieve and select the appropriate paint accordingly.
Q: How do I protect the painted wood furniture?
To protect the painted wood furniture and ensure its longevity, you can apply a clear protective finish. This finish acts as a barrier against scratches, stains, and moisture.
There are various options for protective finishes, such as polyurethane, varnish, or wax. Follow the manufacturer’s instructions for application and allow the finish to dry completely before using or placing objects on the furniture.
Not only does painting old wood furniture provide a cost-effective way to update your living space, but it also allows you to unleash your creativity and personal style. Whether you choose to go bold with vibrant colors or opt for a more subtle, distressed look, the possibilities are endless. So, don’t be afraid to tackle that old dresser or coffee table that’s been hiding in your attic. With a little time and effort, you can transform it into a beautiful, one-of-a-kind piece that will be the envy of all your friends and family. Start your painting journey today and unlock the endless possibilities that await you.
- How to Repair Split Wood Door - April 16, 2024
- How to Fix Gouges in Hardwood Floors - April 16, 2024
- How to Remove Wood Gorilla Glue - April 16, 2024