Wood is a timeless material that adds warmth, elegance, and character to any space. Whether it’s a beautiful wooden deck, a rustic piece of furniture, or a charming wooden fence, protecting wood from the elements is essential to ensure its longevity and beauty. One effective way to safeguard wood from moisture, rot, and decay is by water sealing it. In this guide, we will delve into the art of water sealing wood, exploring the benefits, techniques, and products that will help you preserve and enhance the natural beauty of this remarkable material.
Imagine the satisfaction of knowing that your wooden surfaces are not only visually stunning but also well-protected against the harsh effects of moisture. Water sealing wood is not only a practical solution but also a creative opportunity to elevate the aesthetics of your wooden assets. From preventing warping and cracking to maintaining the wood’s original color and grain, water sealing is a time-tested method that has been used by craftsmen and homeowners alike for generations. So, whether you are a DIY enthusiast looking to enhance your wooden projects or a homeowner seeking to extend the lifespan of your outdoor wooden structures, this guide will provide you with the knowledge and techniques to confidently water seal wood and enjoy its timeless beauty for years to come.
- Clean the wood surface to remove dirt and debris.
- Apply a wood cleaner or brightener to restore the wood’s natural color (optional).
- Choose a water sealant suitable for your wood type, such as a waterproofing stain or clear sealer.
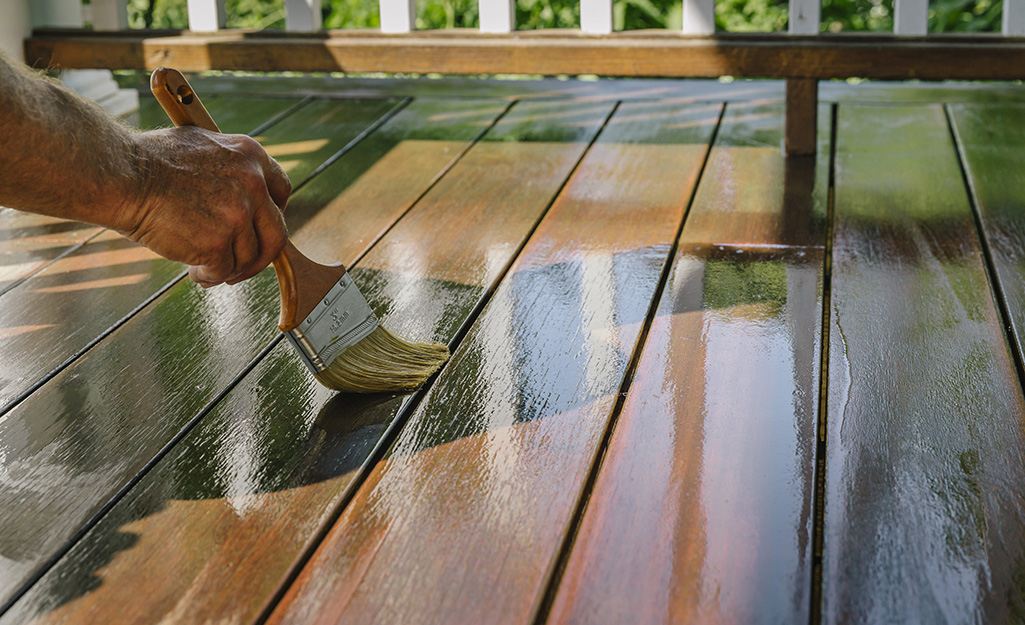
- Apply the water sealant using a brush or sprayer, following the manufacturer’s instructions.
- Allow the sealant to dry completely before exposing the wood to moisture.
How to Water Seal Wood: A Step-by-Step Guide
In this article, we will provide you with a comprehensive guide on how to effectively water seal wood. Water sealing is an essential process for protecting wood surfaces from moisture damage, rot, and decay. By following the steps outlined below, you can ensure that your wood stays in optimal condition for years to come.
Step 1: Prepare the Wood Surface
Before applying the water sealant, it is crucial to properly prepare the wood surface. Start by cleaning the wood using a mild detergent and water solution. Scrub the surface gently with a brush to remove any dirt, debris, or previous sealant. Rinse the wood thoroughly and allow it to dry completely before moving on to the next step.
Once the wood is dry, inspect it for any cracks, splinters, or damage. Use sandpaper to smooth out any rough areas and ensure a uniform surface. Fill in any cracks or gaps with an appropriate wood filler and allow it to cure according to the manufacturer’s instructions. Sand the filled areas lightly to achieve a smooth finish.
Step 2: Choose the Right Water Sealant
When it comes to water sealants, there are various options available in the market. It is essential to choose the right one for your specific wood type and intended use. Look for sealants that are specifically designed for outdoor wood applications and provide long-lasting protection against water damage.
Read the product labels and consider factors such as the type of wood, desired finish, and environmental conditions. Some sealants offer additional benefits like UV protection, mold and mildew resistance, and enhanced durability. Select a water sealant that best suits your needs and budget.
Step 3: Apply the Water Sealant

Before applying the water sealant, make sure to read and follow the manufacturer’s instructions carefully. Ensure that you are working in a well-ventilated area and wear appropriate protective gear such as gloves and a mask.
Using a brush, roller, or sprayer, apply a thin and even coat of the water sealant to the wood surface. Work in small sections, following the grain of the wood. Avoid applying too much sealant as it can lead to an uneven finish and longer drying times.
Allow the first coat to dry completely before applying additional coats, if necessary. Most sealants require multiple coats for optimal protection. Follow the recommended drying times between coats and ensure that each layer is dry to the touch before proceeding.
Step 4: Maintain and Reapply as Needed
After completing the water sealing process, it is important to regularly maintain and monitor the wood for signs of wear or damage. Keep an eye out for any areas where the sealant may have worn off or become ineffective.
Depending on the type of wood, environmental conditions, and usage, you may need to reapply the water sealant periodically. Follow the manufacturer’s guidelines for reapplication intervals and procedures. Regular maintenance and timely resealing will help prolong the life of the wood and ensure its continued protection against moisture.
Step 5: Enjoy the Benefits of Water Sealed Wood
By following these steps and properly water sealing your wood surfaces, you can enjoy the numerous benefits it offers. Water sealed wood is more resistant to rot, decay, and damage caused by moisture. It helps to maintain the natural beauty of the wood and extends its lifespan, making it a worthwhile investment.
Remember to always prioritize safety and read and follow the instructions provided by the sealant manufacturer. With proper maintenance and regular resealing, your water sealed wood will remain in excellent condition for years to come.
Frequently Asked Questions
Here are some commonly asked questions about how to water seal wood:
Q: Why is it important to water seal wood?
Water sealing wood is important because it helps protect the wood from moisture damage. When wood is exposed to water, it can absorb the moisture, causing it to swell, warp, or rot over time. By applying a water sealant, you create a protective barrier that prevents water from penetrating the wood, keeping it in good condition and extending its lifespan.
Additionally, water sealing also helps to prevent the growth of mold, mildew, and other fungi that thrive in moist environments. By keeping the wood dry, you reduce the risk of these organisms damaging the wood and compromising its structural integrity.
Q: When should I water seal wood?
It is recommended to water seal wood when it is new or freshly sanded, as this will ensure maximum penetration of the sealant into the wood fibers. However, if you have existing wood that has not been sealed, it is never too late to apply a water sealant. The best time to do so is during dry weather conditions when there is no rain in the forecast for at least 24 hours.
Regular maintenance is also important to keep the wood properly sealed. Depending on the type of water sealant used, you may need to reapply it every 1-3 years or as recommended by the manufacturer. Pay attention to any signs of water damage or wear on the sealant, and reseal as necessary.
Q: What are the steps to water seal wood?
The process of water sealing wood typically involves the following steps:
1. Clean the wood surface: Remove any dirt, dust, or debris from the wood using a brush or damp cloth. Allow the wood to dry completely before proceeding.
2. Sand the wood (if necessary): If the wood has rough or uneven surfaces, sand it to achieve a smooth finish. This will help the sealant adhere better to the wood.
3. Apply the water sealant: Using a brush, roller, or sprayer, apply the water sealant evenly onto the wood surface. Follow the manufacturer’s instructions regarding the recommended number of coats and drying time between coats.
4. Allow the sealant to dry: Once the sealant has been applied, allow it to dry completely. This may take several hours or days, depending on the type of sealant and weather conditions.
Q: Can I paint or stain over a water sealant?
Yes, it is possible to paint or stain wood that has been water sealed. However, it is important to note that the water sealant may affect the adhesion and appearance of the paint or stain. Before applying any paint or stain, make sure the sealant has fully cured and follow the manufacturer’s recommendations for compatibility with other finishes.
If you plan to paint the wood, choose a paint specifically designed for exterior use and ensure that it is compatible with the water sealant. When staining, opt for a stain that is formulated to be used over sealed wood surfaces. Always test the paint or stain on a small inconspicuous area first to ensure the desired results.
Q: Can I water seal wood indoors?
Yes, water sealing wood can be done indoors. However, it is important to ensure proper ventilation during the application and drying process. Open windows or use fans to promote air circulation and prevent the buildup of fumes. Choose a water sealant that is labeled for indoor use, as some sealants may emit strong odors or contain chemicals that are not suitable for enclosed spaces.
When water sealing wood indoors, protect surrounding areas with drop cloths or plastic sheets to prevent any potential drips or spills from damaging floors or furniture. Follow the same steps for cleaning, sanding, and applying the sealant as you would for outdoor wood surfaces.

In addition to the practical benefits of water sealing wood, there is also a sense of satisfaction that comes with taking care of something that holds both aesthetic and sentimental value. By investing time and effort into the proper treatment of wood, you are not just extending its lifespan, but also preserving the memories and stories associated with it. Whether it’s a cherished piece of furniture, a deck where countless summer barbecues have taken place, or an heirloom piece passed down through generations, water sealing ensures that these objects remain functional and beautiful for years to come. So, take pride in being a caretaker of wood and let the knowledge gained from this guide empower you to protect and enhance the longevity of your wooden treasures.
- How to Refinish a Table That Is Not Real Wood - May 9, 2024
- How to Fake Wood Paneling - May 9, 2024
- How to Cover Ugly Wood Paneling - May 9, 2024