Do you ever find yourself captivated by the intricate beauty of handcrafted wooden objects? From delicate figurines to functional utensils, the art of wood whittling has been practiced for centuries, enchanting both artisans and enthusiasts alike. If you’ve ever wanted to bring a piece of this timeless craft into your own hands, then you’ve come to the right place. In this guide, we will delve into the world of wood whittling, exploring the techniques, tools, and tips that will help you unlock your creativity and create stunning works of art.
Wood whittling is not just a hobby; it is a meditative experience that allows you to connect with nature and tap into your artistic side. As we embark on this journey together, we will learn how to select the right wood, understand the various types of cuts, and master the essential tools needed for this craft. Whether you are a complete beginner or have some experience in woodworking, this guide will provide you with a solid foundation to confidently pursue the art of wood whittling. So, grab your tools, sharpen your knife, and let’s embark on an exciting adventure of transforming a simple piece of wood into a masterpiece.
How to Whittle Wood:
- Select a suitable piece of wood.
- Choose the right whittling tools, such as a carving knife and gouge.
- Secure the wood in a vice or with clamps.
- Start by sketching your design onto the wood.
- Carefully carve away small sections at a time using smooth, controlled strokes.
- Sand the whittled wood for a smooth finish.
- Apply a protective finish or paint if desired.
How to Whittle Wood: A Step-by-Step Guide
Whittling wood is a traditional craft that allows you to create intricate and beautiful designs using just a knife and a piece of wood. Whether you’re a beginner or an experienced woodworker, this step-by-step guide will walk you through the process of whittling wood with ease. By following these instructions and practicing patience, you’ll soon be able to create stunning wooden sculptures and decorations that showcase your creativity and skill.
Choosing the Right Wood
Before you begin whittling, it’s important to choose the right type of wood for your project. Softwoods like basswood, pine, or cedar are ideal for beginners as they are easy to carve and don’t require too much force. Hardwoods like oak or walnut, on the other hand, are more challenging to work with but can result in stunning finished pieces. Consider the size, grain pattern, and availability of the wood as well.
Once you’ve selected your wood, make sure it’s dry and free from cracks or knots. Green or wet wood is difficult to carve and may not hold its shape properly. It’s also a good idea to wear protective gloves and safety goggles to prevent any injuries while working with the wood.
Preparing the Wood
Before you start carving, it’s important to prepare the wood properly. Begin by marking the areas you want to carve with a pencil or a marker. This will help you visualize the design and avoid any mistakes during the carving process. You can also create a rough outline of the final shape you want to achieve.

To make the carving process smoother, you can use sandpaper to smooth out any rough surfaces or edges on the wood. Start with a coarser grit sandpaper and gradually move to a finer grit for a polished finish. Sanding the wood not only makes it easier to carve but also enhances the overall appearance of the finished piece.
Carving the Wood
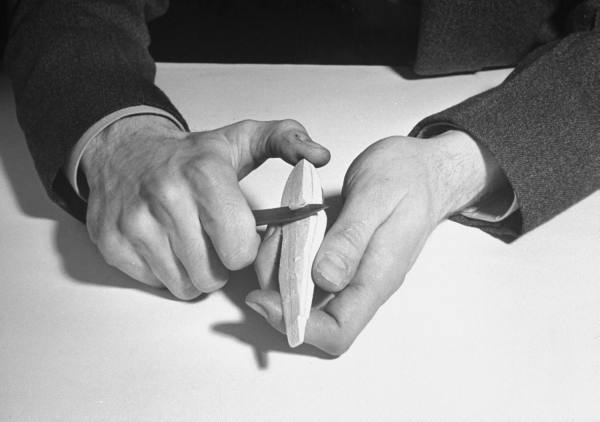
Now that your wood is ready, it’s time to start carving. Hold the wood firmly in one hand and the knife in the other. Make sure to carve away from your body to avoid any accidents. Begin by making small and shallow cuts along the marked lines. Take your time and don’t rush the process.
When carving, always work with the grain of the wood to prevent any splintering or breakage. Use the tip of the knife for finer details and the blade for larger cuts. As you gain more experience, you can experiment with different carving techniques like chip carving, relief carving, or whittling in the round.
Finishing and Preserving the Wood
Once you’ve completed the carving, it’s time to finish and preserve the wood. Use sandpaper or a sanding sponge to smooth out any rough surfaces and remove any carving marks. Start with a coarser grit and gradually move to a finer grit for a polished finish.
After sanding, apply a wood finish or a sealant to protect the wood and enhance its natural beauty. There are various options available, such as varnish, oil, or wax. Follow the manufacturer’s instructions for the specific product you choose. Allow the finish to dry completely before handling or displaying your finished whittled wood piece.
Adding More Detail and Practice
As you become more comfortable with whittling, you can start adding more intricate details to your wood carvings. Practice different techniques, experiment with different types of wood, and challenge yourself with more complex designs. Remember, whittling is an art that requires patience, practice, and a steady hand.
Always prioritize safety while whittling wood. Keep your tools sharp, work in a well-ventilated area, and take breaks when needed. With time and dedication, you’ll develop your own unique style and create beautiful wooden masterpieces that will be cherished for generations to come.
Frequently Asked Questions
Here are some commonly asked questions about how to whittle wood:
Question 1: What tools do I need to start whittling wood?
To start whittling wood, you will need a few basic tools. The most essential tool is a whittling knife, which typically has a small, sharp blade with a pointed tip. You may also find it helpful to have a bench knife or chip carving knife, which can be used for making more intricate cuts. Additionally, you will need a sharpening stone or strop to keep your knife blade sharp. Lastly, having a piece of sandpaper or a sanding block will be useful for smoothing out any rough edges or surfaces.
It’s important to note that safety should always be a priority when working with sharp tools. Make sure to wear protective gloves and goggles, and always handle the tools with care.
Question 2: How do I choose the right type of wood for whittling?
When selecting wood for whittling, there are a few factors to consider. First, you’ll want to choose a type of wood that is relatively soft and easy to carve. Basswood and pine are popular choices for beginners due to their softness and availability. Hardwoods like oak or maple can be more challenging to work with, but they can also produce beautiful results.
It’s also important to consider the size and shape of the wood. Look for pieces that are large enough to comfortably hold and carve, but not too large that they become unwieldy. Additionally, consider the grain of the wood. Straight-grained wood is generally easier to carve, while wood with irregular or interlocking grain can be more difficult to work with.
Question 3: What are some basic whittling techniques?
There are several basic whittling techniques that can help you get started. One technique is called “pushing” or “paring,” which involves pushing the blade away from you to remove thin shavings of wood. Another technique is “pulling” or “drawing,” where you pull the blade towards you to remove wood. Both of these techniques can be used for shaping and refining your carving.
Another useful technique is “stop cuts,” which involve making small, shallow cuts to create boundaries or define the shape of your carving. You can also use a rocking motion with your knife to create curved cuts or to add texture to your carving. Remember to always carve away from your body and keep your fingers clear of the blade.
Question 4: How can I prevent my wood from splitting while whittling?
Wood splitting can be a common challenge when whittling. To prevent this, it’s important to work with the grain of the wood. Carving against the grain can cause the wood to split, so try to follow the natural direction of the wood fibers. If you encounter a particularly stubborn area where splitting seems likely, you can make small, shallow cuts to relieve the tension and reduce the risk of splitting.
Additionally, choosing the right type of wood can also help prevent splitting. Softer woods like basswood are less prone to splitting compared to harder woods. Keeping your tools sharp is also important, as dull blades can cause the wood to tear and split. Regularly sharpen your knife and avoid applying excessive force while carving to minimize the risk of splitting.
Question 5: How can I add finishing touches to my whittled wood project?
Adding finishing touches to your whittled wood project can enhance its overall appearance and durability. One common finishing technique is sanding, which involves using sandpaper or a sanding block to smooth out any rough edges or surfaces. Sanding can also help to bring out the natural beauty of the wood grain.
After sanding, you can apply a wood finish or sealant to protect the wood and give it a polished look. There are various options for wood finishes, such as oils, varnishes, or waxes. Choose a finish that suits your preference and the type of wood you’re working with. Apply the finish according to the manufacturer’s instructions and allow it to dry completely before handling your finished piece.

How to Start Whittling – Complete Beginners Guide to Whittling
In conclusion, the art of whittling wood is a truly captivating and rewarding craft that allows individuals to tap into their creativity and connect with nature. As we have explored in this guide, there are several key steps to mastering this skill, from selecting the right wood to choosing the appropriate tools and techniques. Whether you are a beginner or an experienced whittler, remember to always prioritize safety and take your time to appreciate the process.
By immersing yourself in the world of whittling, you not only get to create beautiful and intricate wooden masterpieces, but you also embark on a journey of self-discovery and mindfulness. The act of carving wood encourages us to slow down, be present in the moment, and embrace the meditative qualities of this ancient art form. So, grab your tools, find a cozy spot in nature, and let your imagination run wild as you explore the endless possibilities of whittling wood. With practice and patience, you will soon find yourself crafting stunning pieces that reflect your own unique style and passion for this timeless craft. Happy whittling!
- How to Make Wooden Pyramid Puzzle - May 13, 2024
- How to Solve Wooden Pyramid Puzzle - May 13, 2024
- How to Wooden Puzzle - May 13, 2024