Building a wooden ramp can be a rewarding project that not only enhances accessibility but also adds a touch of elegance to any space. Whether you’re looking to provide easier access for wheelchair users or simply want to create a smooth transition between different levels, constructing a wooden ramp is a practical and visually appealing solution. In this guide, we will explore the step-by-step process of building a wooden ramp, from planning and design to the final construction, ensuring that you have all the knowledge and skills necessary to successfully complete this project.
Before diving into the construction process, it is crucial to understand the importance of careful planning and precise measurements. A well-designed wooden ramp not only ensures safety but also guarantees a long-lasting structure that can withstand the test of time and weather conditions. From selecting the right materials to determining the appropriate dimensions, we will walk you through each stage of the planning process, providing expert tips and guidelines along the way. So, whether you’re a seasoned DIY enthusiast or a beginner looking to take on a new challenge, join us as we embark on this journey to build a beautiful and functional wooden ramp.
How to build a wooden ramp:
- Measure the desired length and width of the ramp.
- Gather materials such as pressure-treated lumber, screws, and a circular saw.
- Cut the lumber according to the measurements.
- Assemble the frame and secure it with screws.
- Add decking boards to the frame and secure them.
- Install handrails for safety.
- Ensure the ramp is level and stable.

How to Build a Wooden Ramp: A Step-by-Step Guide
Building a wooden ramp can provide a safe and accessible solution for individuals with mobility challenges or for those needing a sturdy ramp for moving heavy objects. Whether you are constructing a ramp for your home or workplace, careful planning and execution are essential. In this guide, we will walk you through the step-by-step process of building a wooden ramp, ensuring you have all the necessary information to complete the project successfully.
Step 1: Assessing the Location and Design
Before you start building a wooden ramp, it is crucial to evaluate the location and determine the appropriate design. Consider the slope, length, and width of the ramp, as well as the weight it needs to support. Measure the available space and take note of any obstacles that may affect the ramp’s placement. You should also check local building codes and regulations to ensure compliance.
Once you have gathered this information, it’s time to create a detailed plan. Sketch out the ramp design, including dimensions and materials required. This will serve as your blueprint throughout the construction process, helping you stay organized and on track.
Step 2: Gathering Materials and Tools
With your ramp design in hand, it’s time to gather the necessary materials and tools. The materials you will need may include pressure-treated lumber, plywood, galvanized screws, concrete footings, and handrails. Make sure to choose high-quality materials that are durable and suitable for outdoor use.

In terms of tools, you will likely need a circular saw, power drill, measuring tape, level, framing square, post hole digger, and a shovel. Additionally, safety equipment such as gloves, safety glasses, and a dust mask should be worn throughout the construction process.
Step 3: Preparing the Site
Before you can start building the ramp, you need to prepare the site. Clear the area of any debris, vegetation, or obstructions. Ensure that the ground is level and stable. If necessary, you may need to excavate and create a solid foundation using concrete footings. This will provide stability and support for the ramp structure.
Mark the area where the ramp will be placed, and dig holes for the footings according to your design plan. Remember to follow any local building codes and regulations regarding footing depth and spacing. Once the footings are in place, allow them to cure according to the manufacturer’s instructions.
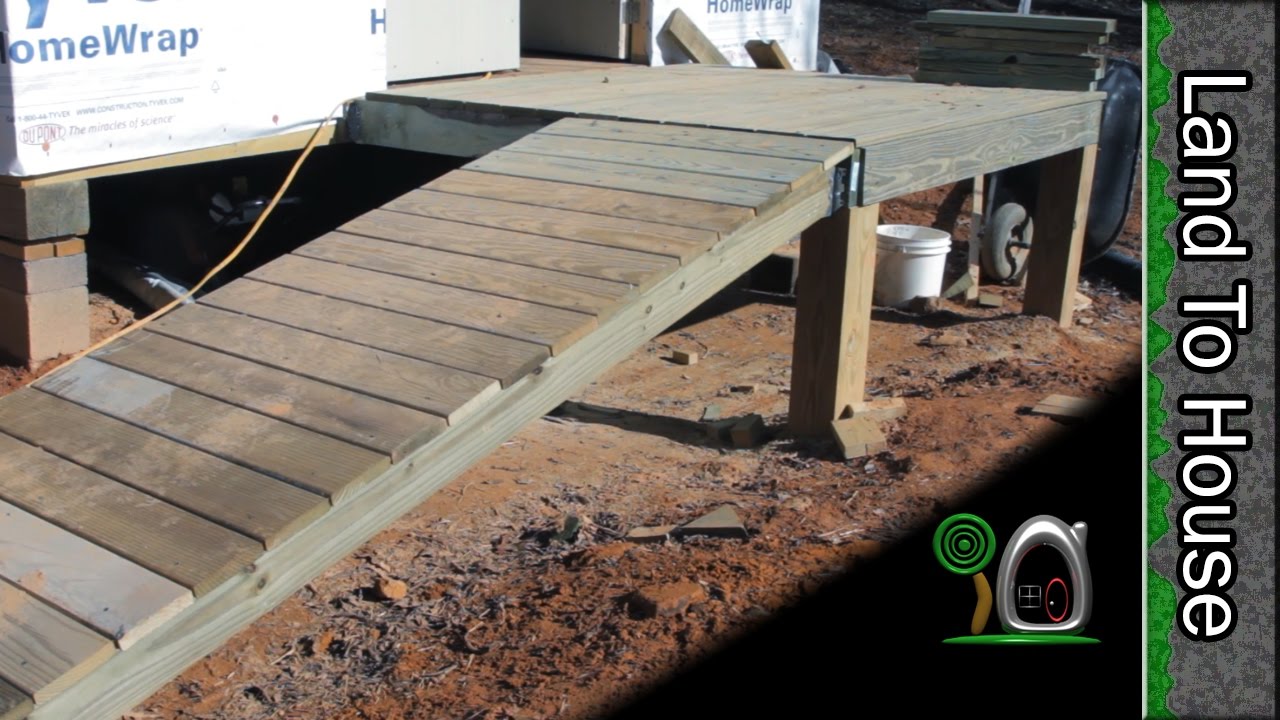
Step 4: Building the Ramp Structure
Now that the site is prepared, it’s time to start building the wooden ramp structure. Begin by constructing the frame using pressure-treated lumber. Cut the lumber to the required lengths and assemble the frame according to your design plan. Ensure that the frame is square and level, using a framing square and level to make necessary adjustments.
Next, attach the plywood to the frame using galvanized screws. Make sure the plywood is securely fastened to provide a solid surface for walking or rolling. If your ramp is long, consider adding additional supports along the length to prevent sagging. Finally, install any handrails or guardrails according to your design and local regulations.
Step 5: Finishing Touches
With the ramp structure complete, it’s time for the finishing touches. Sand any rough edges or surfaces to ensure a smooth and safe finish. Apply an outdoor wood sealant or paint to protect the wood from weathering and extend its lifespan. Make sure to choose a product suitable for outdoor use and follow the manufacturer’s instructions for application.
Lastly, inspect the ramp for any loose screws or nails and tighten or replace them as necessary. Test the ramp’s stability and ensure it can safely support the intended weight. Once you are satisfied with the final result, your wooden ramp is ready for use.
Frequently Asked Questions
In this section, we have compiled some commonly asked questions about how to build a wooden ramp. Whether you are looking to make your home more accessible or need a ramp for a specific project, these questions will provide you with the information you need to get started.
Question 1: What materials do I need to build a wooden ramp?
To build a wooden ramp, you will need the following materials:
– Pressure-treated lumber or plywood for the ramp surface
– Pressure-treated beams or posts for the support structure
– Galvanized screws or nails for securing the wood
– Concrete or gravel for the ramp foundation (if needed)
– Handrails and balusters (if required by local building codes)
– Tools such as a circular saw, drill, measuring tape, level, and framing square
Question 2: How do I determine the size and slope of the ramp?
The size and slope of the ramp will depend on the specific requirements of your project. However, as a general guideline, the ramp should have a slope of 1:12, which means that for every 1 inch of rise, there should be 12 inches of ramp length. This slope provides a safe and gradual incline for wheelchair users and individuals with mobility challenges.
The width of the ramp should be at least 36 inches to accommodate wheelchairs comfortably. If the ramp is intended for heavy equipment or other specific purposes, you may need to adjust the size and slope accordingly. It is always recommended to check local building codes for any specific requirements.
Question 3: How do I prepare the site for building the wooden ramp?
To prepare the site for building the wooden ramp, follow these steps:
1. Determine the desired location for the ramp, ensuring it meets accessibility requirements.
2. Clear the area of any obstacles, including rocks, debris, or vegetation.
3. Level the ground and remove any existing concrete or asphalt, if necessary.
4. Lay a foundation of compacted gravel or pour a concrete pad, depending on the soil conditions and local building codes.
Question 4: How do I construct the wooden ramp?
Here is a step-by-step guide to constructing a wooden ramp:
1. Measure and mark the desired dimensions of the ramp on the ground.
2. Install the support beams or posts at the appropriate intervals to provide structural stability.
3. Cut the ramp surface material to size and attach it to the support beams using galvanized screws or nails.
4. Install handrails and balusters as per local building codes, ensuring they are securely attached to the ramp surface and support structure.
5. Use a level to ensure the ramp is even and adjust as necessary.
6. Apply a weather-resistant finish or sealant to protect the wood from moisture and prolong its lifespan.
Question 5: Are there any safety considerations when building a wooden ramp?
Yes, safety is paramount when building a wooden ramp. Here are some key considerations:
– Ensure the ramp has a non-slip surface to prevent accidents, especially during wet or icy conditions.
– Install handrails and balusters to provide additional support and stability.
– Regularly inspect the ramp for any signs of wear, damage, or rot, and make necessary repairs or replacements.
– Follow local building codes and regulations to ensure the ramp meets all safety standards.
– Consider consulting a professional or experienced builder if you are unsure about any aspect of the construction process.
Furthermore, constructing a wooden ramp fosters a sense of inclusivity and community. Whether it’s for a family member, friend, or neighbor, building a ramp can make a significant impact on someone’s quality of life. By extending a helping hand and dedicating time and effort to this project, individuals can contribute to a more accessible and inclusive society. The skills learned throughout this process can also be applied to future projects, empowering individuals to continue making positive changes in their community. Ultimately, building a wooden ramp is not just about constructing a physical structure; it is about creating a more inclusive and supportive environment for all.
- How to Make Wood Look Weathered - May 14, 2024
- How to Solve Wooden Egg Puzzle - May 14, 2024
- How to Decoupage on Wood With Pva Glue - May 14, 2024